
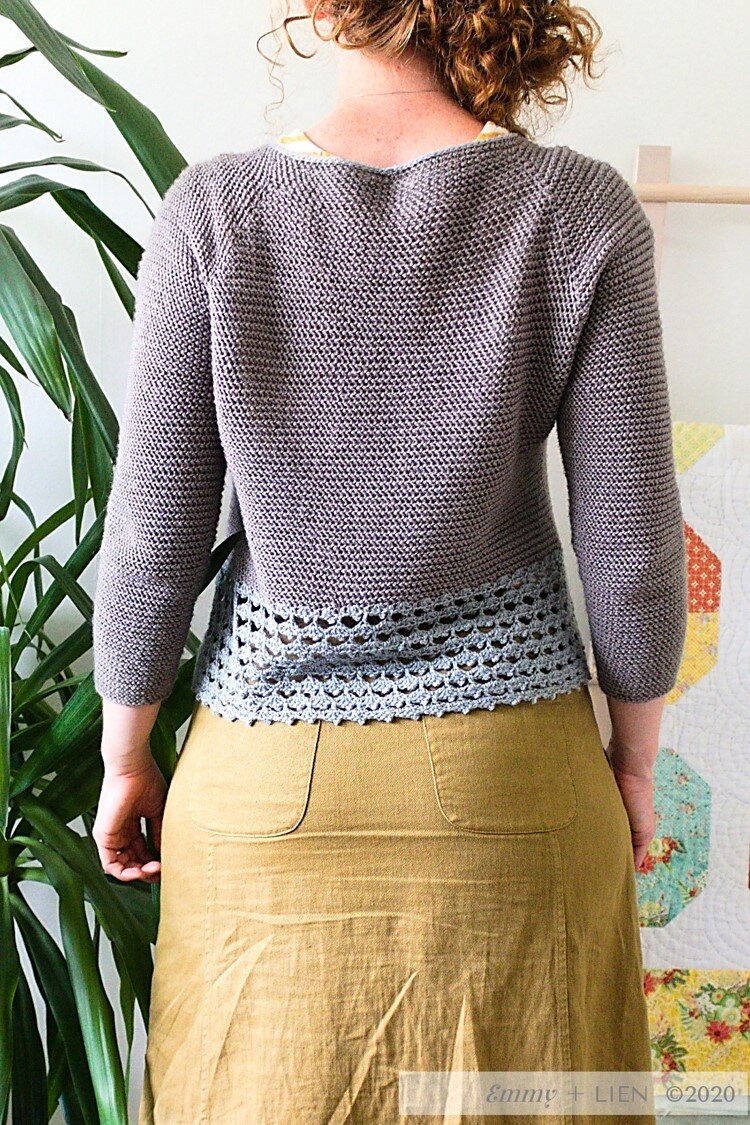
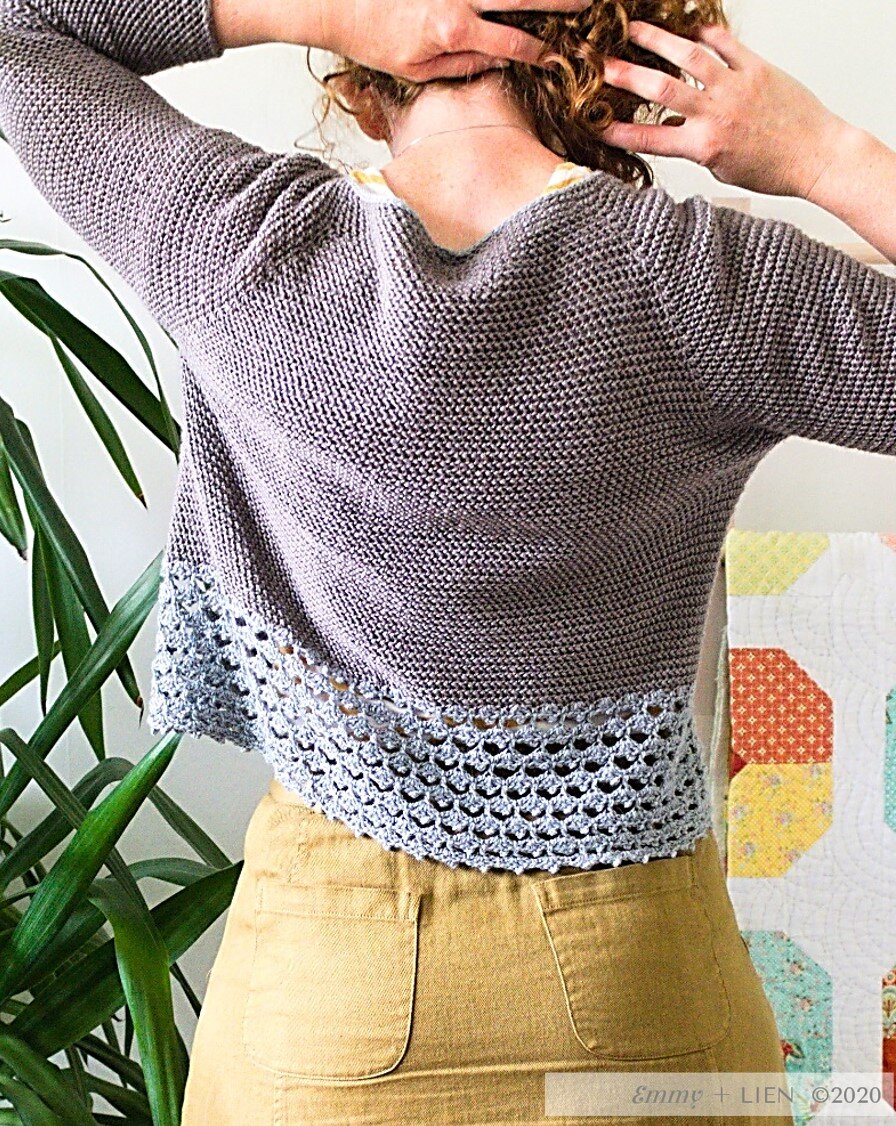
HAVET SHAWL RIFF - how to incorporate lace and two colours into the wings
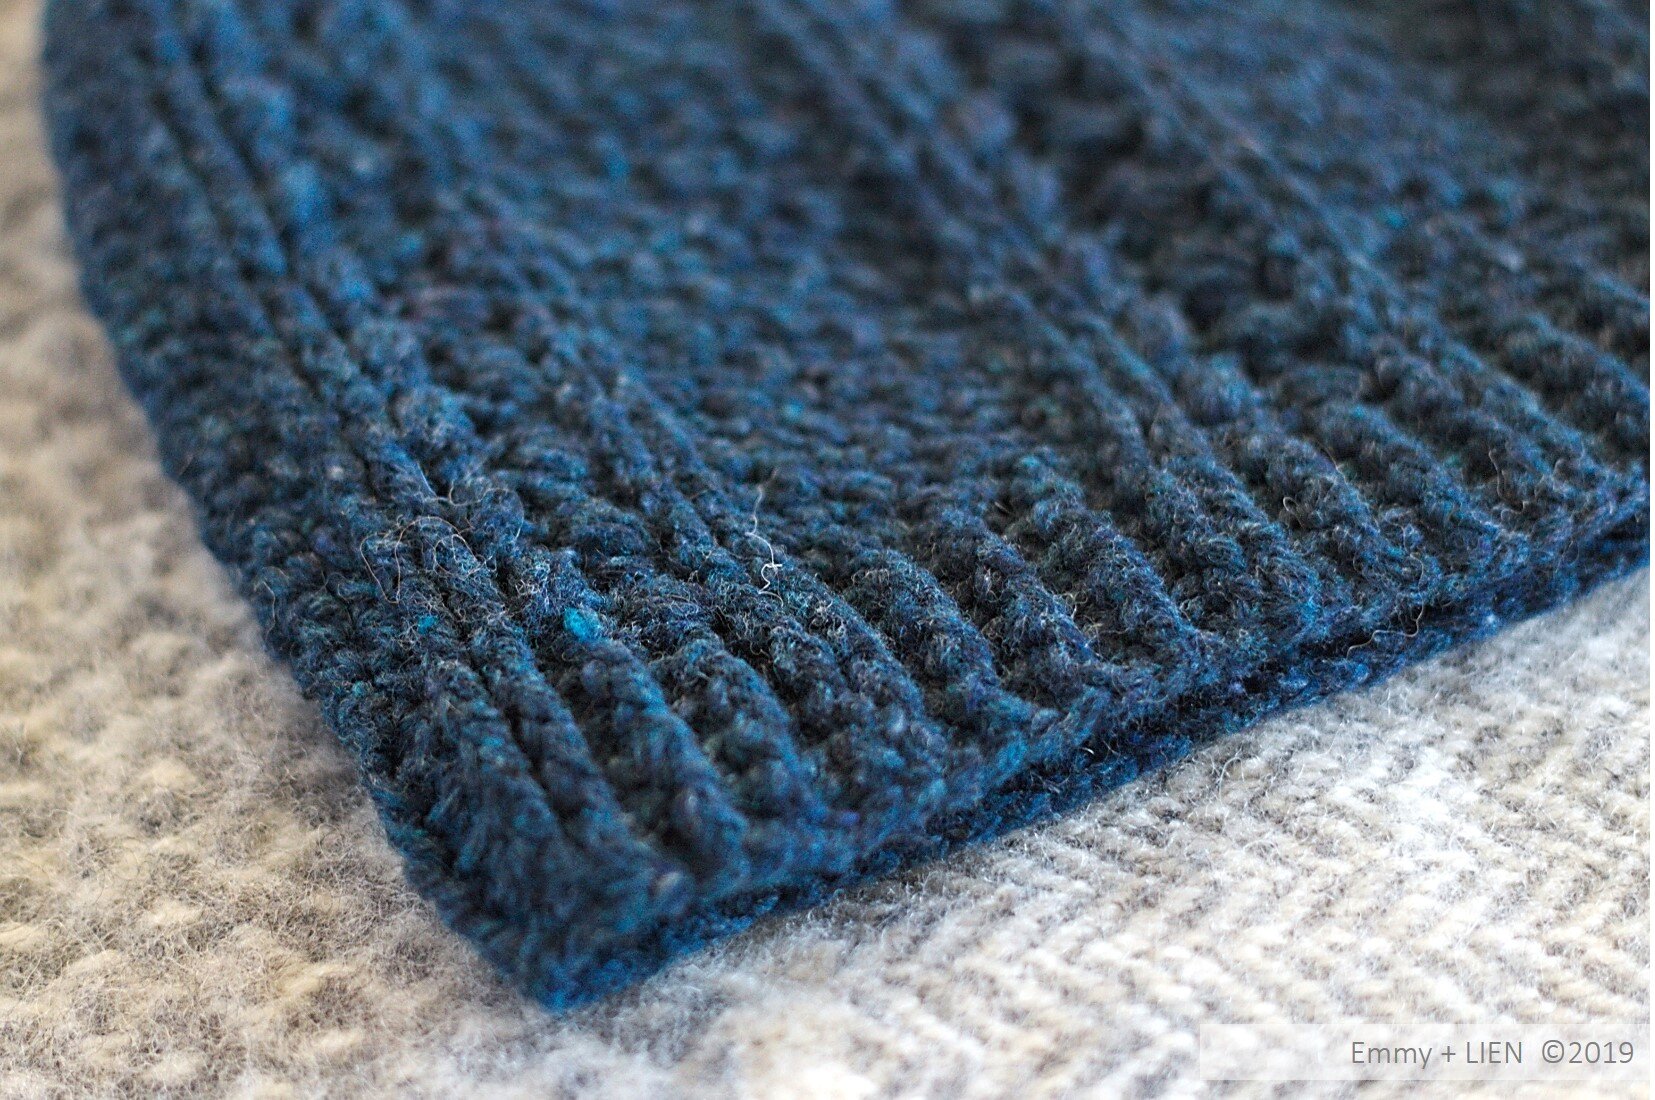
The Havet Shawl pattern was originally designed for a rustic, very woolly wool - the kind that still smells a bit sheepy when you unwind the skein. The colours are deep and rich, picking up the natural dark hues of the Zwarbles fleece that is part of the blend. And most importantly for the finished look and feel of the shawl, it blooms with blocking, fluffing out into the gaps between stitches. As a result, the first, blue and green sample of Havet is lightweight, incredibly soft to the touch, and also very warm.

To recreate this original sample it's important to use a similarly untreated wool, but this is by no means the only option. Indeed, part of the fun in both designing and making is to see where the combination of stitches and yarns take us, how much we can bend the 'rules', etc.
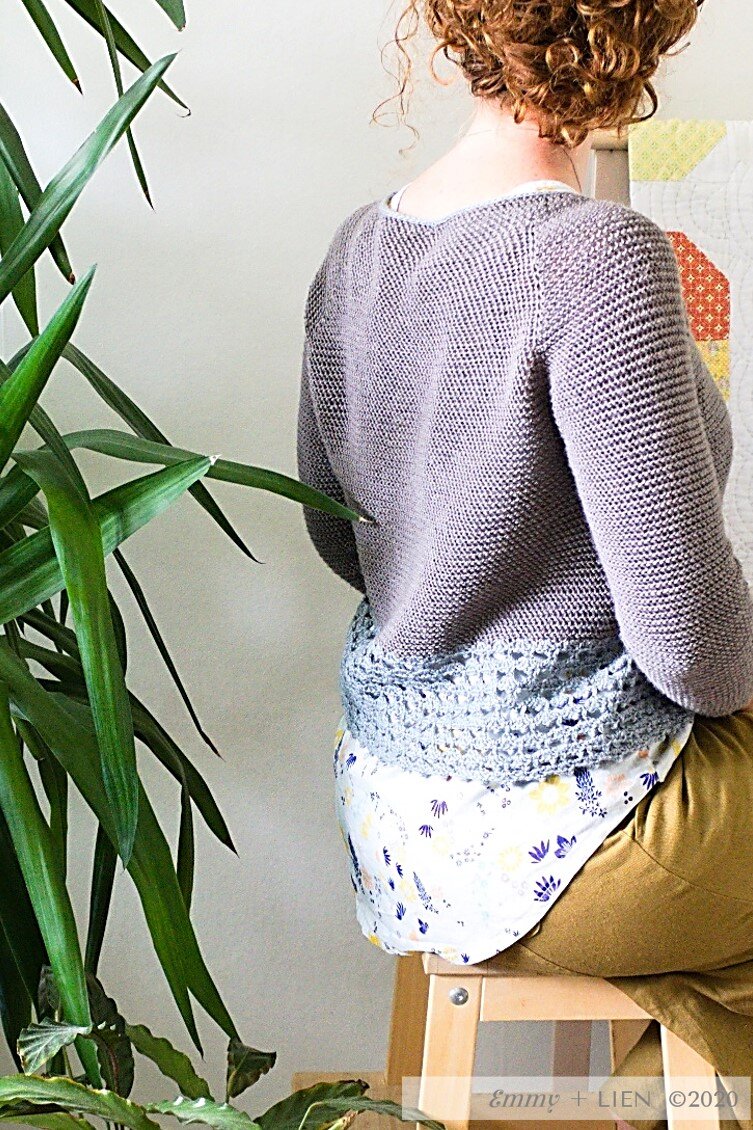
In making another sample I really just wanted to have fun with colours without worrying too much about how the yarn would behave. I'm sure I'm not the only one who's been wooed by the bright, popping colours and speckles that can be achieved on superwash-treated merino. The hand-dyed ones, the one-offs, the really special treats... The three skeins I used for my second Havet are all slinky, smooth superwash merino yarns. The dappled green {oh how I was sold on that dapple!} and the coral pink are single-ply, while the yellow is a 4-ply of which I had lots of tiny leftovers.


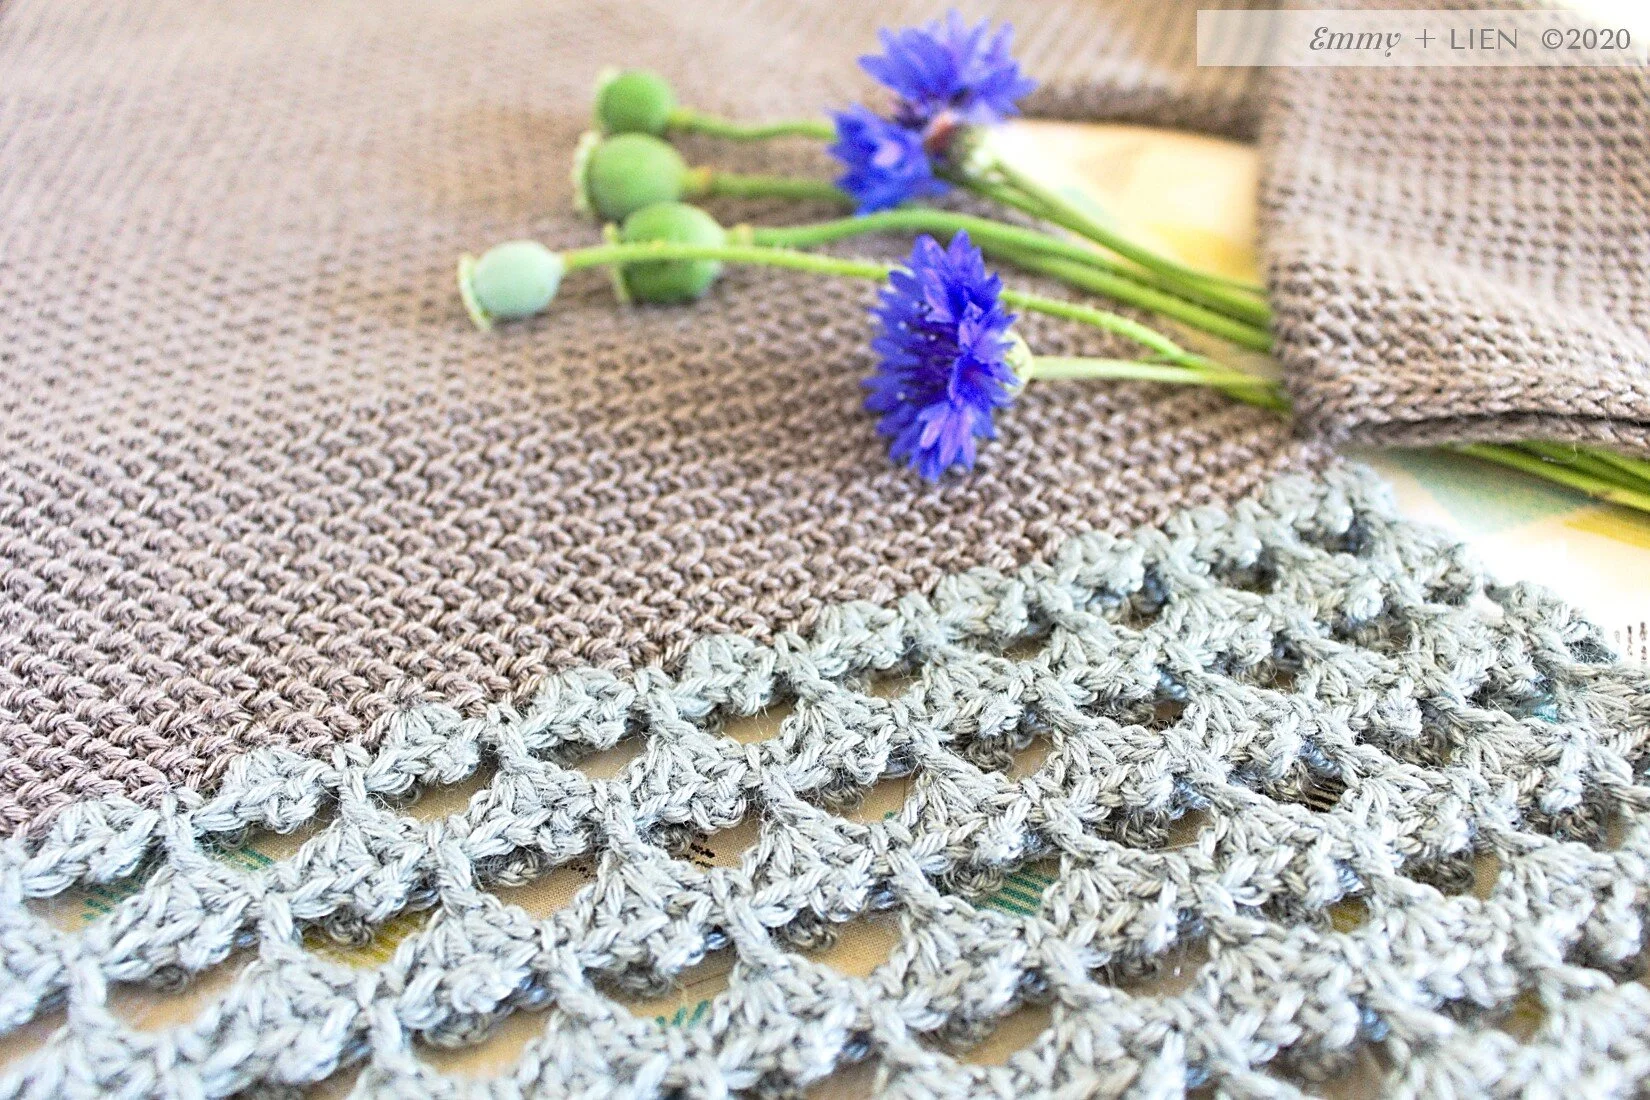
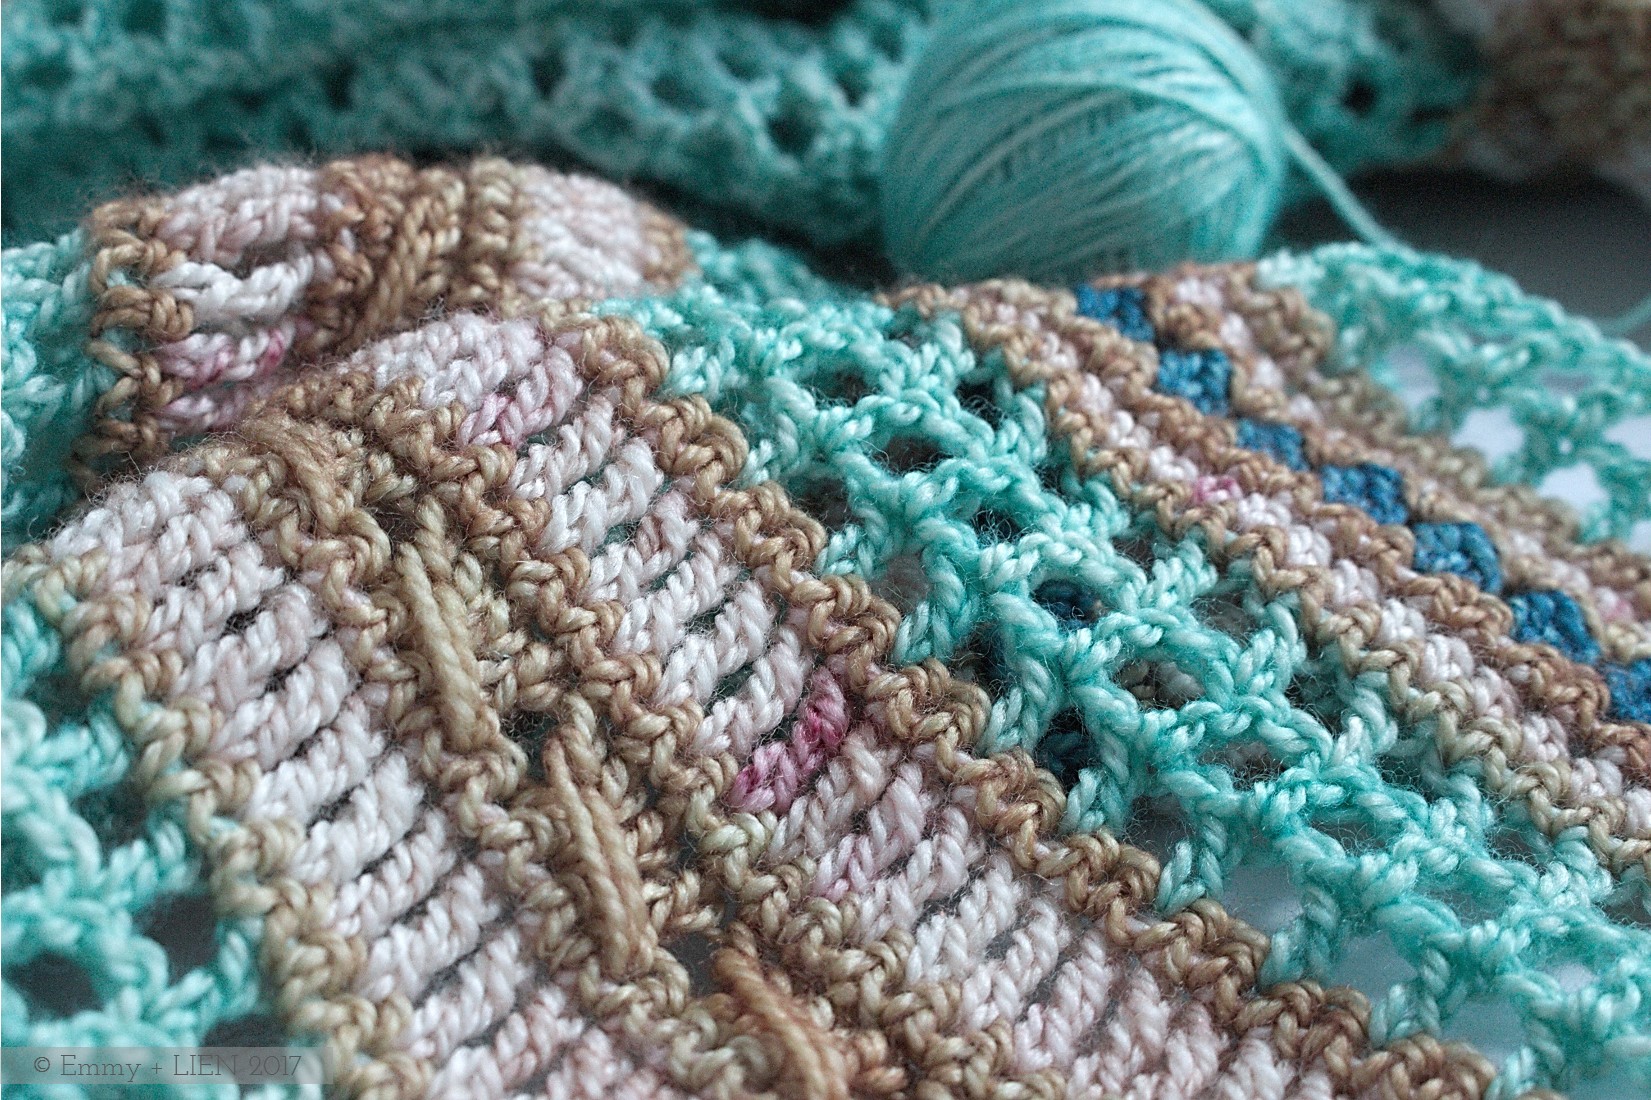
I knew that the resulting shawl would be very different from the original. Superwash yarns are kind of compact, and they barely change with blocking. You can stretch them into whatever shape you need, but the fibres that make up the strand won't shift at all. They certainly won't go fluffy and fill in any gaps between stitches, so a shawl made at a gauge as loose as this pattern calls for with a non-SW will be quite translucent. As the photo below demonstrates, the stitches in the original sample on the right are a bit fuzzy, while the ones in the second sample on the left are much crisper and the gaps between the stitches in green are more noticeable. Which one you choose really comes down to personal preference - a pattern may guide you but there is no right or wrong.
As well as the difference in style and texture, for the second sample I used three rather than two colours. On a complete whim, I decided to mimic the lace as I switched gradually from the dark green to the yellow in the wings of the shawl. If you want to do the same - perhaps because you have three fingering weight skeins in three colours, not two - I've roughly worked out the maths and written the instructions below. I should point out that I ignored the instructions, totally winged it (pun very much intended), and hoped for the best. Therefor, these instructions have not been tested in the same way as my for-sale patterns normally are.

HAVET SHAWL RIFF - how to incorporate lace and two colours into the wings
Dark green = colour B / Yellow = colour C
Follow the pattern until the stitch count for each wing equals a multiple of 8 + 1.
E.g.: total wing st count 73 sts - 72 (multiple of 8) + 1
Somewhere close to a multiple of 8 + 1 is fine too; Just skip fewer or more stitches in the first extra lace row as needed. Any wobbly edges will be blocked out anyway.
Extra row 1 (lace row): In C, [ch 3 (counts as 1 TC), TC 1] in first st, skip 3, *ch 1, [TC 1, ch 2, TC 3] in next st, skip 3, [TC 1, ch 1, TC 1] in nect st; rep from * until 8 sts rem to central lace panel, skip 3, ch 1, [TC 1, ch 2, TC 3] in next st, skip 3, TC 2 in last wing st, work appropriate lace row in A, change to C, TC 2 in first st, skip 3, [TC 3, ch 2, TC 1] in next st, ch 1, *[TC 1, ch 1, TC 1] in next st, skip 3, [TC 3, ch 2, TC 1] in next st, ch 1; rep from * until 1 st rem, TC 2 in last wing st, turn.
Extra row 2 (lace row): [Ch 3 (counts as 1 TC), TC 1] in first st, skip 1, *skip 3, [TC 3, ch 2, TC 1] in next ch-sp, ch 1, skip 4, [TC 1, ch 1, TC 1] in next ch-sp; rep from * until 10 sts rem to central lace panel, *skip 3, [TC 3, ch 2, TC 1] in next ch-sp, ch 1, skip 4, TC 2 in last wing st, work appropriate lace row in A, change to C, TC 2 in first st, skip 4, [TC 1, ch 2, TC 3] in next ch-sp, skip 1, *skip 3, [TC 1, ch 1, TC 1] in next ch-sp, skip 4, [TC 1, ch 2, TC 3] in next ch-sp; rep from * until 4 sts rem, skip 3, TC 2 in last wing st, turn.
Extra row 3 (Up & Down patt row): In B, work first 2 sts in patt, *work next 6 sts in patt, skip next ch, work next st in patt, skip next ch, work next st in patt; rep from * until 9 sts rem, work next 9 sts in patt, work appropriate lace row in A, change to B, work next 9 sts in patt, *work next st in patt, skip next ch, work next st in patt, skip next ch, work next 6 sts in patt; rep from * until 2 sts rem, work next 2 sts in patt, turn.
You will now have 4 more sts than you did on the last ordinary row. Continue in pattern with colours A & B as follows:
Rep R3 of main pattern once, rep R4 of main pattern once, then rep R3 of main pattern twice. 12 sts added. Total wing stitch count should again be a multiple of 8 + 1.
Using colours C and B, repeat the three Extra rows once. 4 sts added. Using colour B, repeat R3 of main pattern twice. 4 sts added. Using colours C and B, repeat the Extra rows once. 4 sts added. Repeat R3 of main pattern once.
Switch to colour C, rep R3 and R4 of main pattern until shawl reaches desired dimensions.


As you can see, I worked the extra lace rows on the wings three times in total, and decreased the number of green rows in between each time. I used exactly one 400m skein of green, one 400m skein of yellow, and about 200m of coral. The shawl feels lacy and appropriate for mild weather. And the colours make me smile every time I look at them, which is exactly what those Special Skeins are meant to do!
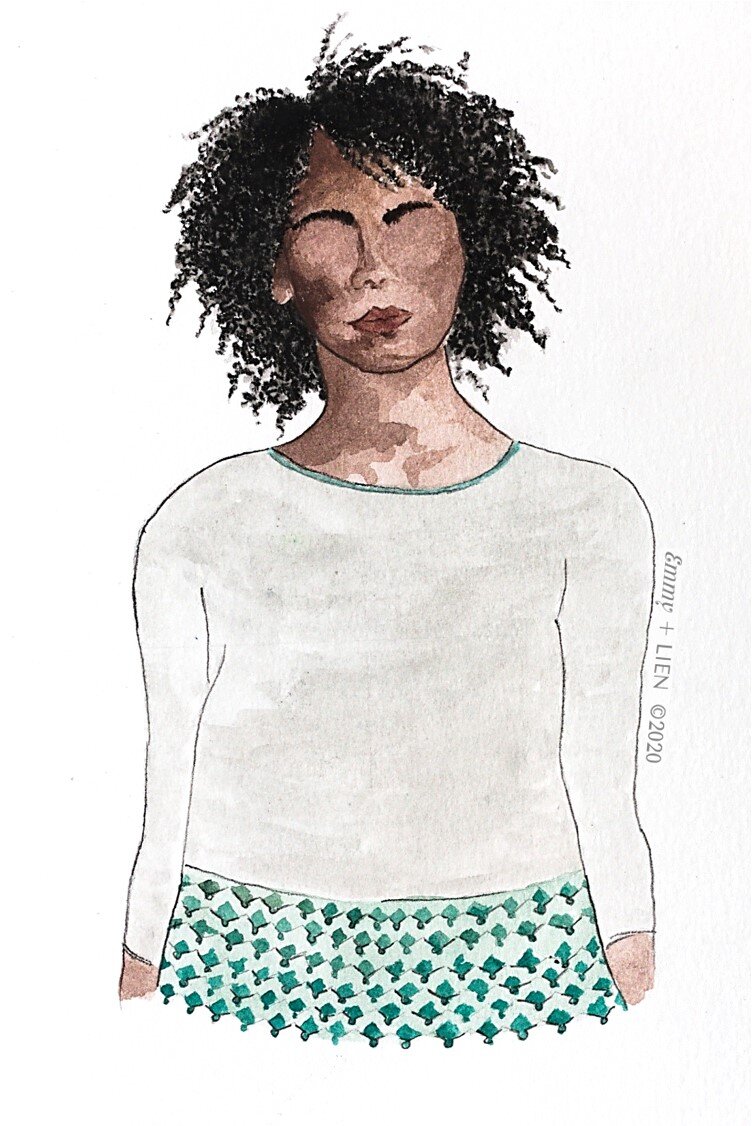
What would you go for - rustic and warm, or bright and lacy?

Maker's Maintenance - Getting the most out of your knitwear and crochetwear
A while ago I ran a poll on Instagram, asking whether anyone wanted to see how I look after my knit & crochet wear. The overwhelming response was "yes", …

A while ago I ran a poll on Instagram, asking whether anyone wanted to see how I look after my knit & crochet wear. The overwhelming response was "yes", but then WOOSH SeptOctNovBERBERBER happened, there was no light to photograph anything by, the kiddos were off school, etc etc. Here we are in late November (well into the woolly season for us), and I haven't shown anyone a thing.
BUT Lo and Behold we got some good natural light last week. So. Would you like to see how I look after my yarny things?
To my mind, rather a lot goes into "looking after" your clothes, starting from before you even make a purchase (whether that be for a finished item or for the materials to make one). To simplify things, however, let's assume you have yarny things in the wardrobe, and you want them to last. Then, let's make categories:
General care
Fixing problems
Resources
1. GENERAL CARE
It may sound rather obvious, but caring for your yarny items can extend their lifetime significantly. Although everyone has accidentally shrunk a wool sweater in the washing machine at some point, it really is worth taking time to learn how to clean and store things properly.
CLEANING
Before you do anything, ask yourself whether your item really needs washing. Could you air it out instead, or spot-clean with a damp cloth? If only a proper wash will do, try to:
Handwash, or machine wash on the delicate/wool cycle, using just a little bit of wool/silk detergent. Pad out the load with a couple of bathroom towels to prevent excessive spinning.
Tackle stubborn stains with sunlight rather than harsh detergent.
STORAGE
In most parts of the world it's really hard to stop fibre-loving critters from getting into your home, so the best thing to do, at the very least, is to stop them from getting to your clothes. Storing your items properly will also help prevent them stretching or becoming misshapen.
When your items are in use:
Place any items bought second-hand in the freezer for at least three weeks, to kill off any moth eggs and such.
Store sweaters and cardigans flat, not on hangers.
Use lavender sachets or cedar wood (sand lightly every now and then to release the scent) to repel moths.
Riffle through cupboards and drawers regularly, to let in air and light, and to check for pests.
Out of season
Carefully check for signs of damage, fix anything that needs fixing, wash everything, and then store in vaccuum bags or plastic containers with lockable lids.
Use lavender sachets or cedar wood to repel moths.

2. FIXING PROBLEMS
As much as I think it's important to properly look after knit & crochet wear (and all clothes in general), that doesn't mean I'm precious about using them. The only way to honour the resources that go in to producing good yarny items (whether by me or a garment worker) is to wear them. That means, of course, that even with the best care they will eventually show signs of wear. Knowing how to deal with this, and keep items looking good*, is invaluable to extending their lifetime.
PILLING
Lots of fibres pill, from cheap acrylic to super-fancy, hand-dyed merino. I don't think there's much you can do to stop it (besides choosing a hard-wearing fibre, like Lettlopi wool, in the first place) but it is quite easy to solve: get a de-piller. With a little effort, yarny things look like new again (check out the difference on the socks below!). I have a wool comb as well as an electric de-piller. The latter is a bit of an investment, but worth it to me; all four of us wear wool for at least six months of the year, and it also helps me to keep my samples looking fresh for photos and shows. At the beginning of autumn I stick on a podcast and set to work on all the sweaters, hats, and socks. It's strangely therapeutic...
Remember: Gentle does it, even if it takes a little longer. Keep your fabric flat while you depill, and go very easy with fine fibres.

Handknitted stripey socks, halfway through a de-pilling session
HOLES
Again, you can minimise the risk of getting holes by choosing hard-wearing fibres to begin with, and working to a tight gauge will also help. Otherwise, however, holes are kind of inevitable. My kids knock through their knees, I seem to have spikey elbows, and socks especially wear thin quickly. I really don't think a hole should spell the end of a garment's life, so over the years I've collected lots of mending materials as well as techniques. I won't lie; It's rare for me to actually get to the bottom of the mending pile, but I do try to plug away at it regularly.
My favourite techniques for yarny items are:
Darning - Probably the most time-consuming and fiddly fix, but I love how it looks. I use thrifted darning wool and leftover sock yarn, and don't worry about matching colours at all. It becomes a little creative outlet in itself.
Patches - Much as I love darning, really big holes on elbows and knees are sometimes just easier to patch. I like these knitted patches by Purl Soho, although I often use leftover bits of woven fabric as well. Etsy is a great place to buy ready-made wool patches.
Swapping out parts - For very frayed cuffs, the easiest fix might well be to simply swap them out. You can buy ready-to-sew ribbed cuffs, or make your own. For the kids fleece below I plan on using the legs of a pair of holey wool socks that I just didn't feel like darning. I’ll let you know how that goes!
Embroidery - More of an embellishment than a fix, and definitely not a quick one at that, but very fun to do.

STRETCHED/MISSHAPEN
Sometimes the reason an item is shoved to the back of the cupboard is because it's got so stretched it just doesn't fit anymore. No amount of de-pilling is going to make it look good. I find it intensely frustrating when this happens, because the cause of the stretching is often precisely the item having been so well-loved.
If the item is only a little stretched or misshapen, the first thing to try is to re-block it. If the item was made with a fibre that has "memory", such as a non-superwash wool, that might be enough to save it. If not, it's time to get creative (and a little brave, probably).
Reknit/crochet the problematic portion - Depending on how the item is constructed, you might able to work straight into the edge. I covered dealing with stretched hat brims previously. Otherwise, you will have to unravel or cut off a part, pick up live stitches, and re-knit/crochet from there. There are some good tutorials to be found on Pinterest for this.
Get the sewing kit out - Sometimes the best option is to look at the item from a tailoring point of view, and take in hems/seams or add a thin elastic.
Alter the thing completely - If taking in seams is likely to add too much weird bulk where it shouldn't be, and reworking a portion is just too hard, go for the chop. Re-work it into something totally new. The photo below shows a top and skirt that started life as a (shop-bought) above-the-knee dress. A very well-loved dress, until the bottom part stretched too much for its length. I didn't think I'd be able to take in the sides, nor re-knit the cabled bottom in a way I'd be happy with. So I cut it in half at the waist. The bottom half became a below-knee skirt, for which the A-line shape was perfect. I then added a couple of sections to the top-half, to make that part wearable too. It did take a while and tested all my sewing/knitting skills, but I now wear both items regularly (again).

3. RESOURCES
HOW TO WASH WOOL - a more detailed blog post from MamaOwl, with great tips and a few FAQs
HOW TO GET RID OF CLOTHES MOTHS - another useful post from MamaOwl
VISIBLE MENDING - a beautiful, clearly-written book by maker Arounna Khounnoraj
MODERNE BRODERI - a GORGEOUS book on embroidering knitwear and clothing, by Warunee Bolstad (currently only available in Norwegian, but the Plystre site has kits and a short tutorial in English too)
BUYING SECONDHAND - though not related to caring for your knits, I had to include this series of Instagram stories by Africa from The Vitamin D Project. Her IG account is like an ode to all things woolly, she’s recently launched a website, and I love it all.
Do you have any tips for getting the most out of you knit & crochet items? Is there anything I’ve mentioned that you particularly love doing, or struggle with?? I’d love to hear about it in the comments!
* I want to add a note about the cultural sensitivity associated with wearing clothes that look "good". I'm fully aware that, as a thin white woman of obvious economic means, there is no danger in walking around in clothes that have been visibly patched up. Quite the contrary - "visible mending" is incredibly trendy and I would be lying if it didn't do my career any good; More than once I've been paid to mend or alter items for friends, after they've seen what I'm wearing. I very much doubt that would be the case if I were Black, or plus size, or visibly disabled, given all the tropes around wealth and skill that surround these marginalised groups.
I'm also aware that doing all of the things I've listed takes resources. Time, money, skill, in some way or form. Not all of us have them, nor can we be expected to obtain them. Do what you can, if you can.
OFFICIAL PREVIEW: DROPPE SWEATER


SIZES 1 (2, 3, 4, 5) {6, 7, 8, 9, 10}
Finished bust circumference: 71 (81, 92, 102, 112) {122, 132, 142, 152, 162} cm / 28 (32, 36, 40, 44) {48, 52, 56, 60, 64}”
SHAPE & FIT
Droppe is intended to be worn with 5-10 cm / 2-4” of positive ease around the bust, zero ease around the biceps, and 7.5-12.5 cm / 3-5” positive ease around the hips. This means it will fit loosely around the bust, have lots of swing around belly/hip but feel more snug around the arms. As this sweater has a top-down construction, however, it is easy to adapt it as you go to suit your shape and preference. Pattern includes directions on customising shape & fit.
Eline has an 86cm/34” bust, 92cm/36” hips, and 29cm/11.5” biceps. She wears a size 3.
CONSTRUCTION
Droppe is worked from the top down in a completely seamless raglan construction. Short rows raise the back slightly. Invisible increases are incorporated after separating for body and sleeves to create a swingy A-line shape. The sleeves are worked directly into the held stitches. I-cord edging provides a neat finish to both the cuffs and collar.
YARN
Eden Cottage Yarns Milburn 4-ply (fingering weight; 85% superwash BFL wool, 15% silk; 200 m / 218 yds per 50g ball) : MC: Steel (grey) - 5 (6, 6, 7, 8) {9, 10, 11, 12, 13} balls / CC: Catmint (light blue) - 1 (1, 2, 2, 2) {3, 3, 3, 4, 4} balls, 3, 4, 4} balls
Yarn Alternatives
This sweater is designed for a fingering weight yarn. Any fibre with a soft handle and gentle drape will produce good results. If using a (blend with) plant-based fibre such as cotton or linen, or a superwash wool, consider shortening the length of the body and the sleeves by 1-2cm/” to avoid excessive stretching over time.
Yardage required
MC: 1000 (1200, 1200, 1400, 1600) {1800, 2000, 2200, 2400, 2600}m / 1090 (1310, 1310, 1530, 1750) {1970, 2180, 2400, 2620, 2835} yds
CC: 200 (200, 400, 400, 400) {600, 600, 600, 800, 800}m / 218 (218, 440, 440, 440) {655, 655, 655, 875, 8751] yds
HOOKS, NEEDLES + NOTIONS
3mm hook, or as required to obtain gauge
9 removable stitch markers, in 3 colours if possible (1 for BOR, 4 raglan markers, 4 sleeve markers)
Wool needle
GAUGE 20 sts x 17 rows = 10 cm / 4” in HHTC, worked in the round and measured after wet blocking.
TECHNIQUES TO ENJOY
Foundation stitches / Herringbone HTC / Picots / Short rows / Increasing & Decreasing / Raglan shaping / A-line shaping / I-cord edge
PATTERN INCLUDES
Clear written instructions in UK terms / Stitch diagrams / Professionally tech-edited & test crocheted instructions / UK to US term conversion chart / Size schematic / Directions on choosing a size and fit, and making adjustments

The thing about hats
I’ve been bitten by the hat making bug. For years I’ve made shawls/cardigans/socks/sweaters - anything but hats, really. And now suddenly I can’t stop. I’ve even set about designing one. But it’s not ready, because the thing about hats…

I’ve been bitten by the hat making bug. For years I’ve made shawls/cardigans/socks/sweaters - anything but hats, really. And now suddenly I can’t stop. I’ve made nine since September. It turns out hats are quick, fun, and really good for using up odd skeins. Huh.
The impending festive season definitely has something to do with it. “Quick! Gift! Knit!”, I see everywhere, from chunky cables to classic rib to round-and-round-and-round sort of tubes. I get it, I do. Five of those nine hats were not for me or my own kids, not made out of necessity but for the heck of it. And seeing how happy they are, to receive something that is warm, pretty and (hopefully) a good fit has been really fun.

September Hat by Caroline Dick
I’ve even set about designing one. I thought, I only have one hat pattern in my portfolio so far, I was given two skeins of perfect, midnight blue tweed at Edinburgh yarn festival, it’d be good for a bit of end-of-year publicity, etc.
The thing about hats, however, is that they’re like everything else I design. Best not rushed. When I rush, I make mistakes or end up with compromises I later regret.
The thing about hats, whether made for yourself or someone else, is that they’re like sandwiches. They always make the receiver happy, this fact you’ve taken the time to butter the bread all the way to the edges and melted the cheese to just the right level of bubbliness and maybe even gone the whole hog with all the toppings. I ate a rye bread open sandwich piled high with nut butter, apple slices, pumpkin seeds, dates and honey at a cafe in Edinburgh. The equivalent of a perfectly slouchy, nubbly grey hat with a little cable, perhaps?
When I stuck a sample of my new design on my best friend’s head, saw how much she liked it and how beautifully it accentuated her blue eyes… I had to let her keep it. I shared that sandwich with her, too.
So I haven’t released the pattern yet. I’ve made an ochre sample and started another blue one, I’m working out multiple sizes, putting options for both a snug beany and a slouchy hat in… I won’t be able to say, “cast on this last minute Christmas gift!”, but I don’t mind. I like the idea of someone getting to this pattern in the quiet of January, or whenever suits them, of them taking their time over the tiny ridges and delighting in the little puffs that go up and up.
An act of spiritual belly-filling, in the making, the wearing and - for me as a designer - the not-stressing about “keeping up”.
See you in January?
P.S. If you do want to crochet a new hat this side of Christmas, I made some tweaks to the instructions for the Lomma Hat (it’s free"!) so they are easier to understand.
P.P. S. I will also be running a promotion cum fundraiser from 21 to 31 December, so follow my social media outlets if you want to keep an eye on that.


New brushes
For my birthday this year Mr E+L said he wanted to buy me something at the art shop. It had been years since I last picked up a pencil but then, a month or two ago …

For my birthday this year Mr E+L said he wanted to buy me something at the art shop. It had been years since I last picked up a pencil but then, a month or two ago - in an ongoing attempt to chase away the fog of PND, to connect with the increasingly recalcitrant 5yo in a shared creative way, to just give in to a very ancient-feeling itch, I don't know - I suddenly started again. So he said, do you need any new materials?
Proper paper and paint brushes, I replied. Off we went one afternoon (because I had to choose myself), and the buying was so very, so hilariously, representative of where we are now:
A week late (because the biggest boy had us all marooned at home with chickenpox on my birthday itself), two small children, bribery snacks smudged into the corners of their mouths. As soon as I walked into the shop it felt like all the ones that had gone before: a treasure trove of smells and textures, instantly safe. Except previously I'd always been alone, and now there were three other people with me, two of whom couldn't wait to discover. Less doable for the small one (not that he didn't try, swipey hands at the ready), but the big one was enthralled. I set him to work with the paintbrushes and water at one of those Japanese calligraphy practice tablets while I tried, as quickly as baby-time allowed, to think.
It was rushed, infuriating, funny, exhilerating to share "my" space with them. I came away with three beautiful new brushes and a fat pad of paper. Oh and a set of watercolour pencils for the Bean. He's since drawn a whole series of alien busses with them. Because, why not?
As for me, I can't tell you how good it feels to draw again. I hadn't realised how much I had missed the timber smell of pencils or the touch of the paper, until they were in front of me again. It's almost like an awkward dance of courtship: I know you deeply, but I've lost the fluency and confidence with which to handle you properly. The only thing to do is practice.
At the moment I'm using Derwent Inktense pencils - you draw and then go over them with water. I'm sketching new designs in them, but I'm also doing lots of colour studies. I feel a great need for coherence, right now, and I feel my portofolio so far is all over the place. Which I have been too, of course (5 countries and 2 continents in two decades!) but now it's time become more grounded.

This is what came out for the rest of this year's new releases. I'm surprised at just how "grounded" - soil, earth, foliage with a splash of sky - they are, but I think I like them. The idea for the little colour cards, by the way, is one I have unashamedly stolen from Ingrid at IngThings, one of my favourite blogs and corresponding instagram accounts. A while ago she was selling the cutest sets of them in her webshop but, having failed to secure one, I decided to make my own. They're very addictive to do.
So now I'm using these cards to help me plan what I hope will become something akin to a collection. The fibres I'm working with don't match the current season (always two ahead, as a rule), but I feel that come winter the pretty pinks and lilacs will serve as good reminder of what inspired me, this beautiful but uncharacteristically warm spring (has the weather been as crazy where you are? We are heading towards drought, in Sweden of all places).


On stripey birthdays
In the run-up to my smallest boy turning one a couple of weeks ago, I had all the feelings. There was nothing for it but to tip the box of yarn oddments out onto the floor, …

I was watching an episode of Chef's Table the other day, in which someone talked about the correlation between big feelings and baking. Birthday? Bake a cake, obviously. But also, failed an exam? Bake a cake. Got an interview - bake a cake. Somebody died - bake a cake. Or something along those lines
I think I'm the same with knitting. It feels right, somehow, to try to weave a little extra "but I love you so" into the stitches. Or to let your own complex feelings unravel as the rows slowly grow.
In the run-up to my smallest boy turning one a couple of weeks ago, I had all the feelings. There was nothing for it but to tip the box of oddments out onto the floor, watch the delight on his face as he tangled his little fingers into the soft fluff, and try to rescue a few balls for his first birthday jumper.
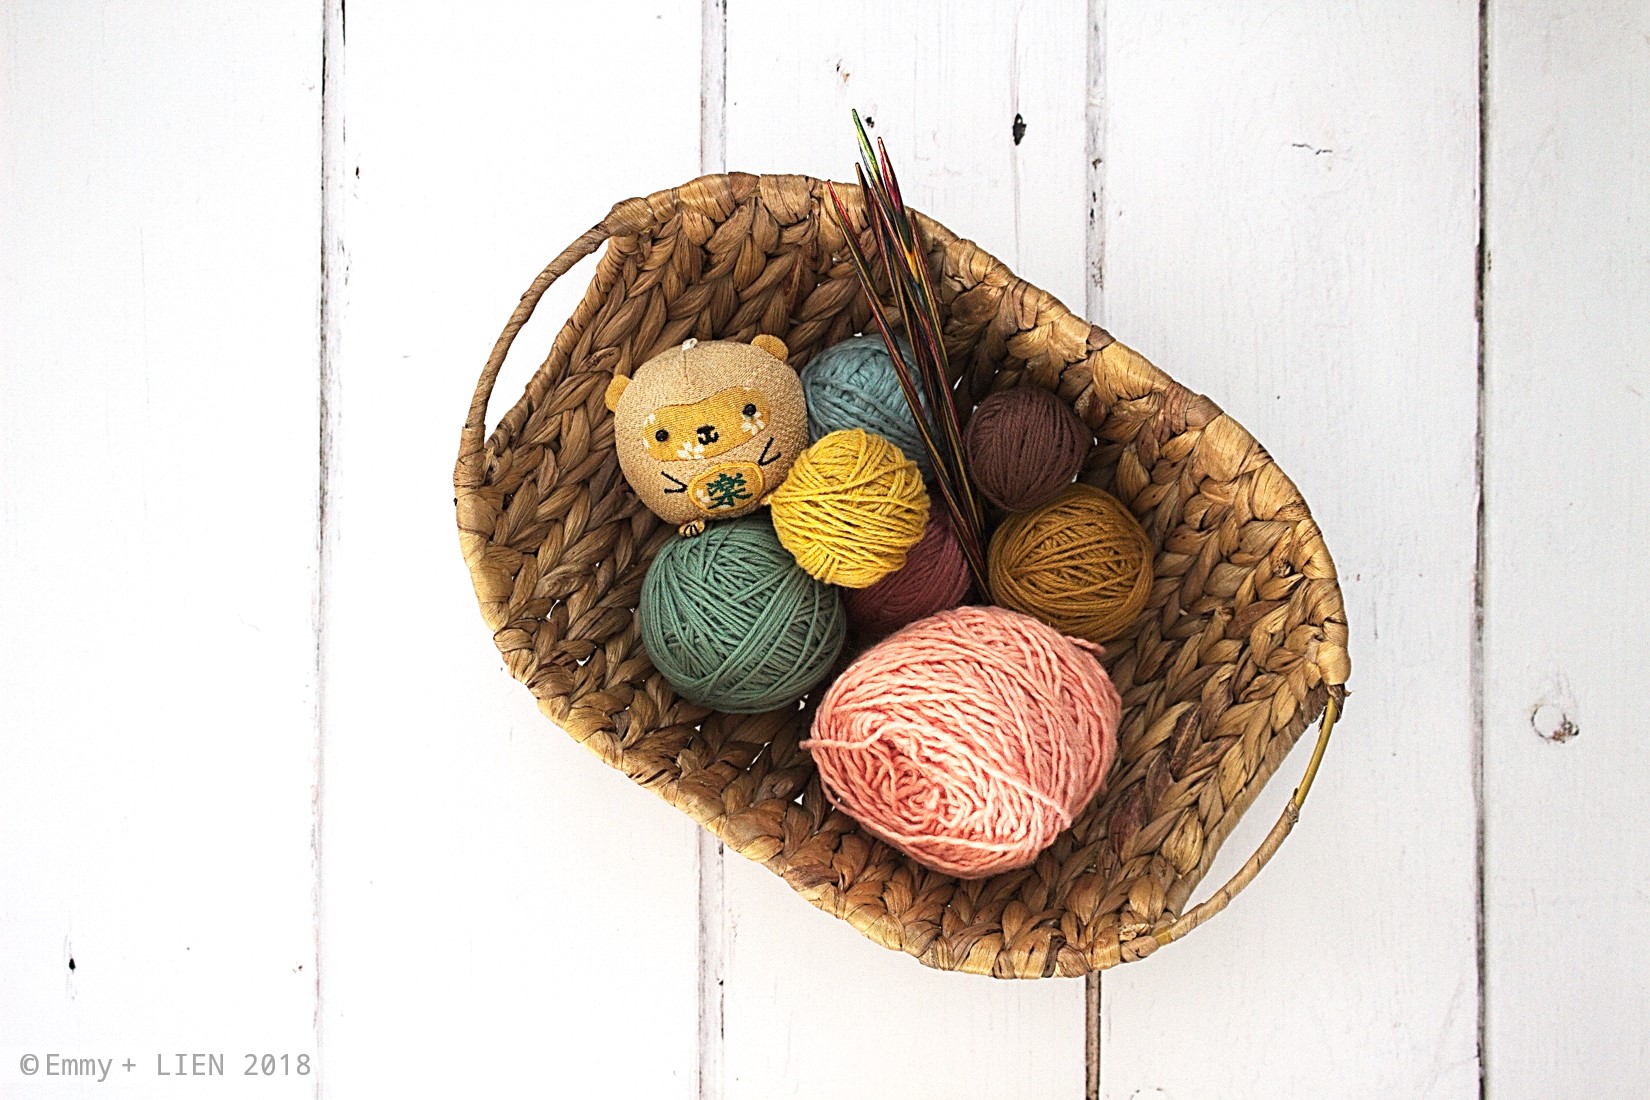
This is what came out of the box, in the end. A mix of cottons and cotton-wool blends, perfect for chilly mornings in spring.
For the pattern I decided on a randomly striped, simple raglan jumper, based on Tin Can Knits' Flax. It's a very easy, well-written pattern that's perfect for quick kids' knits - I used it for The Bean's birthday jumper last year.

Since I had DK weight yarn rather than aran, as the pattern called for, I cast on the size 2-4 yrs with 4.5mm needles and carried on working raglan increases until I had the dimensions instead of the row numbers stated. I left out the garter panel too, so as not to distract from the stripes.
I tucked in the last end a week after The Bug's birthday. Which was perfectly on time, given he was a hot, itchy chickenpox mess on the big day itself. So I suppose he had a spotty, not a stripey birthday, really. But two weeks on he is back to his chirpy self, a little taller and with new walking skills to boot. Spring has burst into perfect bloom and we are so very ready to enjoy the garden in our new home for the first time. The jumper turned into just the sweet stripey number I was hoping for, with a little extra room to grow.


Because grow, grow, grow they do. The little one starts nursery today. I think I'll go and cast him on some socks.

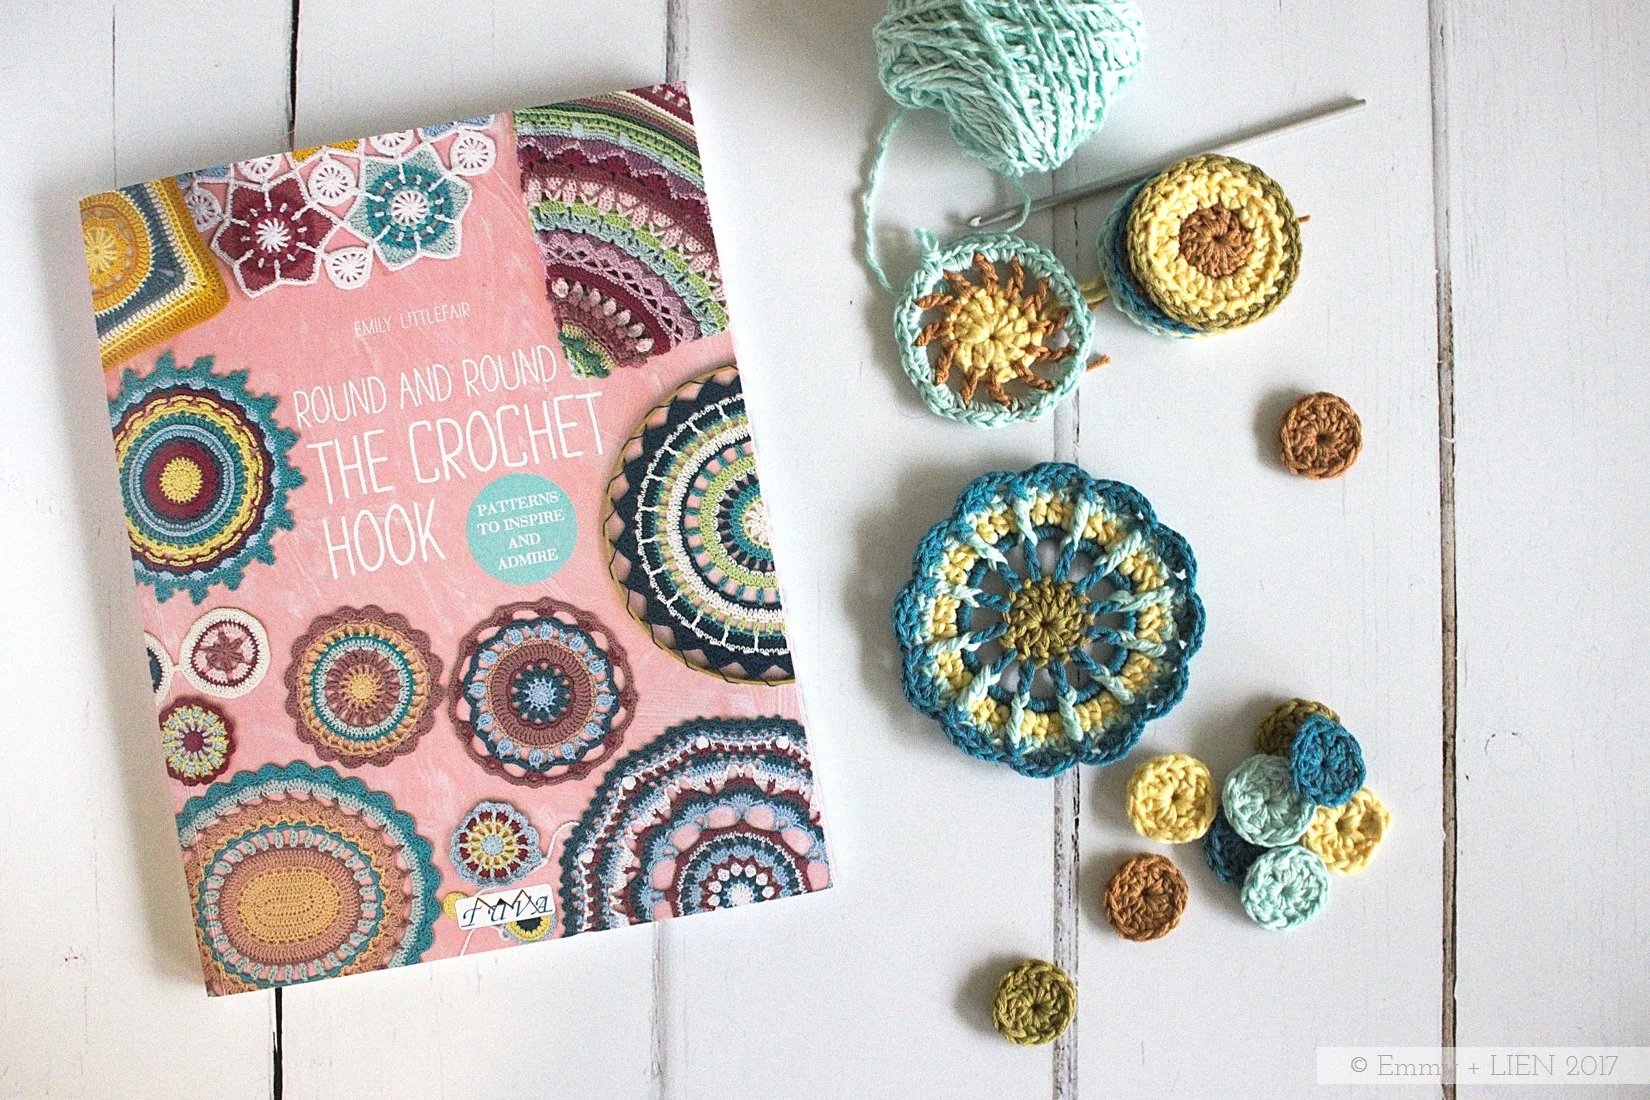
BOOK REVIEW: Round and Round the Crochet Hook
A review of Round and Round the Crochet Hook, a beautiful new book by Emily Littlefair (aka The Loopy Stitch).
My crojo has gone missing. Do you know what crojo is? It stands for "crochet mojo" and, as with so many things, I didn't know it was "a thing" until I saw someone mention it on instagram. It's that feeling when you're so into a project you dont want to put it down at all, when you're full of inspiration for what to make, when you're generally just so crochet-y. Usually, that's me. Since baby 2, not so much.
It's okay, I know exactly why it's happened to me at this time. Crochet is my Creative Thing, but it's hard to be innovative and original when you're so sleep-deprived you can barely string a sentence together. It all goes in phases, doesn't it, and in the meantime I'm thankful I have knitting as my Making Thing.
I do miss it though. The weight of the hook in my hand, zipping through rows (god, knitting is slow), my favourite familiar textures...
So when Emily Littlefair (who you may know as The Loopy Stitch) asked whether I'd like to take part in a virtual tour for her new book, I jumped at the chance. Emily's IG page is full of gorgeous crochet, and I thought, what better way to try to tease my crojo back but with one of her patterns?
The new book is called "Round and Round the Crochet Hook", and contains 19 patterns that are all worked in the round. Most of them are small, reasonably quick projects, but there is one stunner of a blanket as well. Each pattern comes with detailed written instructions, complete stitch charts, and clear project photos. At the back of the book there's a handy "Crochet Basics and Techniques" section as well.
When I received the book, the first thing that struck me was how pretty it is. As you'd expect from Emily, the colour palettes are very, very beautiful, with just the right balance between bright and sophisticated. We're in the depths of gallingly-grey November days here, and even just flipping through the pages is a enough for a bit of a visual pick-me-up.
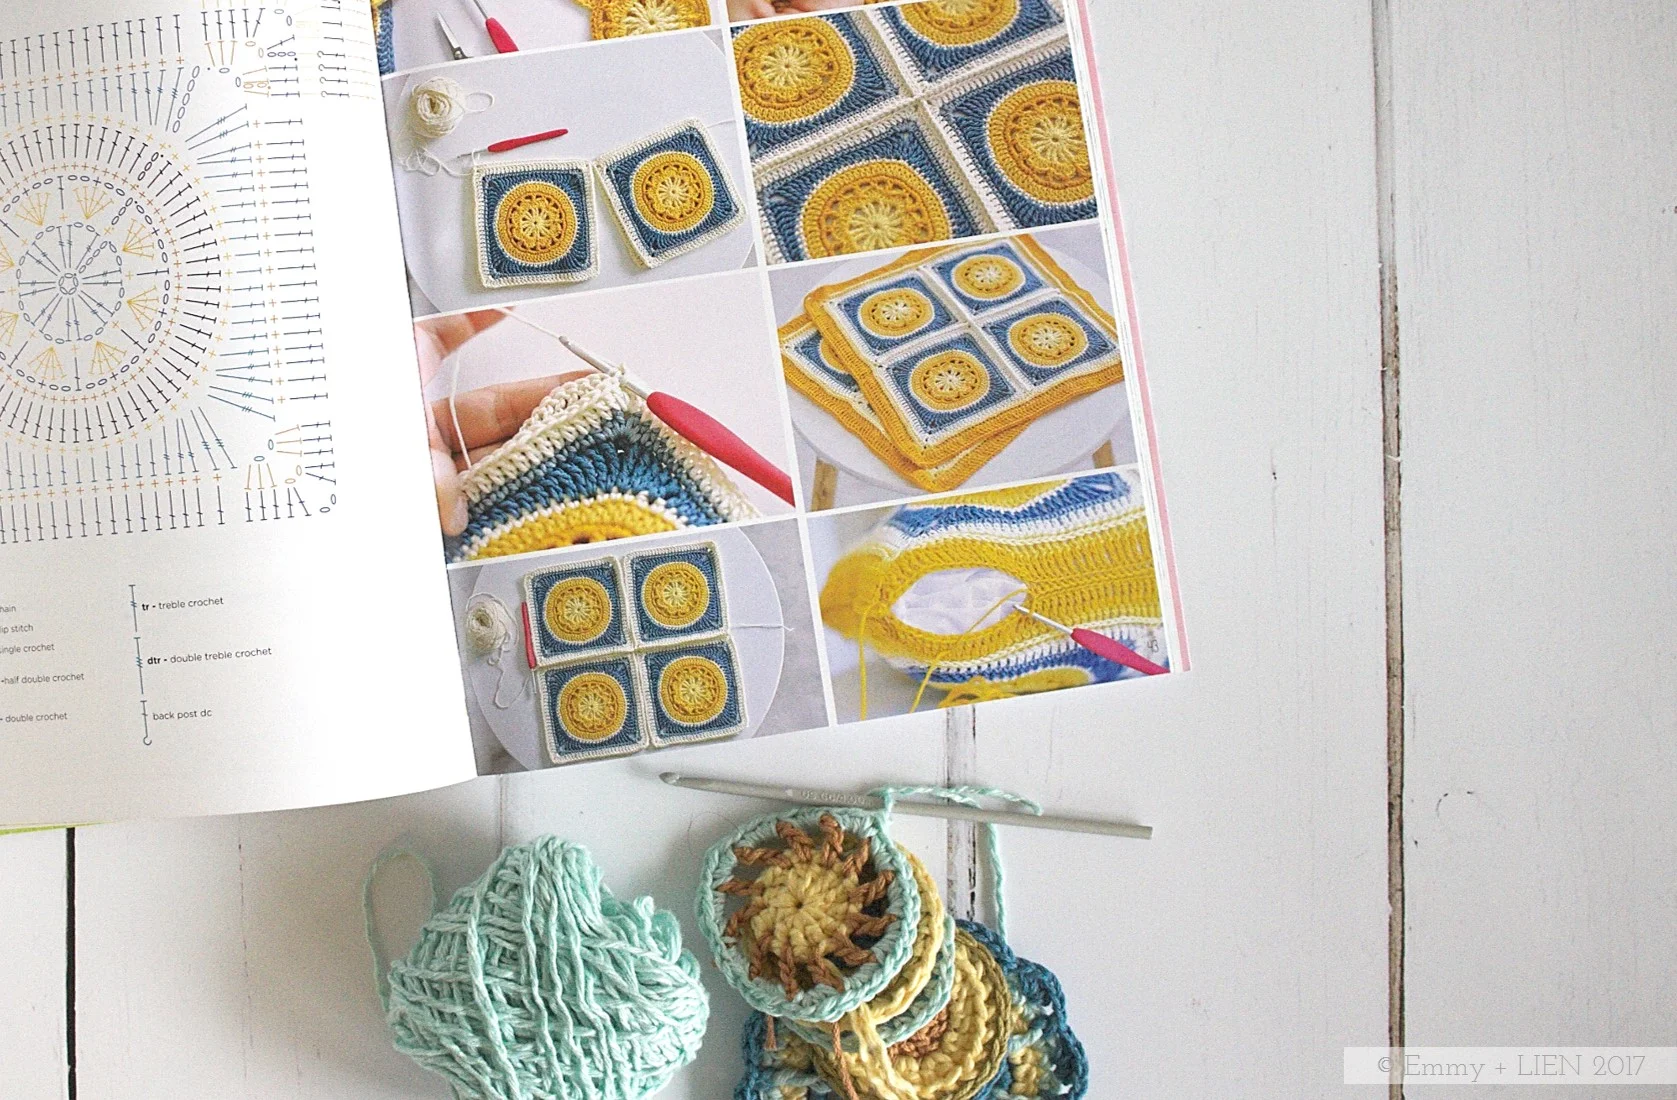
The other thing I really like is how clever the whole thing is. I've always admired crochet mandalas, both for how they look and for their meditative round-and-round-and-round construction - but I don't often make them because, well, what do you do with them all? Emily has anwsered that question for me: you make cushions, coasters, table runners, wall hangings... And you end up with truly beautiful as well as usable pieces for the home.
It was such fun flicking through this pretty book in a quiet, baby-is-finally-napping moment. I made tea, my favourite crochet notebook came out...


In the end, I chose the Spotty and Dotty garland as my first project. I'm using bits of leftover Vinnis Colours cotton and bamboo because I just love the colours. We're doing up the boys' room at the moment, so that's where it will go, assuming I can bear to part with it! I'm pleased to say I'm really enjoying making it, to the point where I'm already toying with the idea of making them a rug from the book in matching colours.
Well hello there crojo, my old friend...
Round and Round the Crochet Hook by Emily Littlefair is published by Tuva Publishing and available to buy now. Thank you to Emily and Tuva Publishing for giving me the opportunity to review this lovely book and take part in the virtual book tour (for a full list of participants, click here).
Crochet speckle
Have you ever wondered: what does a crochet speckle look like? Yes yes, me too, it's an important question. So here you are:

I'm sure that, in between pondering what to cook for dinner yet again and hoovering up crumbly leaves and sand and whatever else the preschooler/dog/cat has stormed in with, you've wondered: what does a crochet speckle look like? Yes yes, me too, it's an important question. So here you are:
Did you spot it? That little dash of burgundy red? Lovely, isn't it.
But it's also made me wonder, why aren't there more crochet speckles about? Why do speckled yarns seem to be mostly a knitterly thing, so much so that I've even heard mutterings of solid colours being "refreshing" in a "world of speckles and fades".
As a new-ish knitter, I'm new-ish to speckles. I've decided I like speckles. I didn't really come to them entirely of my own accord; It was Petra, the indie dyer I'm collaborating with on a merino version of the Sea Glass Shawl who suggested it with such an air of "well why wouldn't you", that I thought, "well why not?" And now, I like them.

Perhaps the reason you don't see so many crochet speckles is because they tend to feature on socks or fingering weight yarns (the very thin, light ones), and my impression is that crocheters prefer DK and above. Speckles are also a bit subtle - you need tiny stitches to show them off. Are we crocheters just a bit too impatient, a bit too used to our projects growing quickly, to really appreciate speckles?
I hope not. Because I want to re-release the pattern for this shawl soon and more speckly ideas are forming in my head. So at some point (providing the baby ever learns to go without mama milk for more than two hours at a time, but that's a story for another day) there will be more crochet speckle. Just a little bit. It's just too pretty not to, isn't it?


The dreams of a 4.5-year-old boy
There was once a little boy, of a generally sunny but also pensive disposition, who often struggled with bad dreams.

There was once a little boy, of a generally sunny but also pensive disposition, who often struggled with bad dreams. Sometimes it was them darn zombies. His mama told him there's no such thing but, what do mamas know about these things anyway? And sometimes he dreamed his mama herself would leave, which was altogether worse. No amount of night lights or cuddly toys or dolly friends would make those dreams go away.

His mama said, I won't leave, I'll always be here for you one way or another. But she knew that words are sometimes not enough. So they put their heads together, and both agreed: a dreamcatcher. Because both knew, deep down, that the best way to soothe another person's soul is to give them something your own hands have made.
Two old embroidery hoops, leftover cotton yarn, some feathers pilfered from the Easter decorations box. New beads though, because, well... Shiny things. Irresistible.
And here is the result.


If you want to make a similar dreamcatcher, I was inspired by this one.

The Fling-It Project
Do you know what a FIP is? This innocent-looking little cardigan turned out to be mine...

Some projects roll off the hook or needle. The swatch is true, the wool buttery, the colours just so. This kind of project is rare, and to date I think I've only had two: the Floss scarf and the Flax sweater.
Most projects seem to have to involve at least a few hiccups. Perhaps the colours don't quite sing in the way you expected, or maybe you dropped a stitch somewhere and have to go back a bit. You might have to spend a few evenings pouring over blogs and YouTube tutorials, having been a little too optimistic about your own abilities. This is okay. I don't mind hiccups - you always learn something new.
Sometimes, though, often when you least expect it, you get an absolute b****** of a project. Not so much a WIP (work in progress) as a FIP (fling-it project). Fling it across the bloody room.

See this lovely, innocent-looking little cardie? It's my FIP. Oh my, am I glad Pinterest doesn't do audio, because the Bleeps and @*!Xs that are woven into those tiny fairisle stitches...
The pattern is from an Editions Marie Claire pattern book I've had for years. It has a bottom-up, seamed raglan construction, and is meant to be knit in 3mm needles. I knit quite tightly, so I went up to 3.5mm to get the right gauge. I picked the smallest size: 0-3 months. Although now that it's finished and finally on the Squidgy One I do think it's rather lovely, but unusually for me, I didn't enjoy making it one bit. Sheer stubbornness to avoid wasting the beautiful yarn (more details below), as well as a looming "oh look mum, I'm about to bust out of this before you've even finished it" situation are the only reasons I didn't abandon it halfway through.
The thing about baby knits is that they are meant to be quick, satisfying makes but despite its diminutive size this was anything but. I started it before we even knew whether the wriggly baby in my belly would be a girl or a boy, and didn't finish until our Bug had already been with us for good month. This was mostly my own fault, owing to a series of spectacular misjudgments.
No matter how small the cardie, fine 2-ply is never going to knit up fast.
No matter how small the cardie, trying your hand at fairisle for the second time in your life is never going to be fast.
No matter how small the cardie, itty bitty pieces with itty bitty stitches are never going to be fast to seam.
D'oh.

The yarn probably didn't make things easier either. It is utterly lovely, don't get me wrong - a blend of 50% cotton and 50% merino, both organic, by Hjerte Garn. It's soft and strong, and will probably pill very little. But it's also very fine and kinda sticky, so with all the colour changes it tangled like nobody's business. The stickiness does make the little fairisle Vs stand out and hold their shape very nicely, but an inexperienced knitter like me was always bound to want to Fling It. Lesson learned.
Part of my frustration was down to the pattern itself, too. As I knitted, blocked and laid out each piece, frowned over them, held them up, put them next to the Bug, frowned again, it became clear that the dimensions were turning out very odd. The body is very wide, but the sleeves and hem line both come up short on my average-sized boy. There are no pictures in the book of the finished cardigan worn by a baby, just of pretty flatlays. It goes to show how important it is to understand body measurements as well as construction methods - my Bug happens to be long in the body, and (since I wasn't able to measure him when I started this knit) I could have adjusted the pattern as I went had it been a top-down one. So an oddly three-quarter length thingy it is.
About halfway through I did start cheating a bit to speed things up. To do the raglan shaping I decreased stitches rather than binding them off. The button band and the neckline are meant to be knitted separately and sewn on but, just no. I picked up the stitches along the selvedge edge instead and called it done.
So there it is. A wee FIP cardie finished off with little clear buttons from my stash. And doesn't he look cute as a button in it? Phew. Just don't ask me to make another one.
