
TUTORIAL: Crochet Ribbing pt. One | HTC and slip stitch
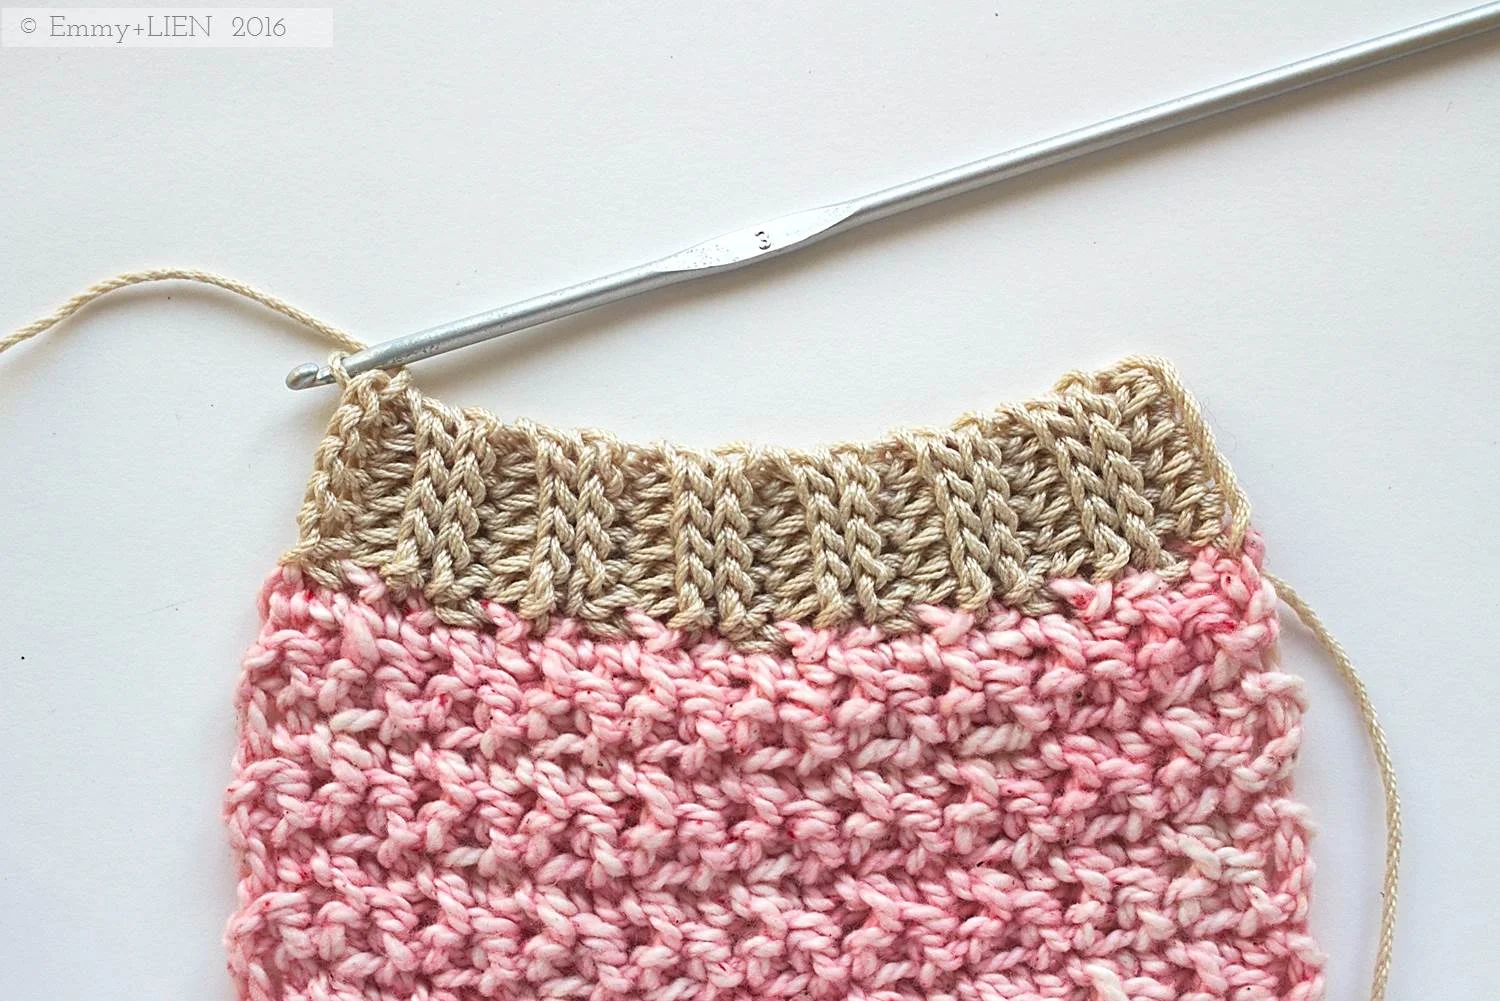
In the first part of this series on crochet ribbing, I will show you how to create a tight rib using a combination of HTC (HDC for you US folks) and slip stitches worked in the back loop.

When I think about what sets apart my successful crochet projects from the not-so-successful ones (or the absolute disasters, because we all have those), I can come up with a few reasons:
- Wrong yarn - wrong weight, or wrong type of fibre
- Wrong fit (for garments) - everyone has a different body shape, of course, and knowing enough about what suits you - tailored or boxy? Long or short? - is very important to the ultimate success of a garment. More about that in a later post!
- Poor finishing - ends not securely sewn in, ugly seaming or wrong/lack of ribbing/edging
It’s this last one that I want to focus on today, because a poor finish can really ruin an otherwise well-executed project. It’s the boring bit at the end, I know, but it does make a difference. Ribbing especially can have a huge impact on to whether a garment fits properly, and how well it lasts with frequent wear.
There are several ways of working crochet ribbing, each with their own characteristics - super-stretchy, or nice and neat, or just easy to do. In the first part of this series on crochet ribbing, I want to show you how to create a tight rib using a combination of HTC (HDC for you US folks) and slip stitches worked in the back loop.
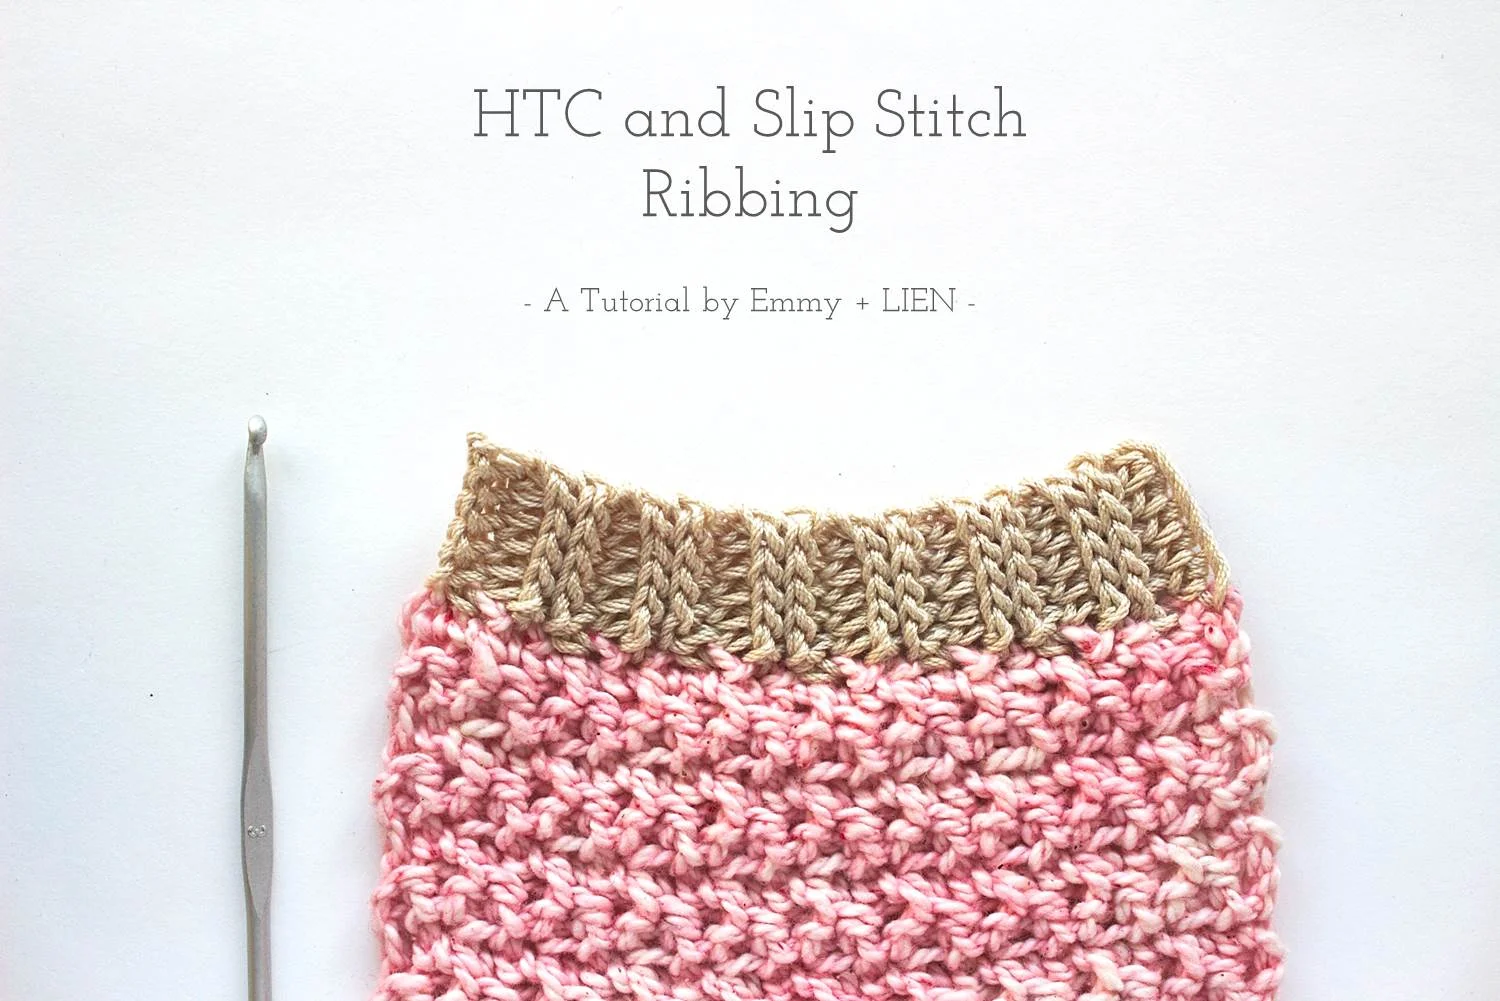
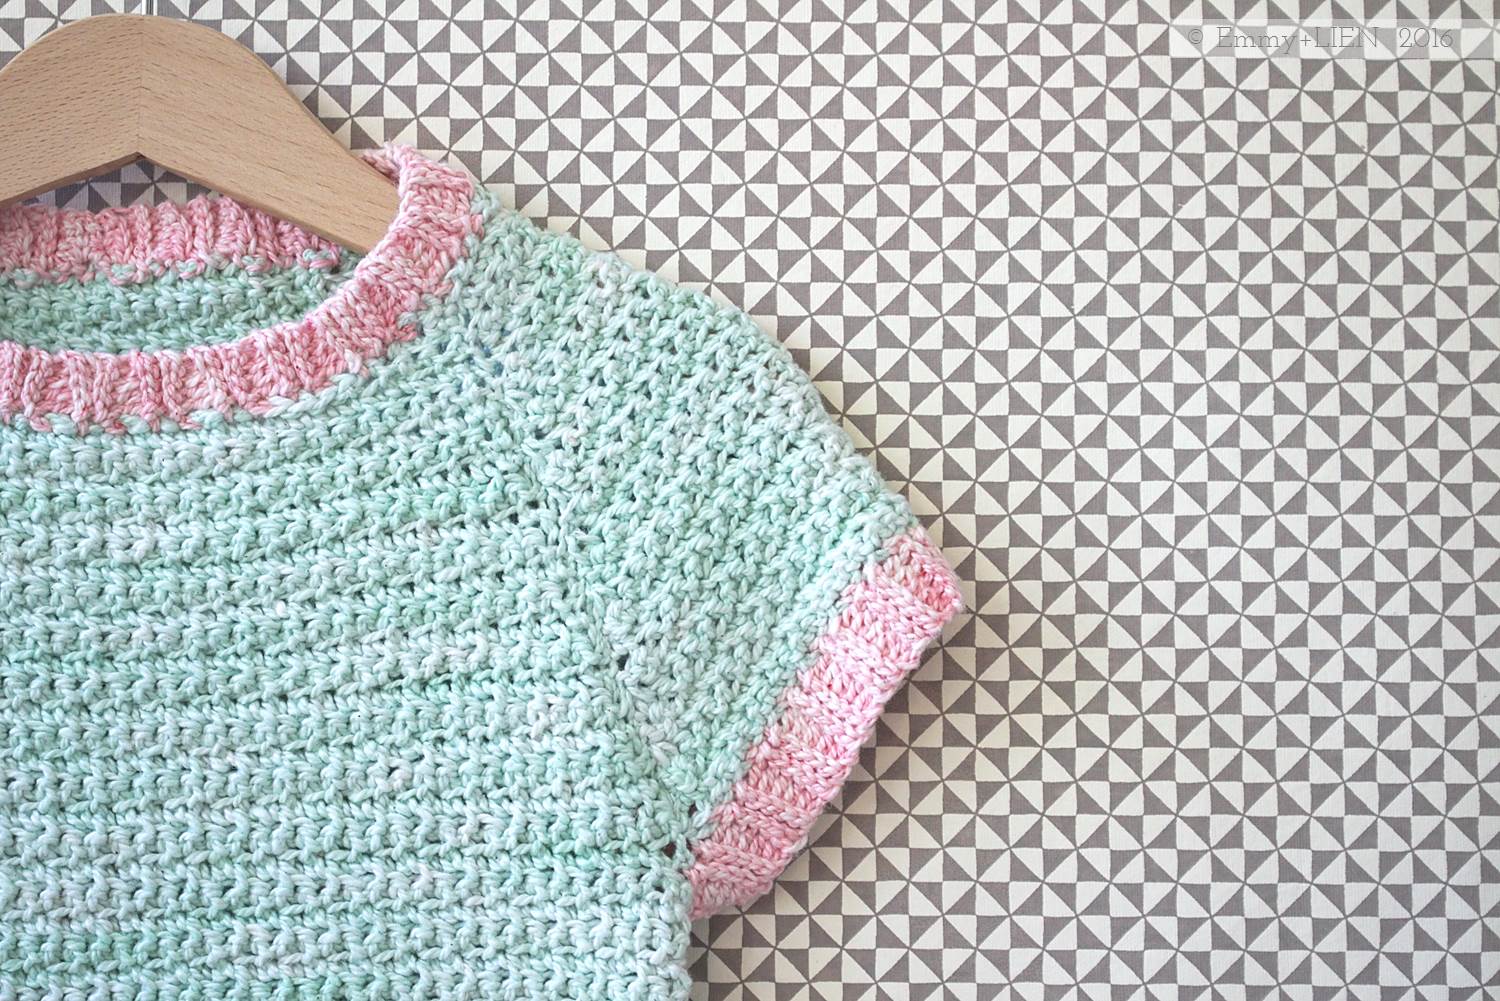
This ribbing is worked directly into the selvedge edge of a garment and gives a very neat finish that draws in the fabric underneath. I’ve used in quite a few of my garment designs so far, including the Peach Pocket Tunic (pictured below), the Sea Breeze Hoodie and the Hanabira cardigan.
HTC and slip stitch ribbing
Use it for:
Areas that need to sit snugly on the body with only a little stretch, such as necklines, sleeves edges and hems.
Avoid it when:
You need a very stretchy or flexible edge, such as on hat brims or sock cuffs.
Make it your own:
- Experiment with different hook sizes - a small hook for a very tight and stiff rib, a larger hook for something with more give.
- Increase or decrease the number of repeats - as this ribbing is worked directly into a selvedge edge, you can work more repeats for a straight, looser finish, or fewer to give you a more drawn-in effect (see further notes in step-by-step instructions below).
Materials
3.0mm crochet hook
Yarn: this rib works with any yarn weight or type. The type of fibre in particular influences the look and feel of the rib. For example, linen, cotton and non-superwash wool will be neat and stiff, while a superwash wool or alpaca will have more flexibility.
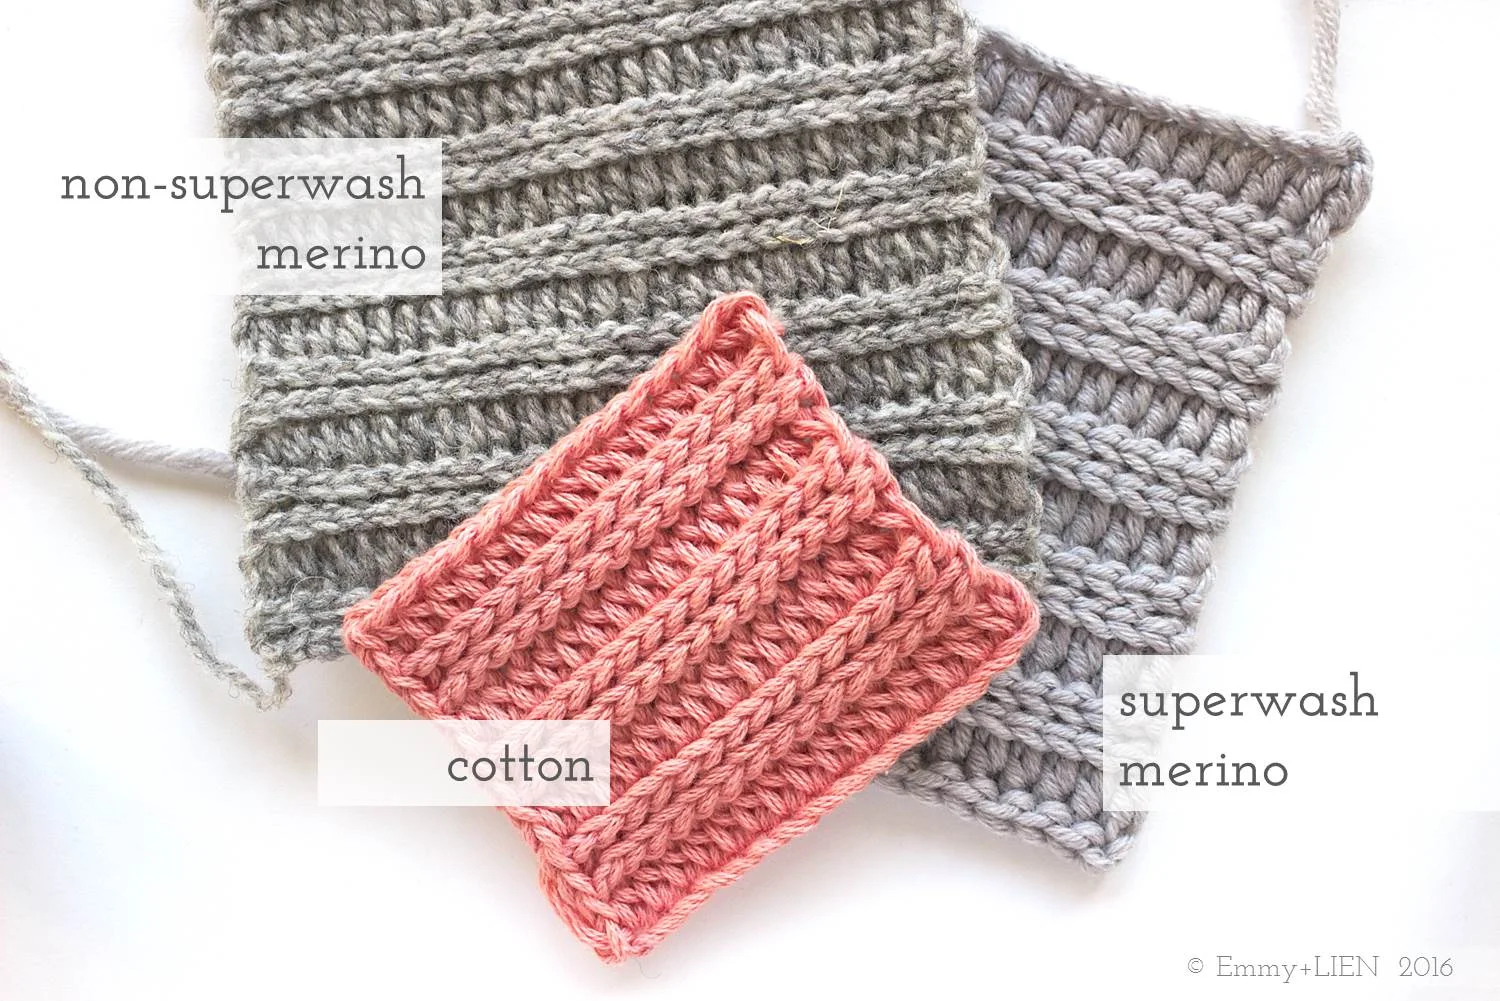
For this tutorial, I’ve used a cotton yarn in DK weight with a small hook to get a tight rib.
Difficulty Level
Confident Beginner
Stitches + Abbreviations
BLO - back loop only
Ch - chain
HTC - half treble crochet
RS - right side
Sl st - slip stitch
Slst2tog - slip stitch 2 together:insert hook, YO and pull up a loop, insert hook into next st, YO and pull through work and two loops on your hook (see step-by-step photos below)
Note this tutorial uses UK crochet terms
Instructions
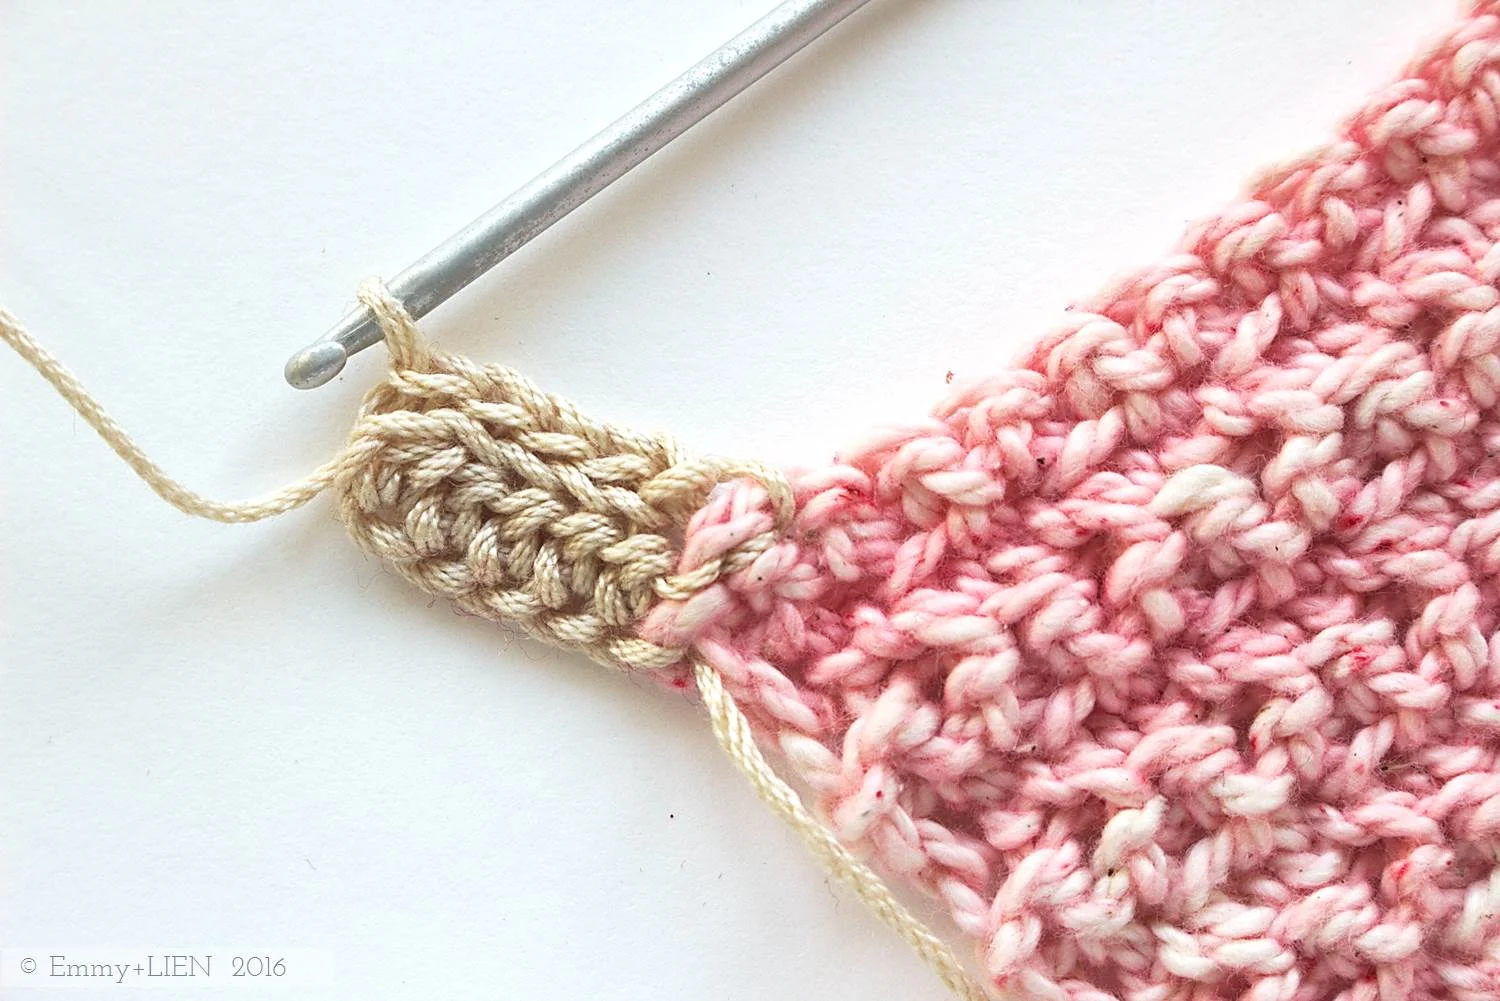
With RS facing, pull yarn through first stitch on edge and ch 6. Turn.
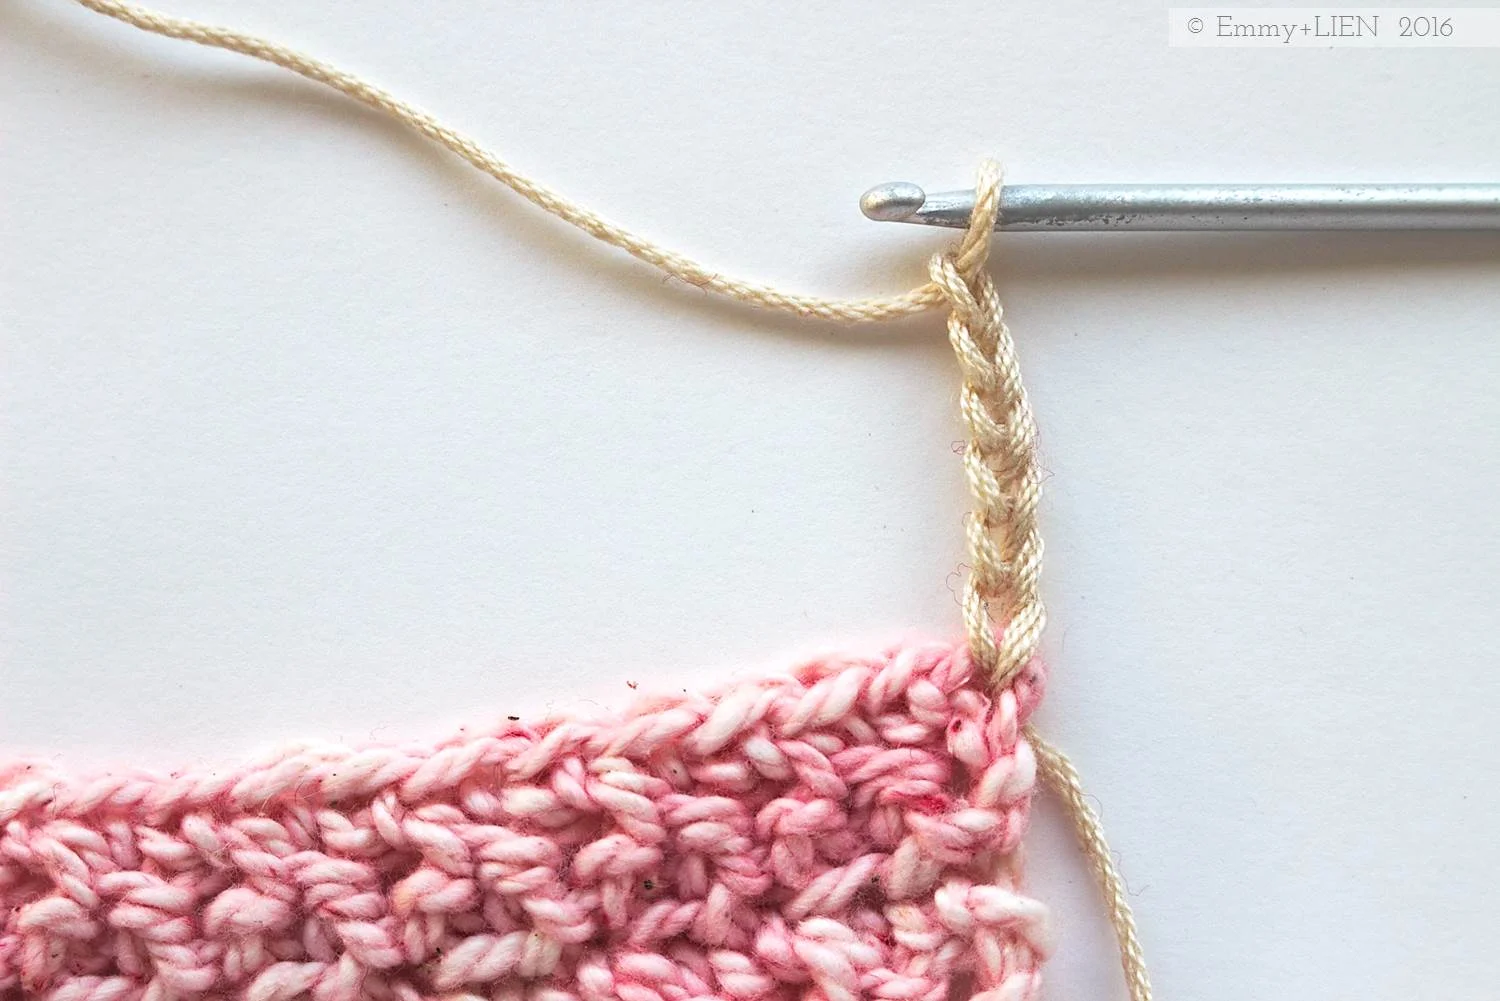
R1: Starting in 2nd chain from hook, HTC 1 to end. 5 sts.
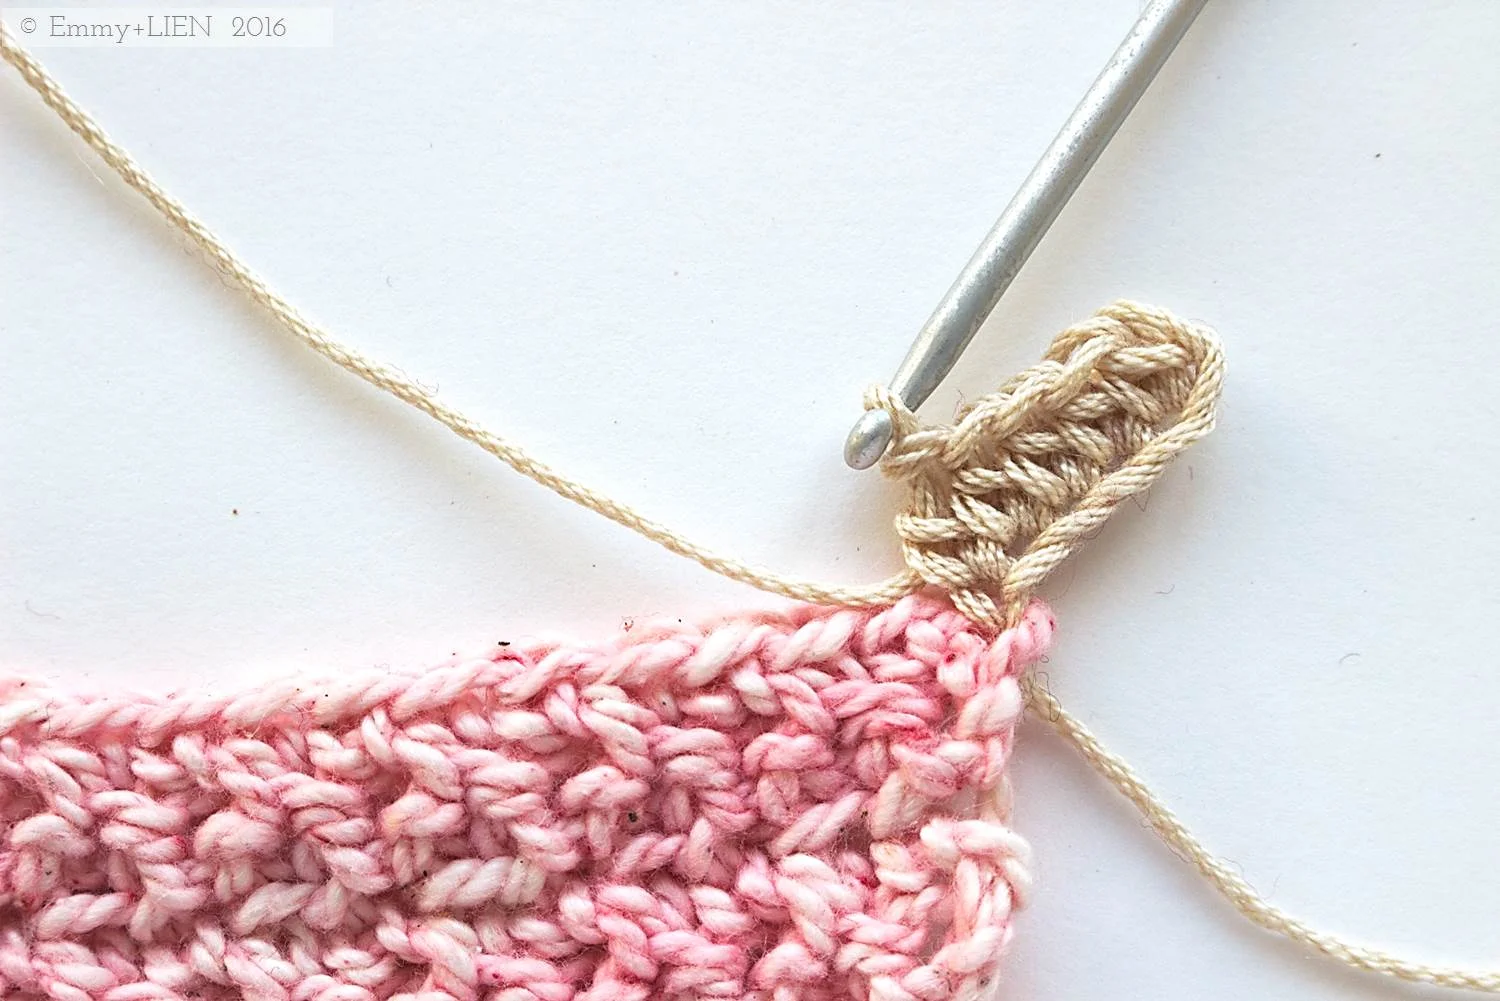
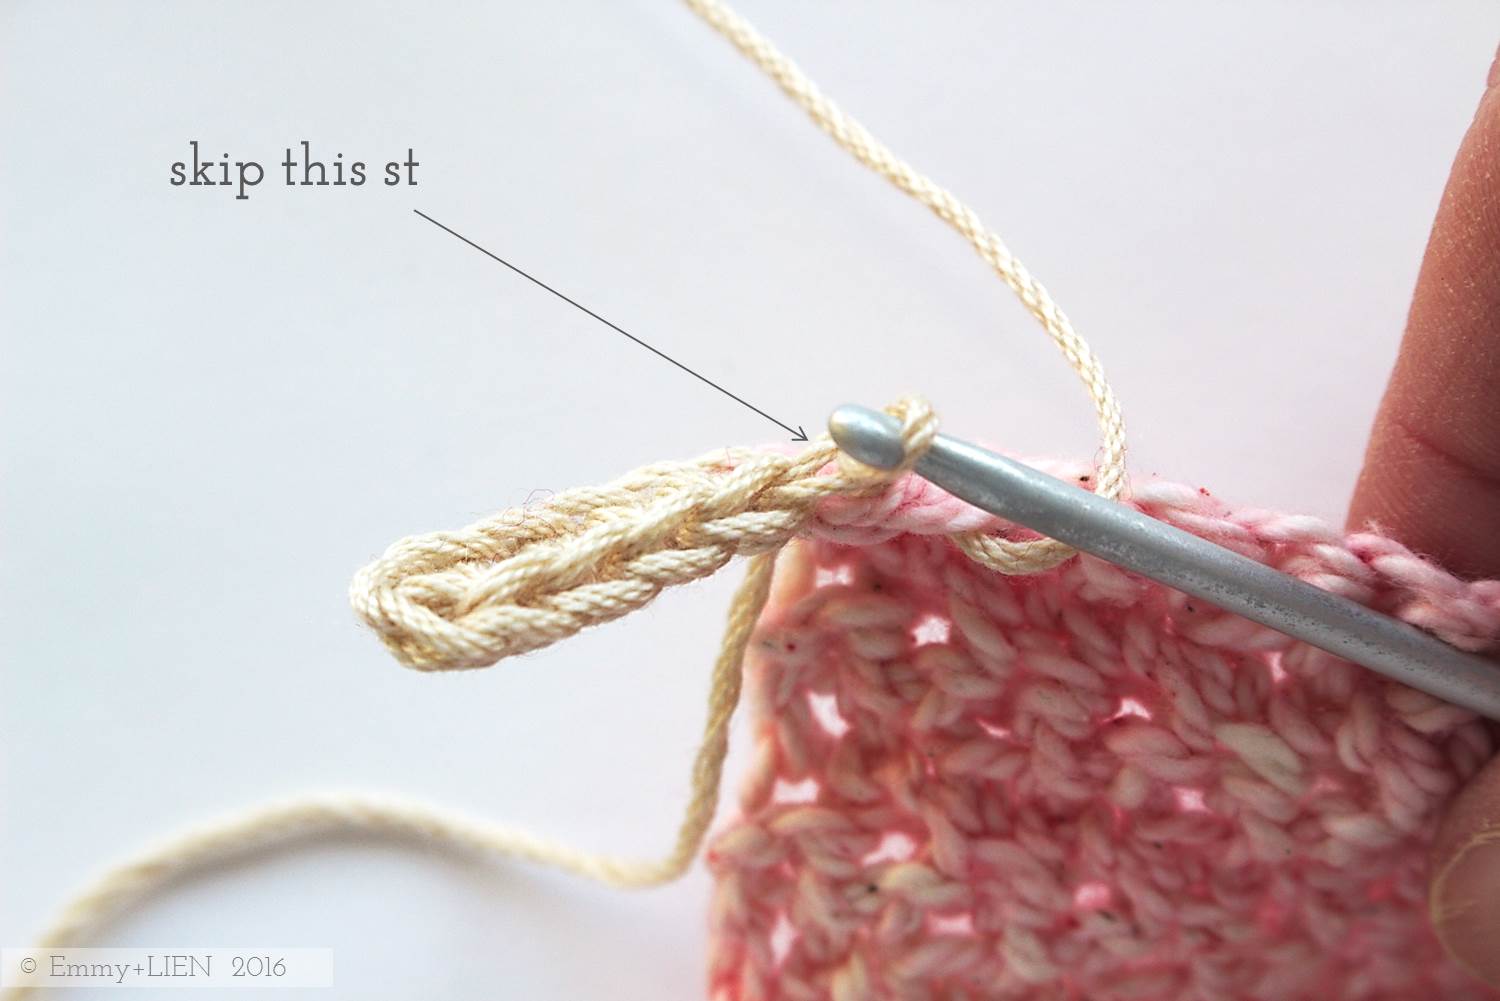
To attach the ribbing to the body of the garment, slst2tog the next 2 sts: insert hook, YO and pull up a loop, insert hook into next st, YO and pull through work and two loops on your hook. To adjust the tightness of the ribbing, you can either skip a stitch before working the sl2tog (= tighter), or you can just work a single sl st (= looser).
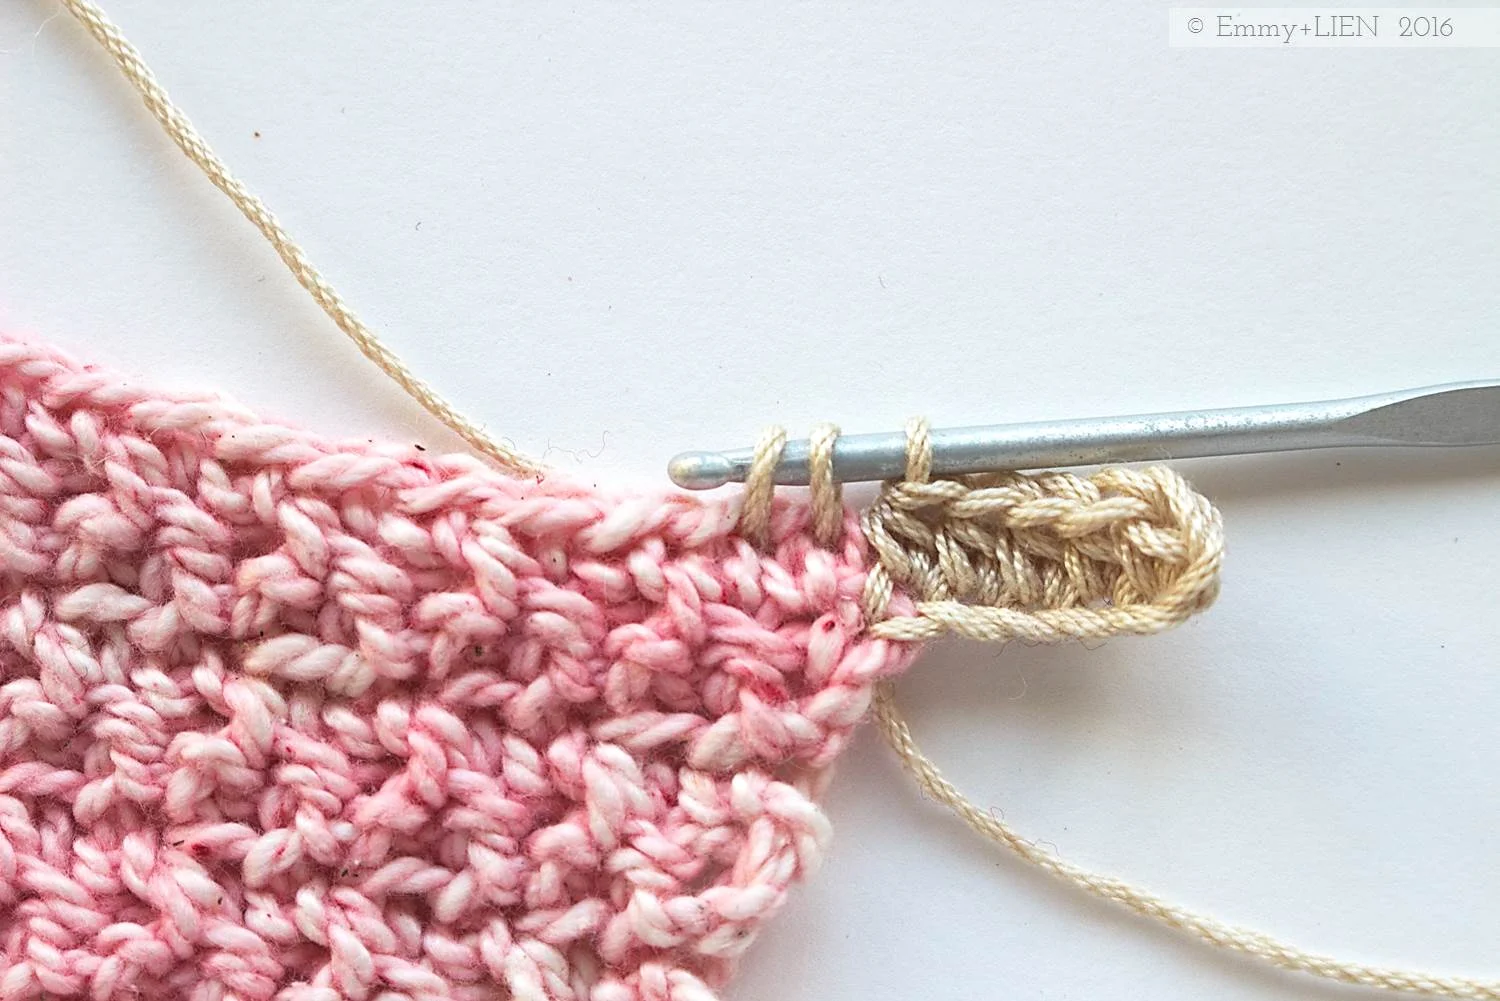
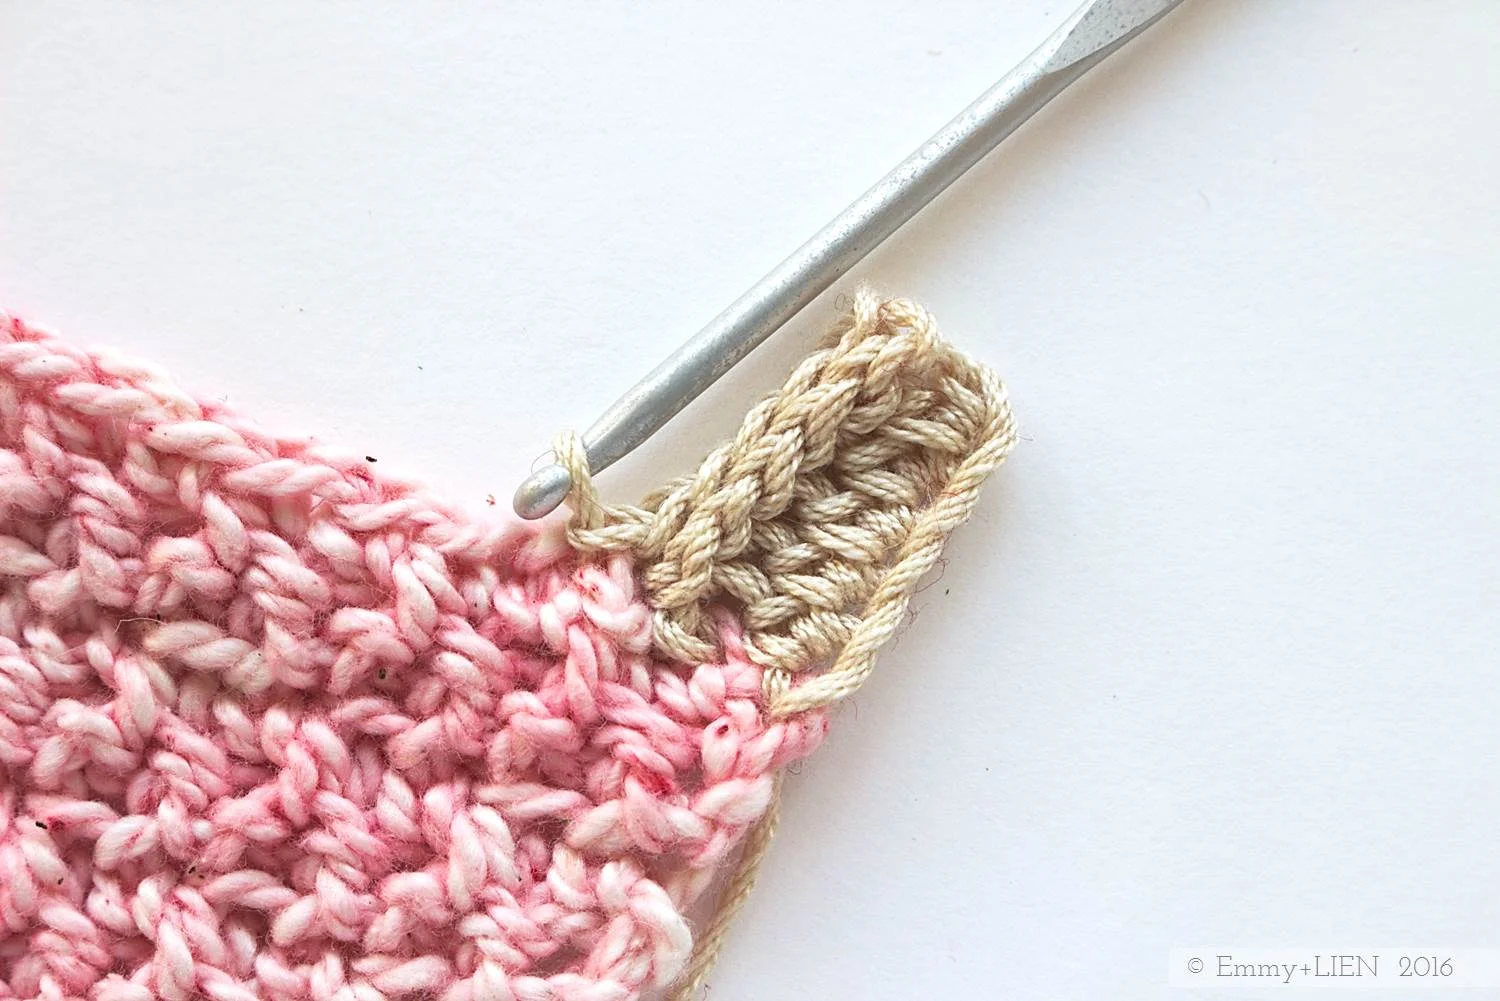
R2: Do not ch 1, skip 1, sl st 1 in BLO to end.
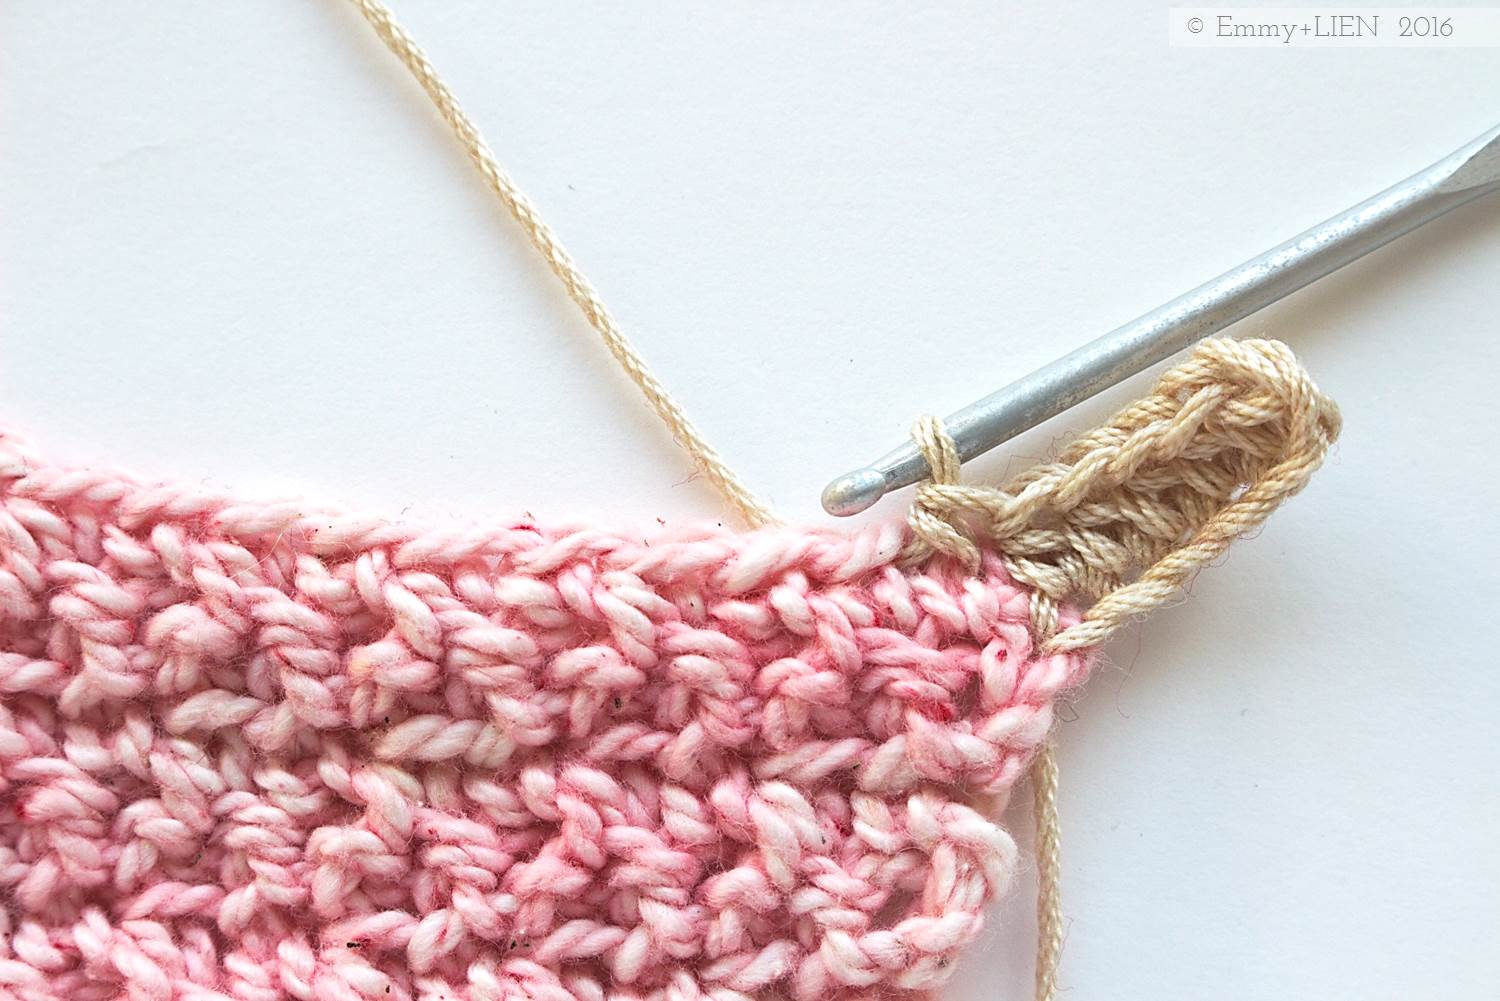
R3: Ch 1, skip 1, sl st 1 in BLO to end. Attach to hem with a sl st.
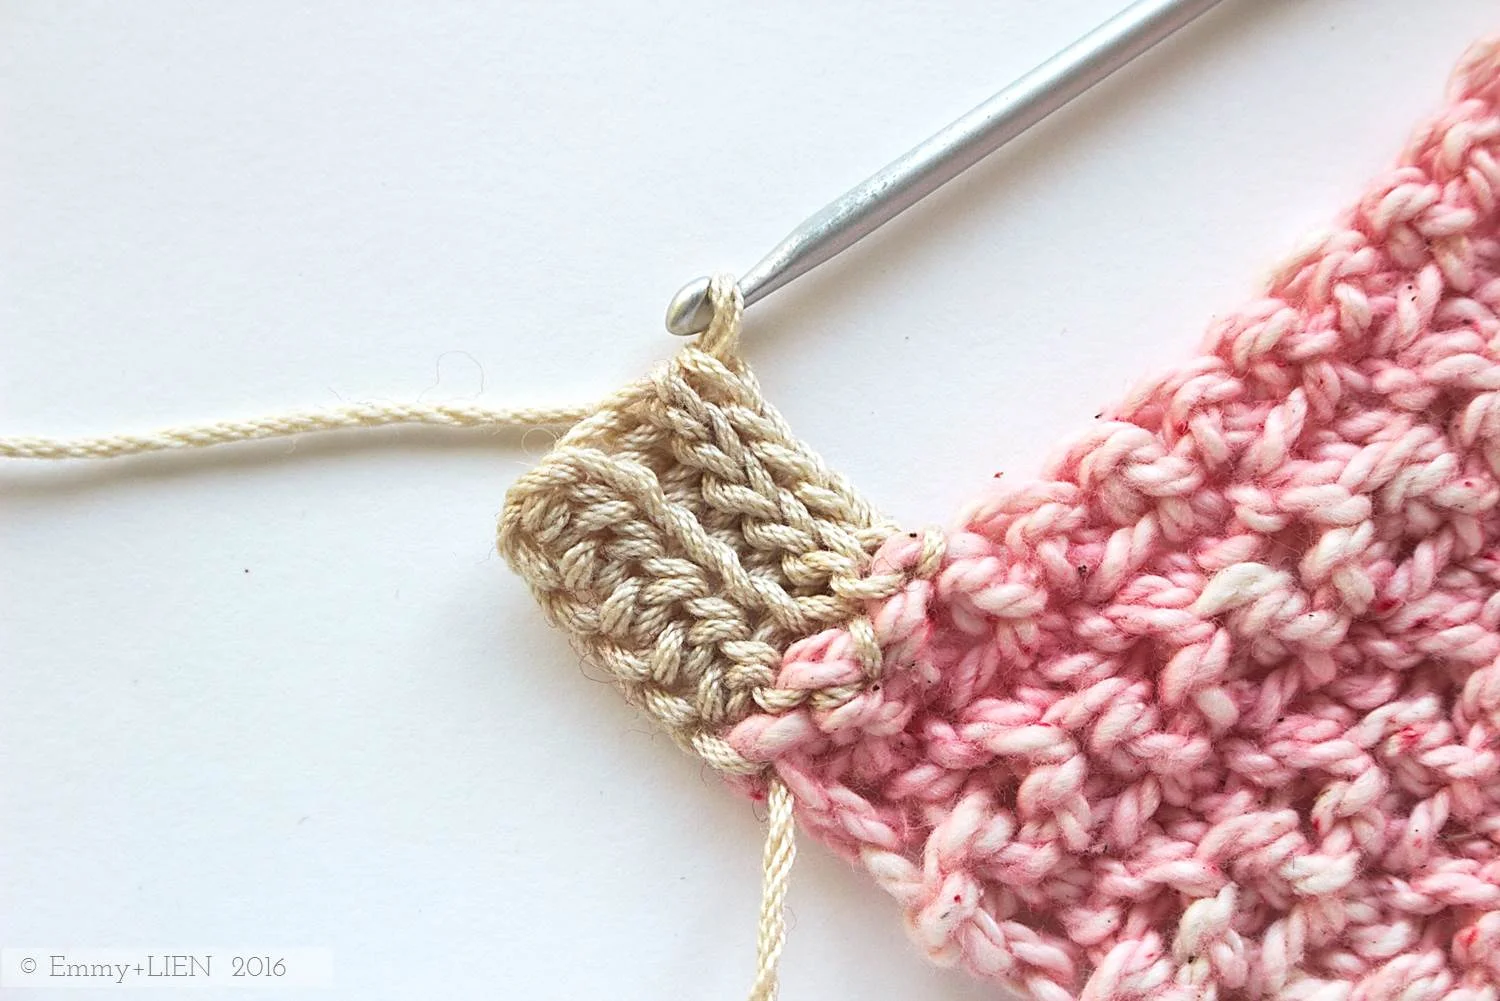
R4: Repeat R2.
R5: Ch 1, HTC 1 in BLO to end. Attach to hem with slst2og.
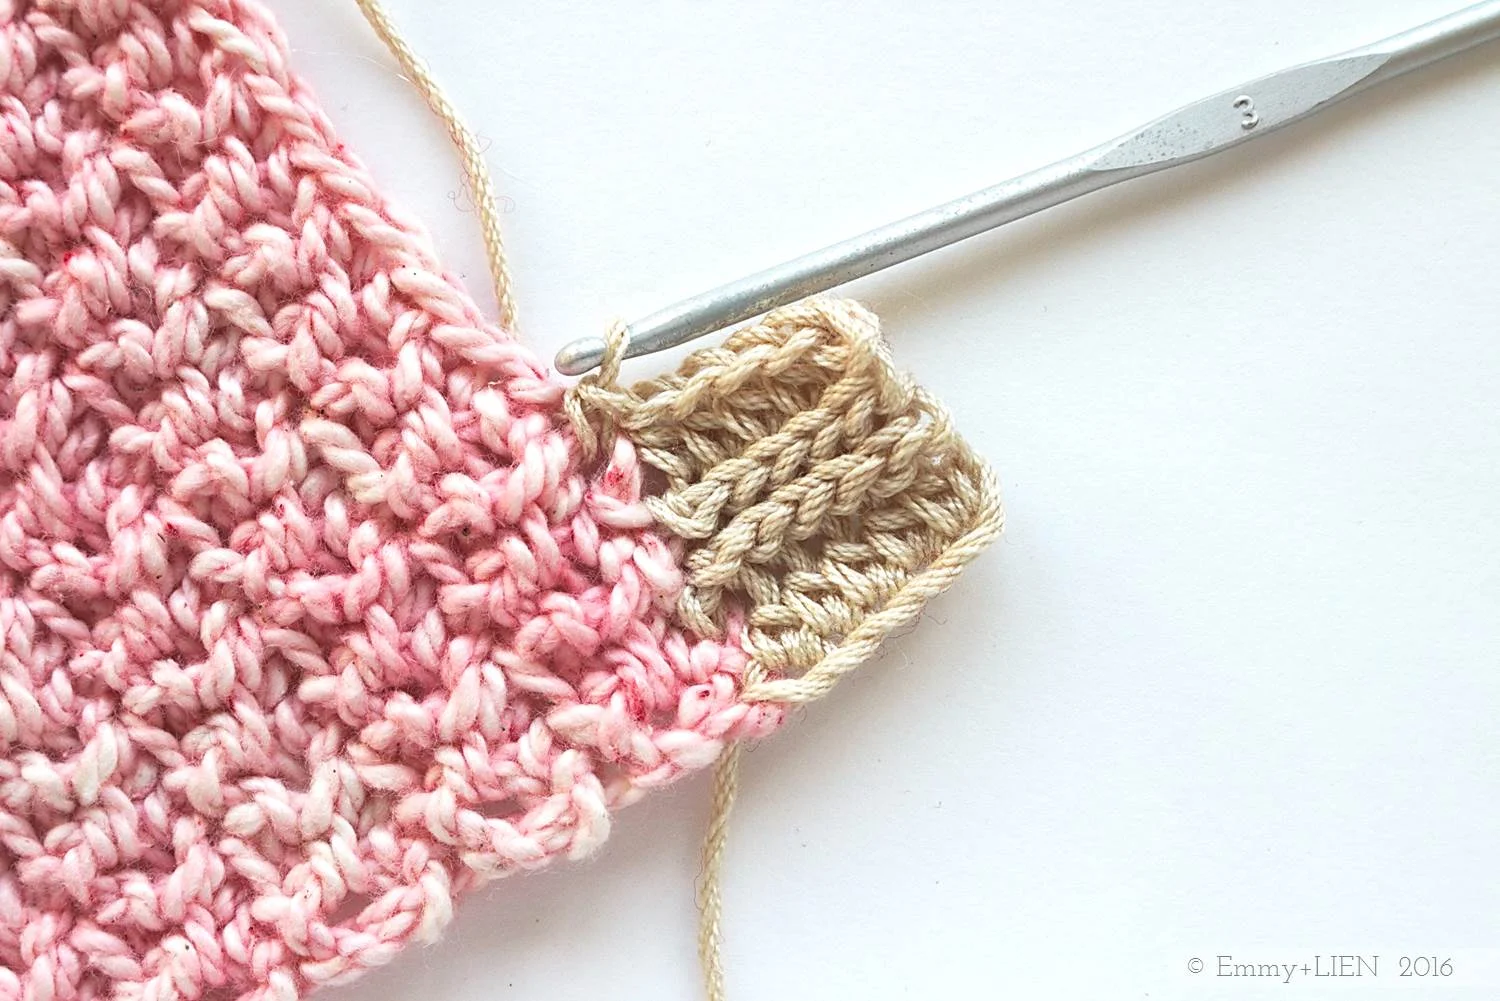
Repeat R2-R5 to end.
Copyright notice:
You may not reproduce, either partially or in full, any of the photos or the text contained in this tutorial without obtaining written permission from me first.
Thank you and happy crocheting!

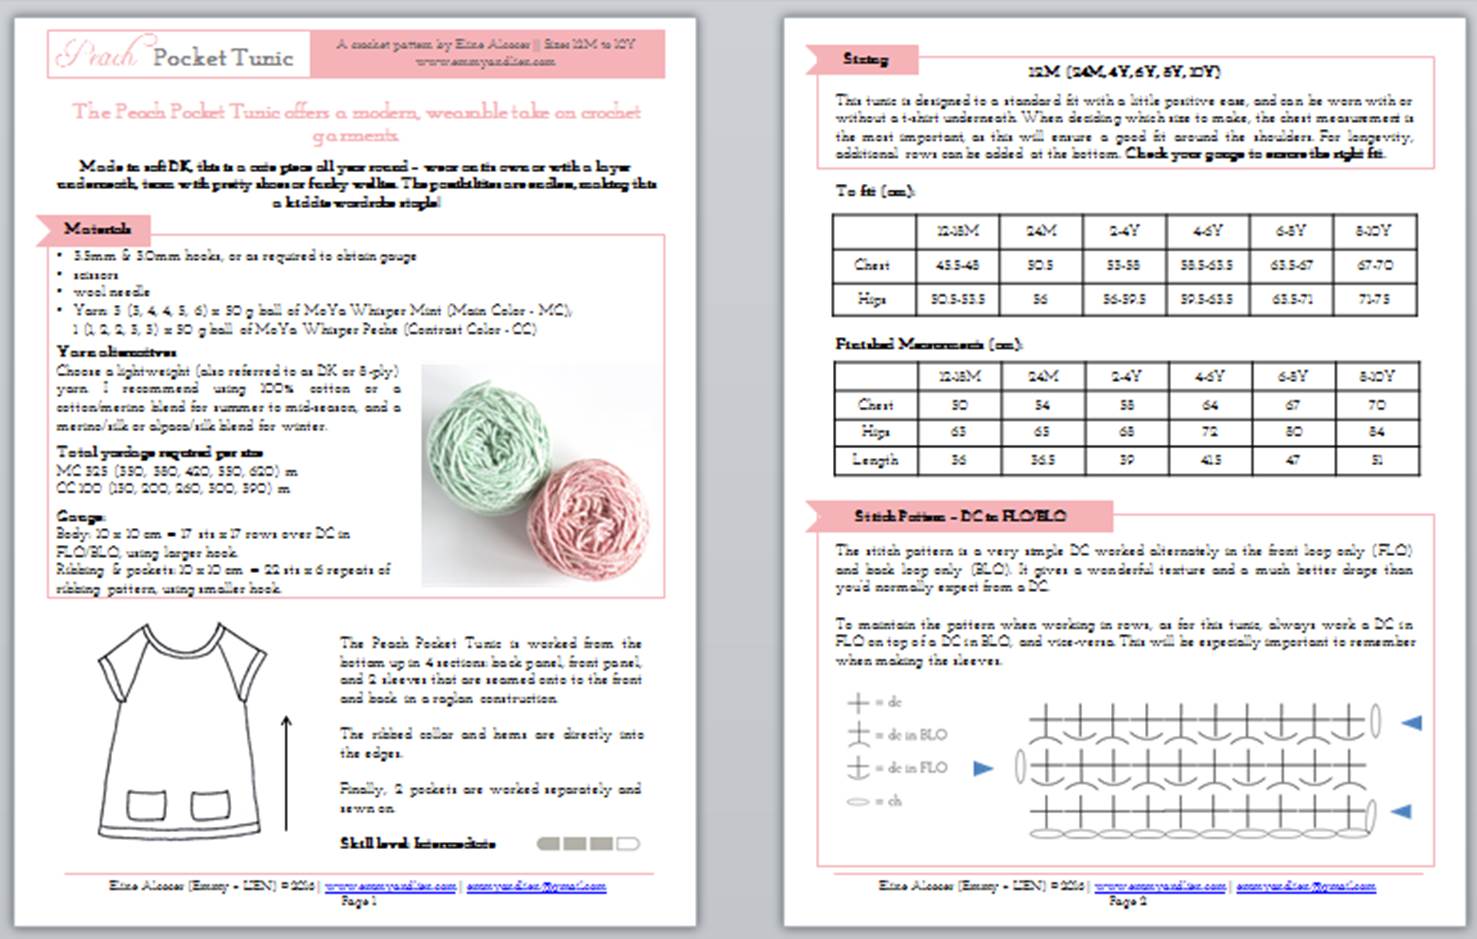
PATTERN: The Peach Pocket Tunic
Made in soft DK, this is a cute piece all year round – wear on its own or with a layer underneath, team with pretty shoes or funky wellies. The possibilities are endless, making this a kiddie wardrobe staple! Available in sizes 12M to 10Y.


It's here!!! Finally, finally I am ready to re-release this pattern. I say re-release, because you might have seen it knocking about on Pinterest for a while. I first published it on my old blog in the spring of 2015, in one size only. I did promise there would be more sizes, so ta-da!
I didn't quite intend for it to take this long, but there has been a very good reason for the delay. I wanted it to be perfect. So really, this is a completely re-worked pattern. I made another sample in the most deliciously soft organic cotton. The instructions are more concise and easier to understand. When I'd finished writing the pattern my editor pored over it for hours and my team of testers did a wonderful job, providing feedback that allowed me to iron out the last kinks. I'm really, really happy with it and I hope you will be too.
You can purchase a copy of this pattern, in either UK or US terms, from my Ravelry store now.

The Peach Pocket Tunic offers a modern, wearable take on crochet garments. Made in soft 8-ply (DK), it’s a cute piece for any time of the year – wear on its own or with a layer underneath, team with pretty shoes or funky wellies. The possibilities are endless, making this a kiddie wardrobe staple!
The pattern is worked from the bottom up in 4 sections: back panel, front panel, and 2 sleeves that are seamed onto to the front and back in a raglan construction. The ribbed collar and hems are worked directly into the edges. Finally, 2 pockets are worked separately and sewn on.
The stitch pattern is a very simple SC worked alternately in the front and back loop. It gives a wonderful texture and a much better drape than you’d normally expect from a SC.
Difficulty level
This pattern is aimed at intermediate crocheters who want to create a well-fitting, more tailored garment. It uses an easy stitch (SC worked in FLO and BLO) and clever shaping techniques. Full written instructions as well as stitch diagrams and schematics are included. If you're more of a beginner crocheter, don't feel intimidated by this pattern - a separate blog post full of tips, photos and tricks is on its way! A step-by-step photo tutorial for the ribbing is available already.
Materials
E/4 (3.5mm) & D/3 (3.0mm) hooks, or as required to obtain gauge
scissors
wool needle
yarn: 3 (3, 4, 4, 5, 5) x 50 g ball of MoYa Whisper Mint (Main Color - MC); 1 (1, 2, 2, 3, 3) x 50 g ball of MoYa Whisper Peche (Contrast Color - CC)
Yardage
MC 325 (350, 380, 420, 550, 620) m / MC 355 (385, 420, 460, 605, 680) yds
CC 100 (130, 200, 260, 300, 390) m/ CC 110 (145, 220, 285, 330, 430) yds
Yarn alternatives
Choose a lightweight (also referred to as DK or 8-ply) yarn. I recommend using 100% cotton or a cotton/merino blend for summer to mid-season, and a merino/silk or alpaca/silk blend for winter.
Sizing
12-18M (24M, 2-4Y, 4-6Y, 6-8Y, 8-10Y)
Tension
Body: 10 x 10 cm = 17 sts x 17 rows over DC in FLO/BLO, using larger hook.
Ribbing & pockets: 10 x 10 cm = 22 sts x 6 repeats of ribbing pattern, using smaller hook.
Stitches + Skills
Basic crochet stitches, crochet ribbing, decreasing, short row shaping, basic sewing skills
You can purchase the PDF download in US and UK terms from my Ravelry store now.
€4.50 (plus VAT if applicable)
Until Friday 21 October 2016, I'm offering a 20% discount - just enter code PEACH20 at checkout. Or, for extra crochet kiddie goodness, you can purchase this pattern as a bundle with the Sea Breeze Hoodie for €7.00. Add both patterns to your basket and the price will automatically be updated. Also valid until Friday 21 October!

I'm linking up this post with Moogly Blog and Petals to Picots