
Nikkim Milo
My boys were spoiled this summer by the lovely Petra at Fru Valborg: she sent us some soft, handdyed Vinnis Colours Nikkim to try. I just needed to whizz it up into a couple of tops, oh the hardship.
This summer the lovely Petra from Fru Valborg asked if I wanted to try some new cotton she'd be stocking in her webshop. Would I?! To justify yet more yarn parcels arriving when I'm not exactly small of stash, I asked whether she might be happy to provide enough for a couple of tops for the boys {altruism on my part, and all that}. She was, and this arrived:

Vinnis Colours Nikkim, a handdyed, hand-balled cotton produced by a fair trade, women's cooperative in South Africa. I've worked with this yarn before for a commission, and it's truly lovely. The colours are vibrant and enticing, while the cotton itself is much softer than you'd expect. Petra stocks lots of colours, and ships worldwide if you fancy giving it a try.
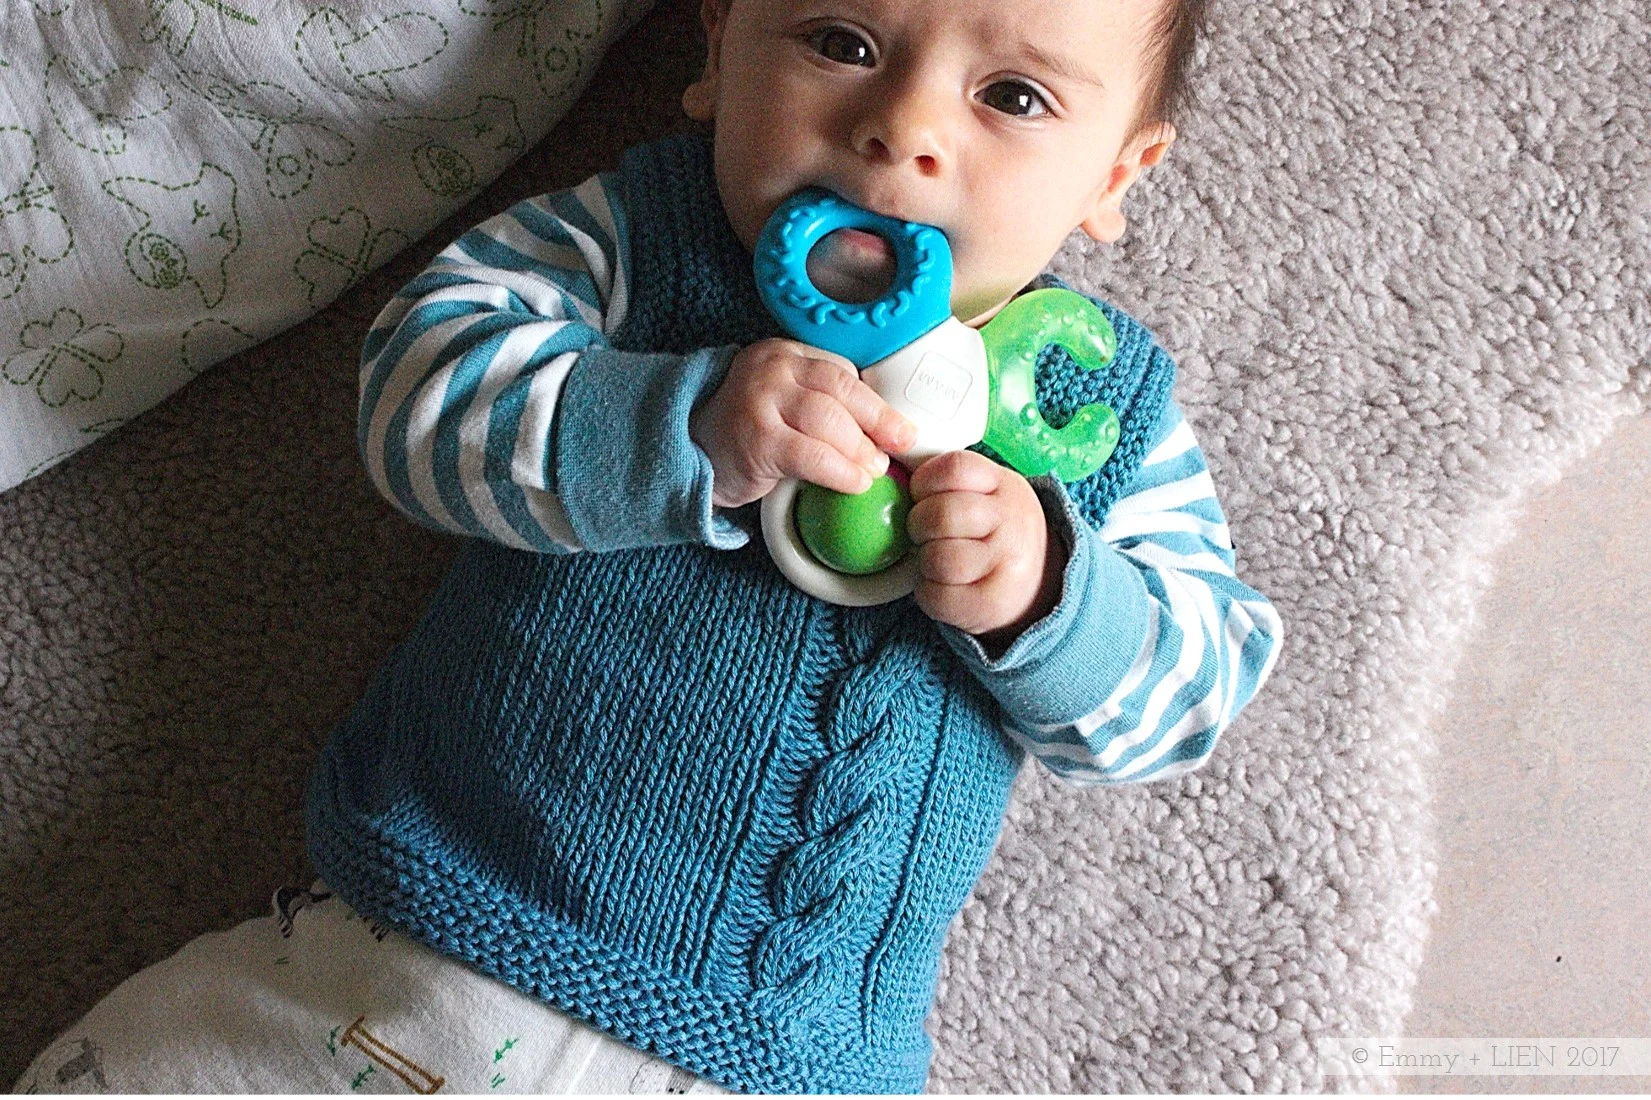
I decided to make another Sea Breeze Hoodie for the Bean in the "brick red" (because everything must be red at the moment) and "camel". Initially I had planned to make a mini Sea Breeze for the smallest boy in the "pacific blue" and "sand" shades for a bit of sibling non-matching matching, but my severe allergy to Making the Same Thing Twice put paid to that.
I reached for a knitting pattern I had in my Ravelry Library but bollicksed up the first time: Milo by Georgie Hallam. I think it was the second thing I ever knit and as I don't fail gracefully, a second attempt seemed like a good idea. Luckily it went much better this time. It's a delight of a pattern, one I'd recommend to anyone with little people to knit for. The raglan increases are clever, the garter stitch is appropriately smooshy, the cables add interest. Best of all, there being no sleeves means it works up really fast.

I had the whole thing done in about a week. The small boy looks so snazzy in it, in my completely biased opinion, that I might even be tempted to make him another in wool now the weather is beginning to turn. With a different cable, mind (the pattern provides no less than six).

Disclosure: I was sent Nikkim yarn to try, free of charge. All images, words and opinions are my own.

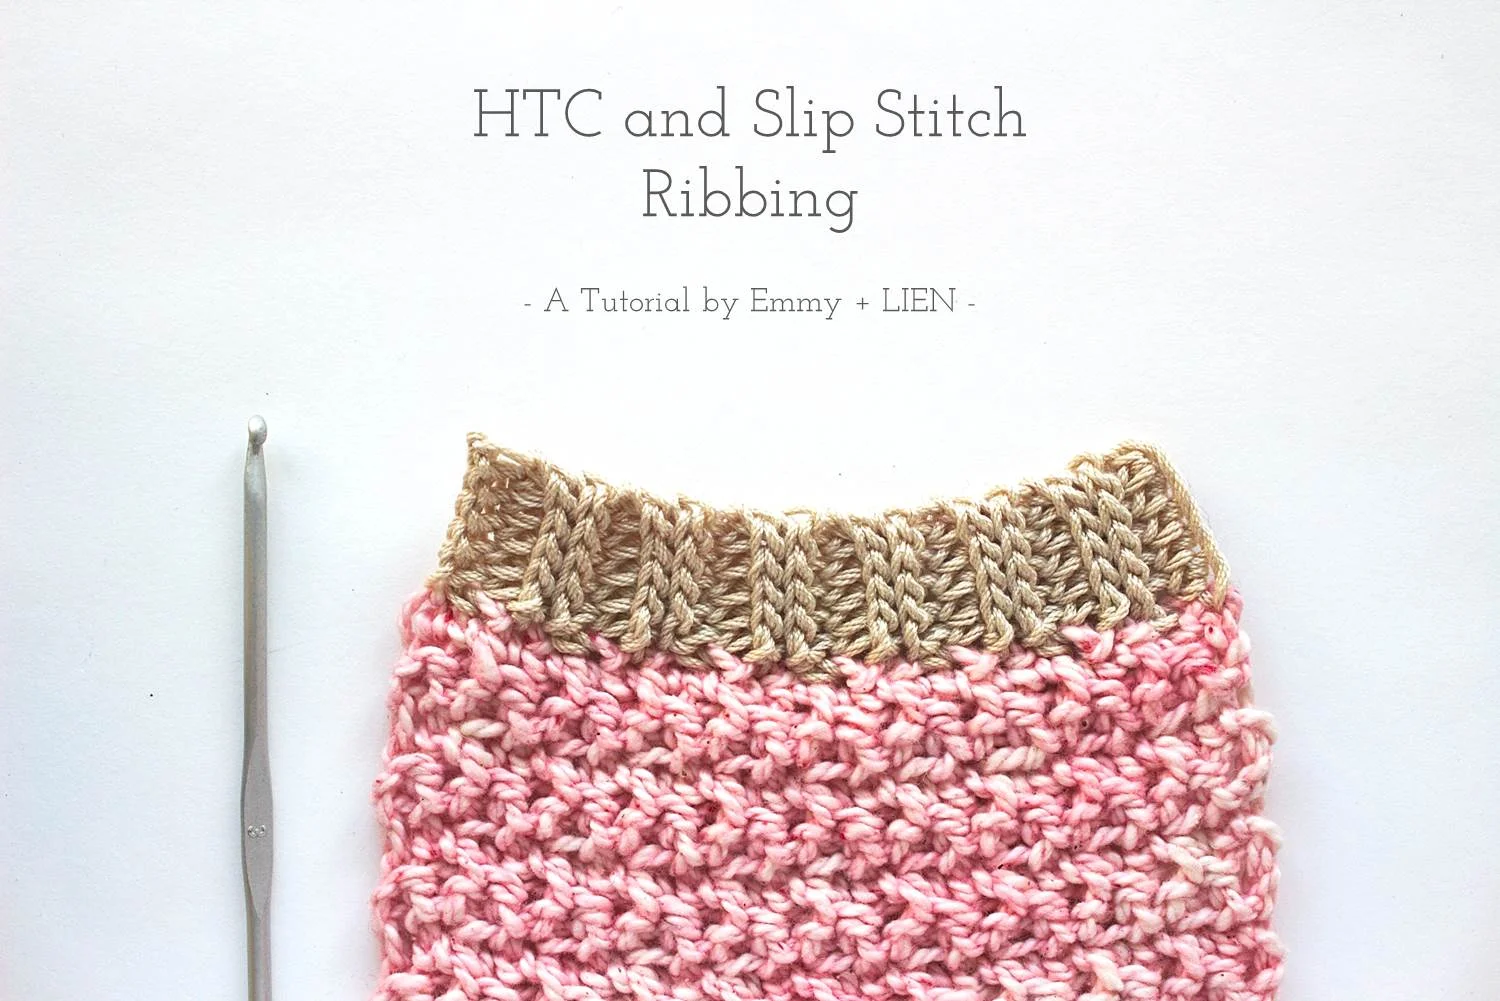
TUTORIAL: Crochet Ribbing pt. One | HTC and slip stitch
In the first part of this series on crochet ribbing, I will show you how to create a tight rib using a combination of HTC (HDC for you US folks) and slip stitches worked in the back loop.

When I think about what sets apart my successful crochet projects from the not-so-successful ones (or the absolute disasters, because we all have those), I can come up with a few reasons:
- Wrong yarn - wrong weight, or wrong type of fibre
- Wrong fit (for garments) - everyone has a different body shape, of course, and knowing enough about what suits you - tailored or boxy? Long or short? - is very important to the ultimate success of a garment. More about that in a later post!
- Poor finishing - ends not securely sewn in, ugly seaming or wrong/lack of ribbing/edging
It’s this last one that I want to focus on today, because a poor finish can really ruin an otherwise well-executed project. It’s the boring bit at the end, I know, but it does make a difference. Ribbing especially can have a huge impact on to whether a garment fits properly, and how well it lasts with frequent wear.
There are several ways of working crochet ribbing, each with their own characteristics - super-stretchy, or nice and neat, or just easy to do. In the first part of this series on crochet ribbing, I want to show you how to create a tight rib using a combination of HTC (HDC for you US folks) and slip stitches worked in the back loop.
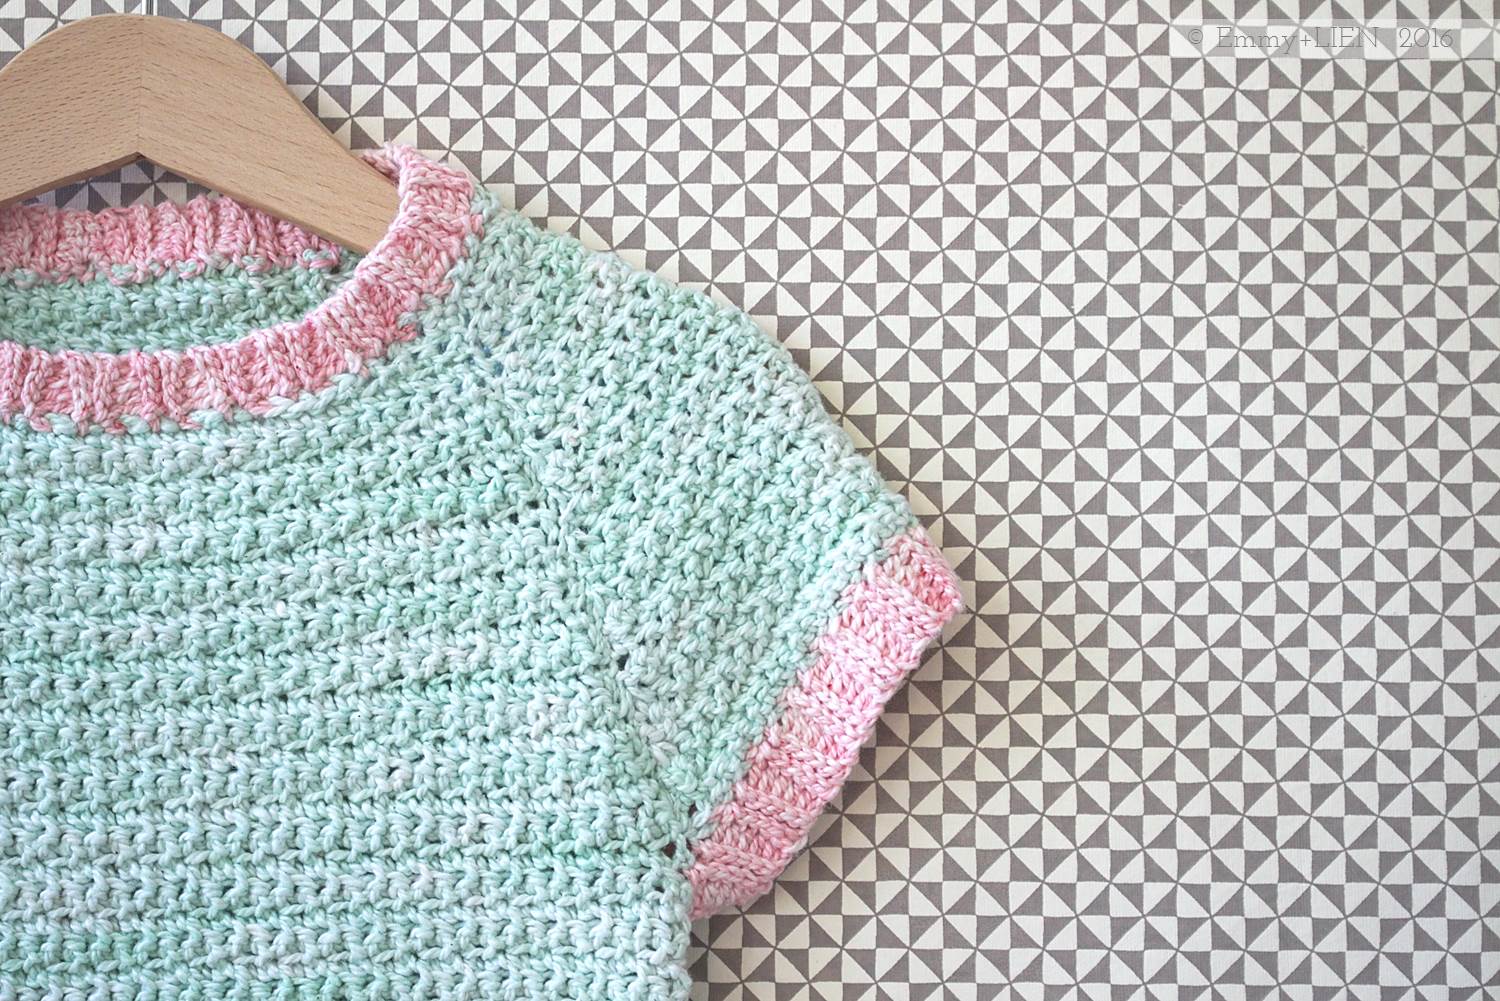
This ribbing is worked directly into the selvedge edge of a garment and gives a very neat finish that draws in the fabric underneath. I’ve used in quite a few of my garment designs so far, including the Peach Pocket Tunic (pictured below), the Sea Breeze Hoodie and the Hanabira cardigan.
HTC and slip stitch ribbing
Use it for:
Areas that need to sit snugly on the body with only a little stretch, such as necklines, sleeves edges and hems.
Avoid it when:
You need a very stretchy or flexible edge, such as on hat brims or sock cuffs.
Make it your own:
- Experiment with different hook sizes - a small hook for a very tight and stiff rib, a larger hook for something with more give.
- Increase or decrease the number of repeats - as this ribbing is worked directly into a selvedge edge, you can work more repeats for a straight, looser finish, or fewer to give you a more drawn-in effect (see further notes in step-by-step instructions below).
Materials
3.0mm crochet hook
Yarn: this rib works with any yarn weight or type. The type of fibre in particular influences the look and feel of the rib. For example, linen, cotton and non-superwash wool will be neat and stiff, while a superwash wool or alpaca will have more flexibility.
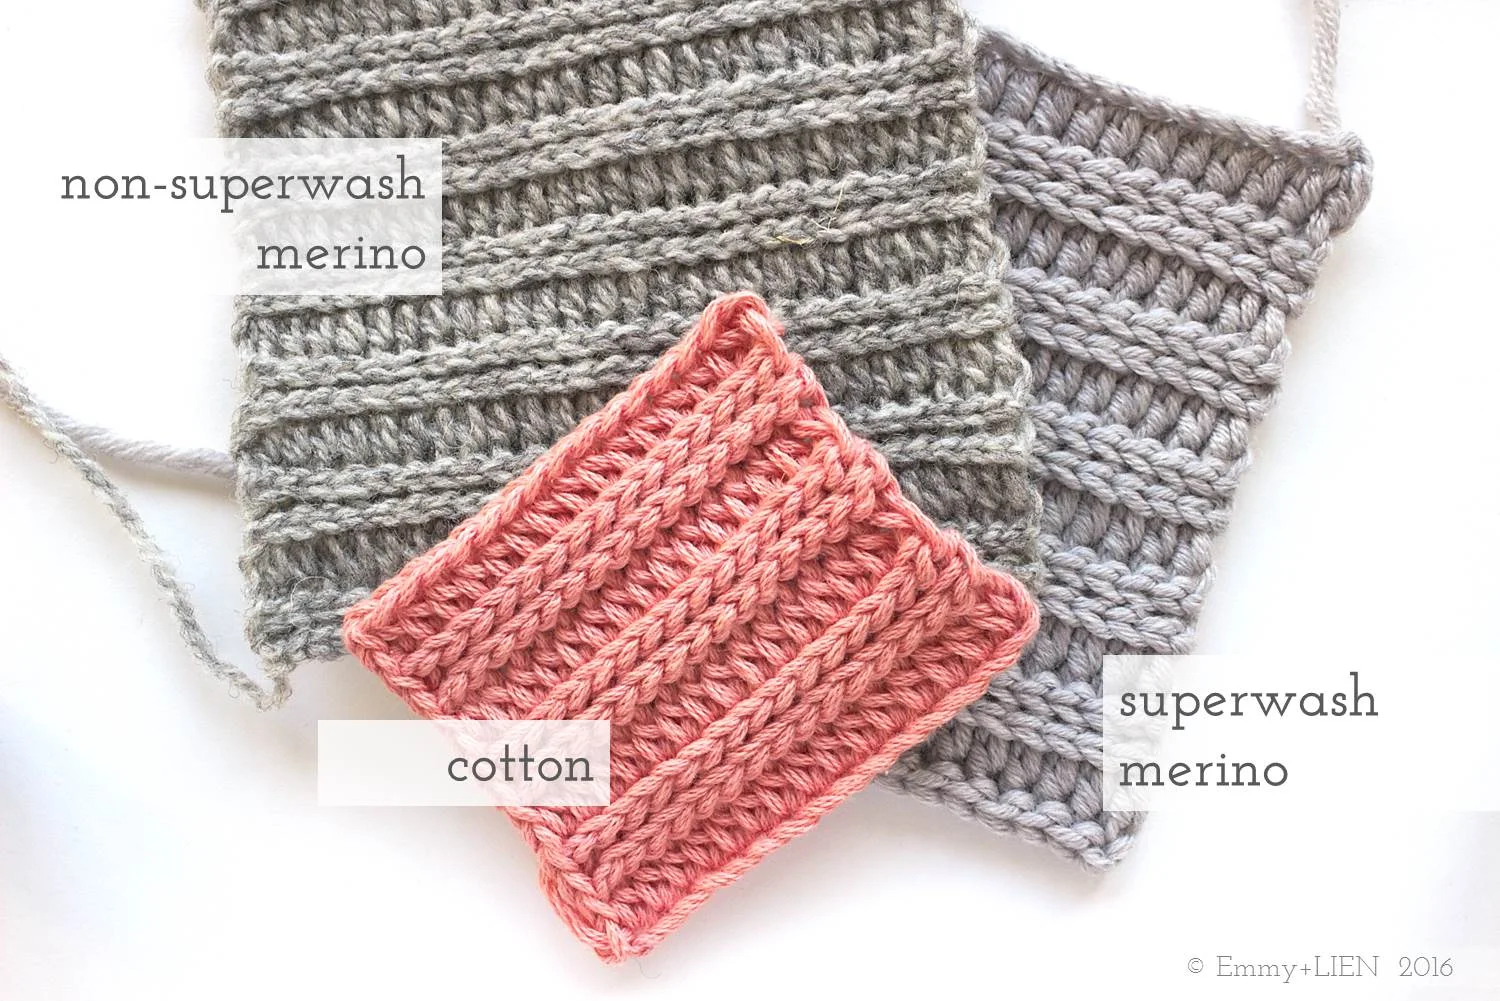
For this tutorial, I’ve used a cotton yarn in DK weight with a small hook to get a tight rib.
Difficulty Level
Confident Beginner
Stitches + Abbreviations
BLO - back loop only
Ch - chain
HTC - half treble crochet
RS - right side
Sl st - slip stitch
Slst2tog - slip stitch 2 together:insert hook, YO and pull up a loop, insert hook into next st, YO and pull through work and two loops on your hook (see step-by-step photos below)
Note this tutorial uses UK crochet terms
Instructions
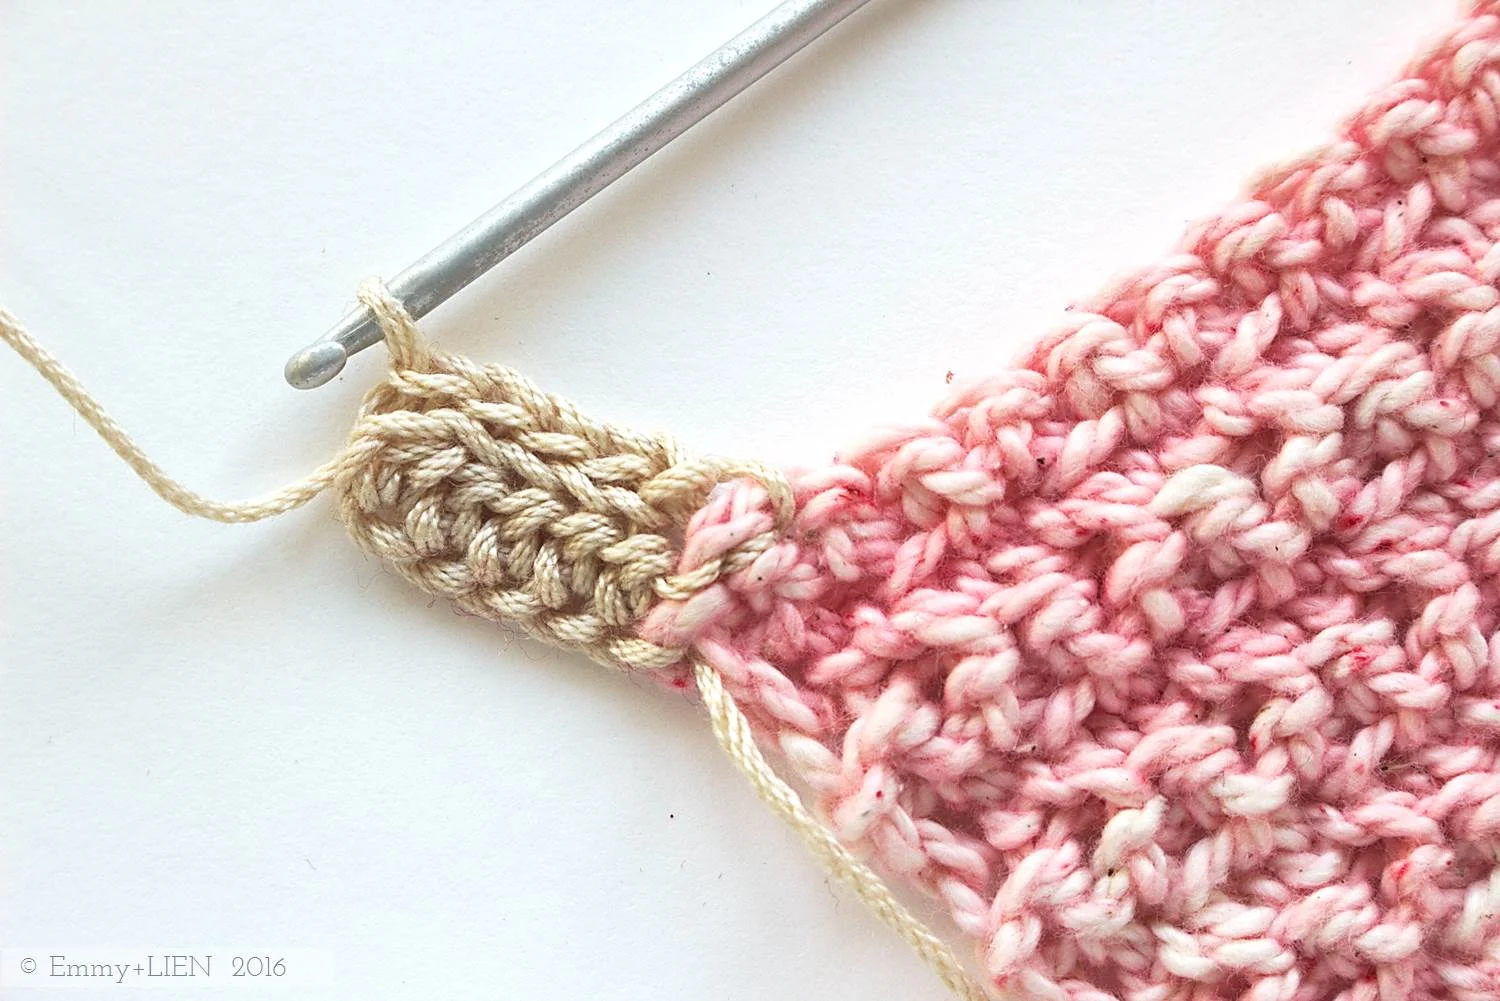
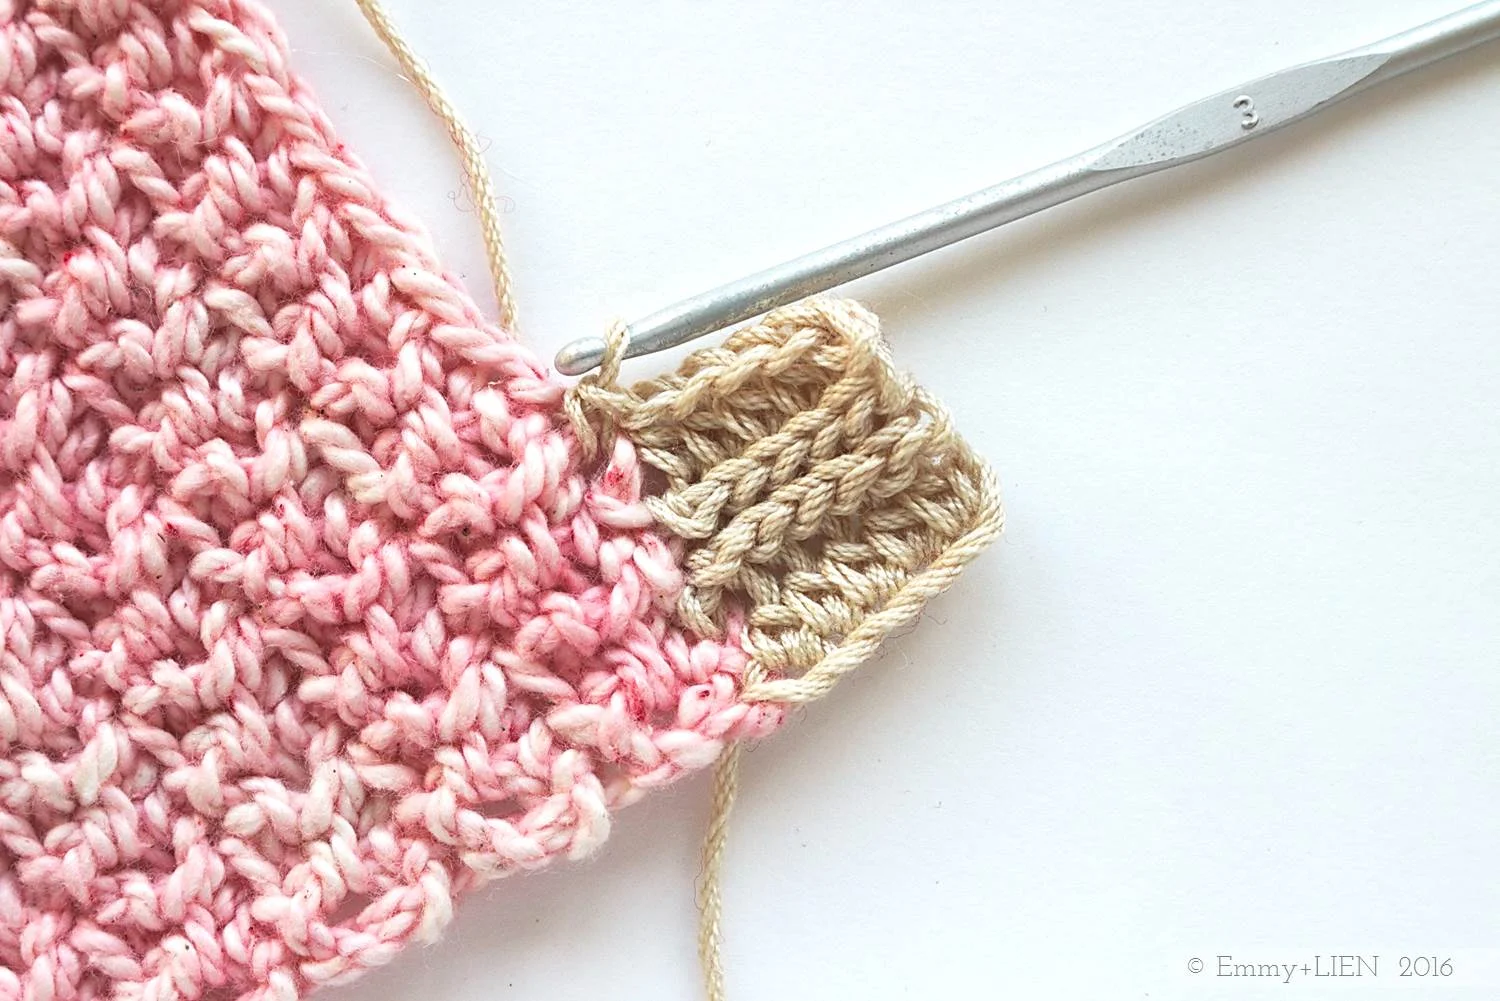
With RS facing, pull yarn through first stitch on edge and ch 6. Turn.
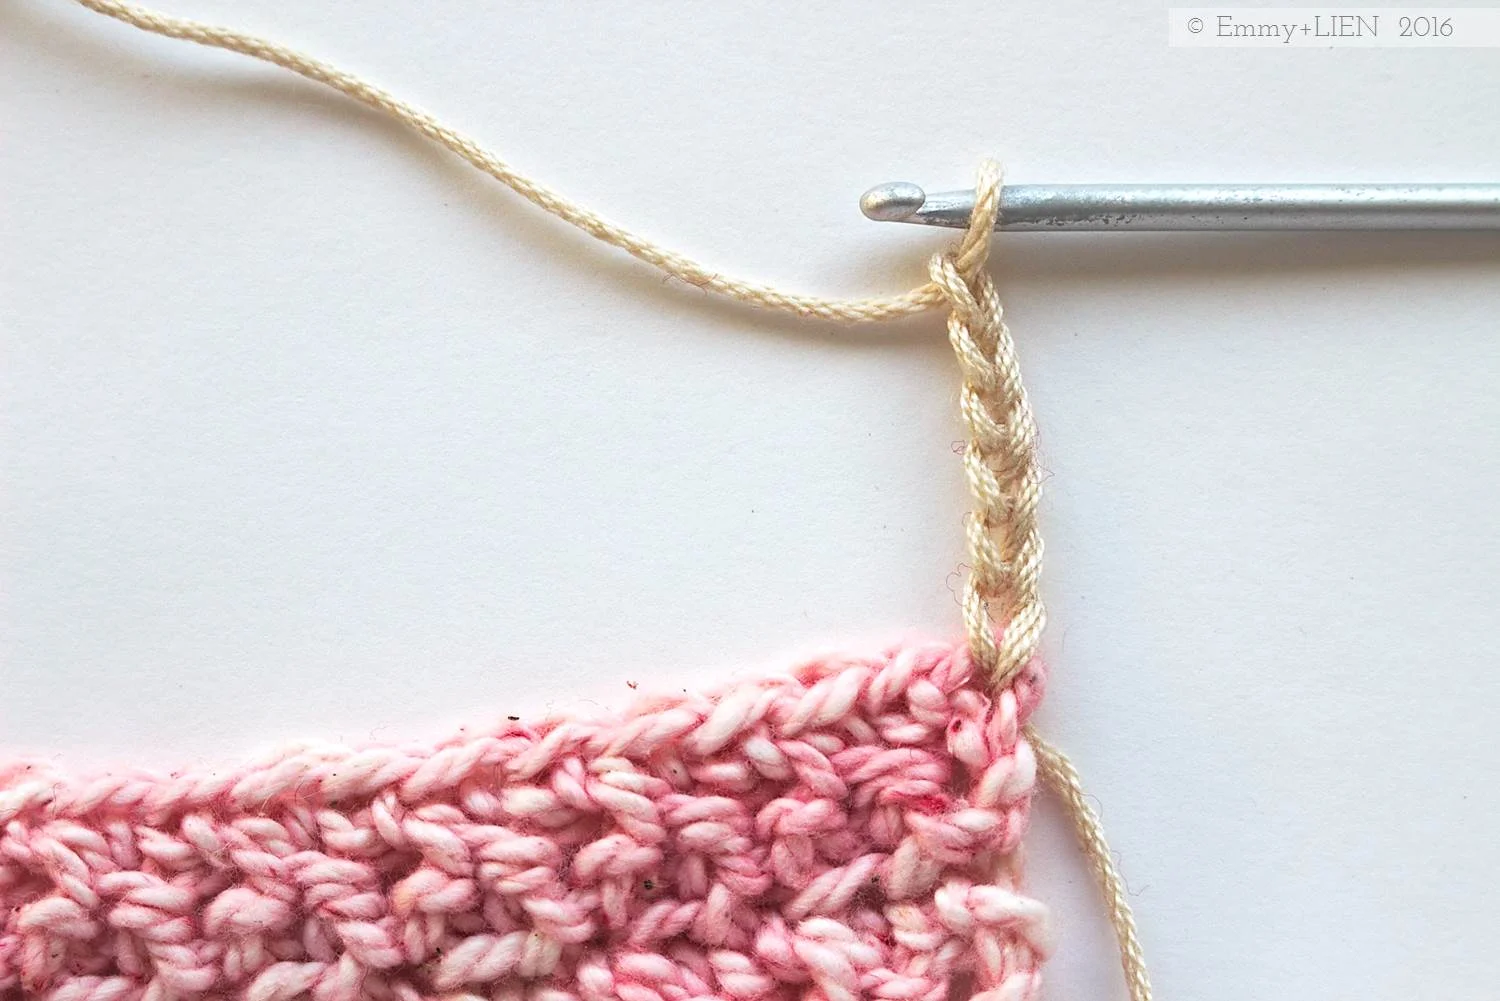
R1: Starting in 2nd chain from hook, HTC 1 to end. 5 sts.
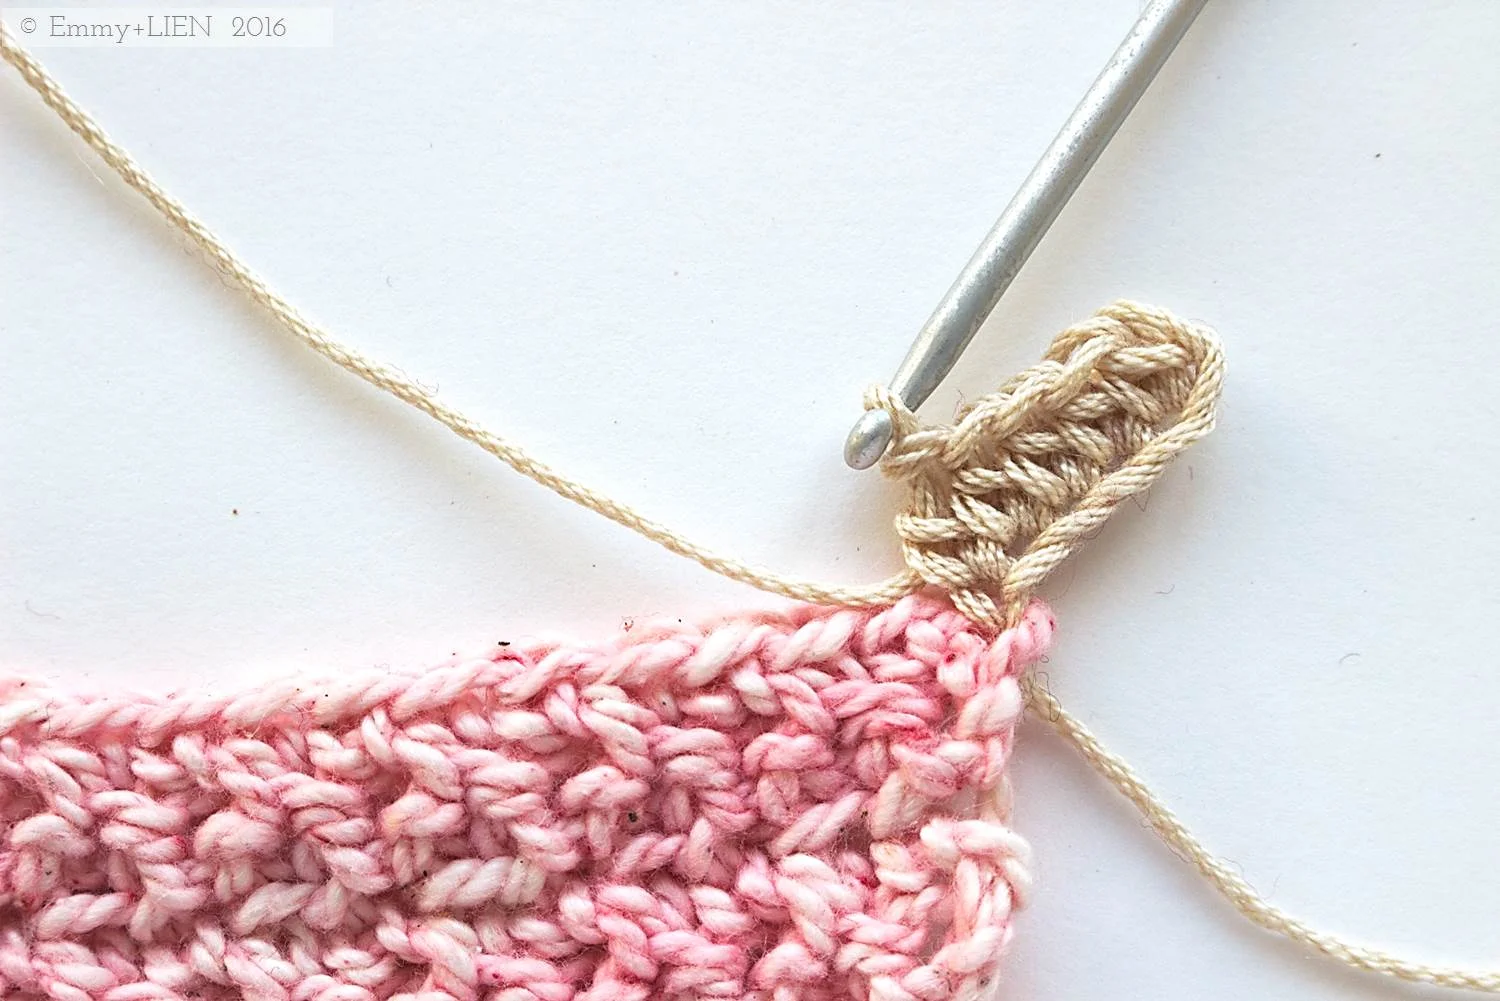
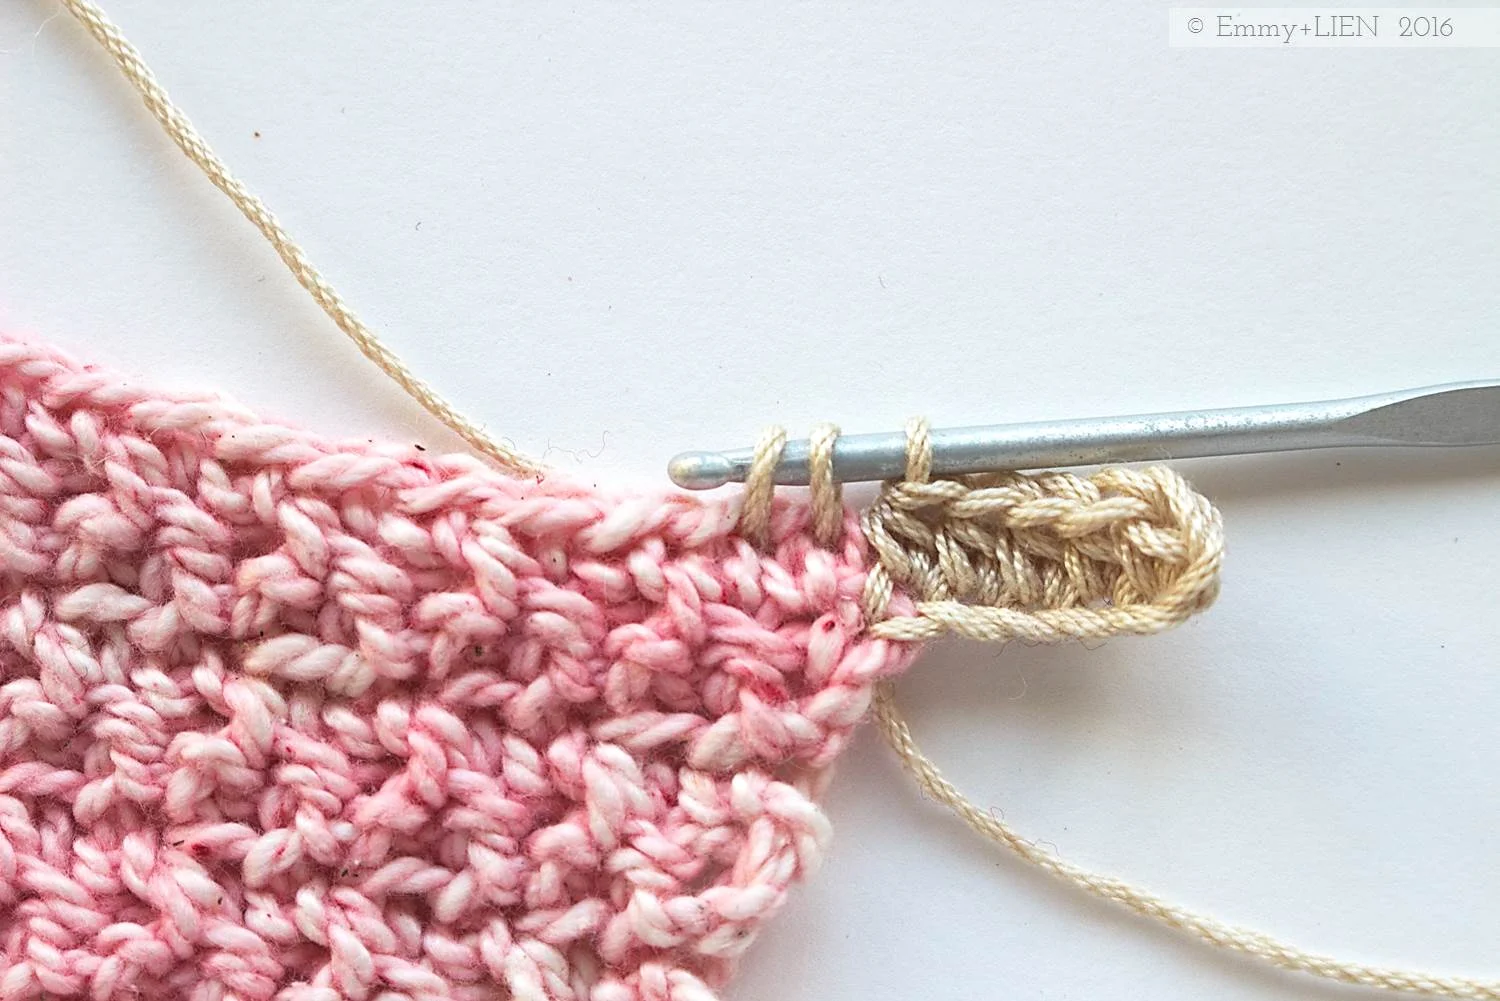
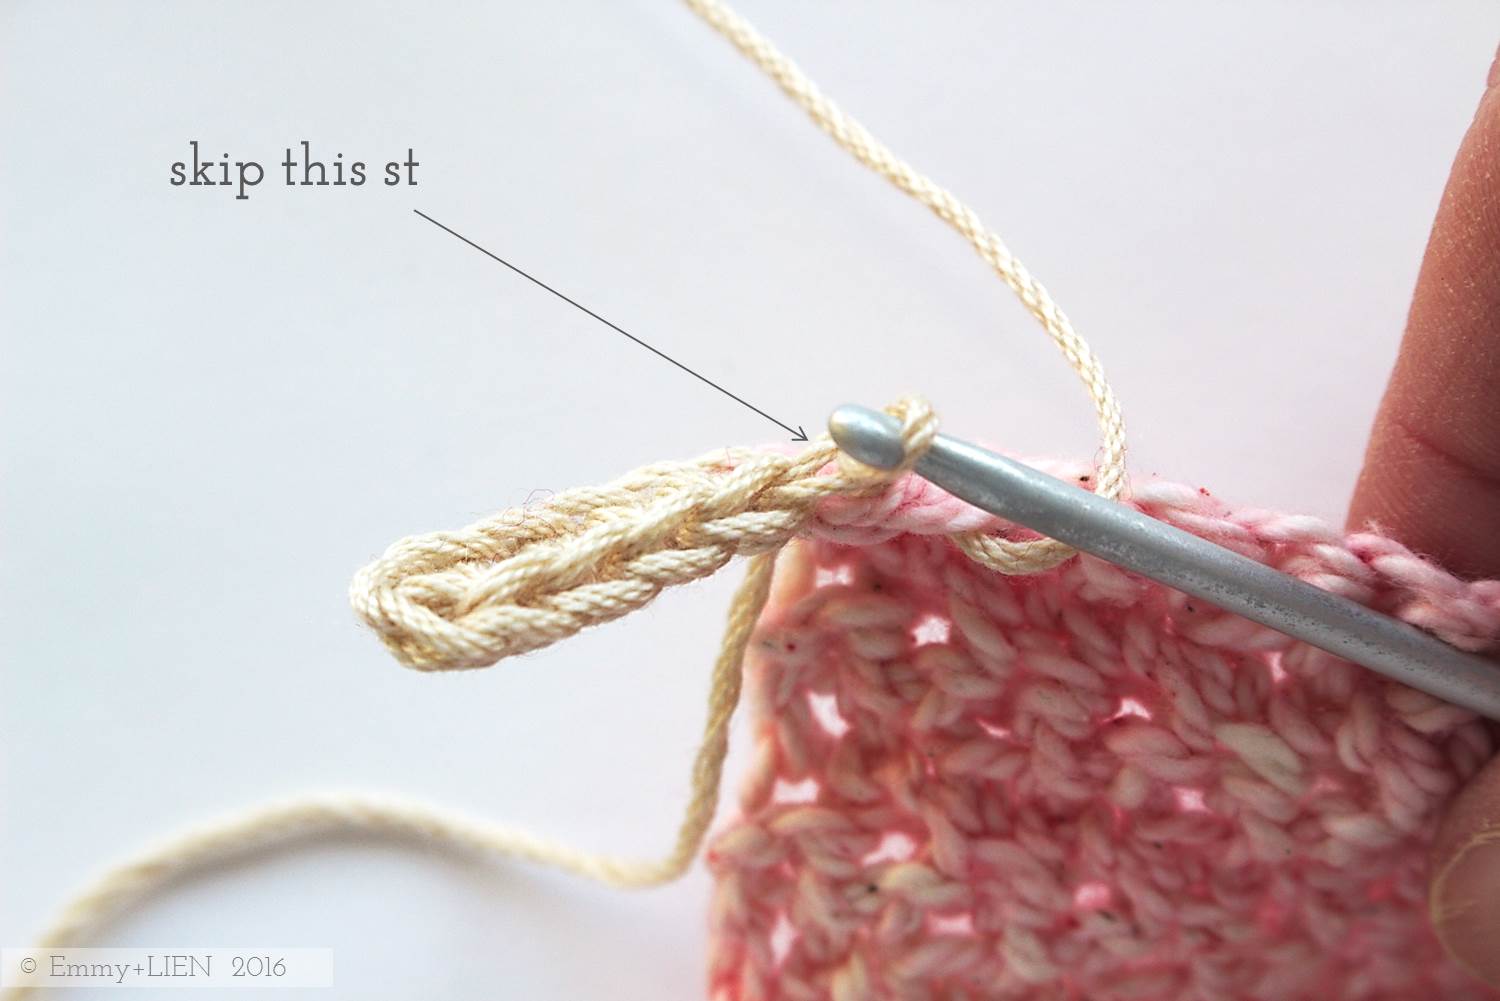
To attach the ribbing to the body of the garment, slst2tog the next 2 sts: insert hook, YO and pull up a loop, insert hook into next st, YO and pull through work and two loops on your hook. To adjust the tightness of the ribbing, you can either skip a stitch before working the sl2tog (= tighter), or you can just work a single sl st (= looser).
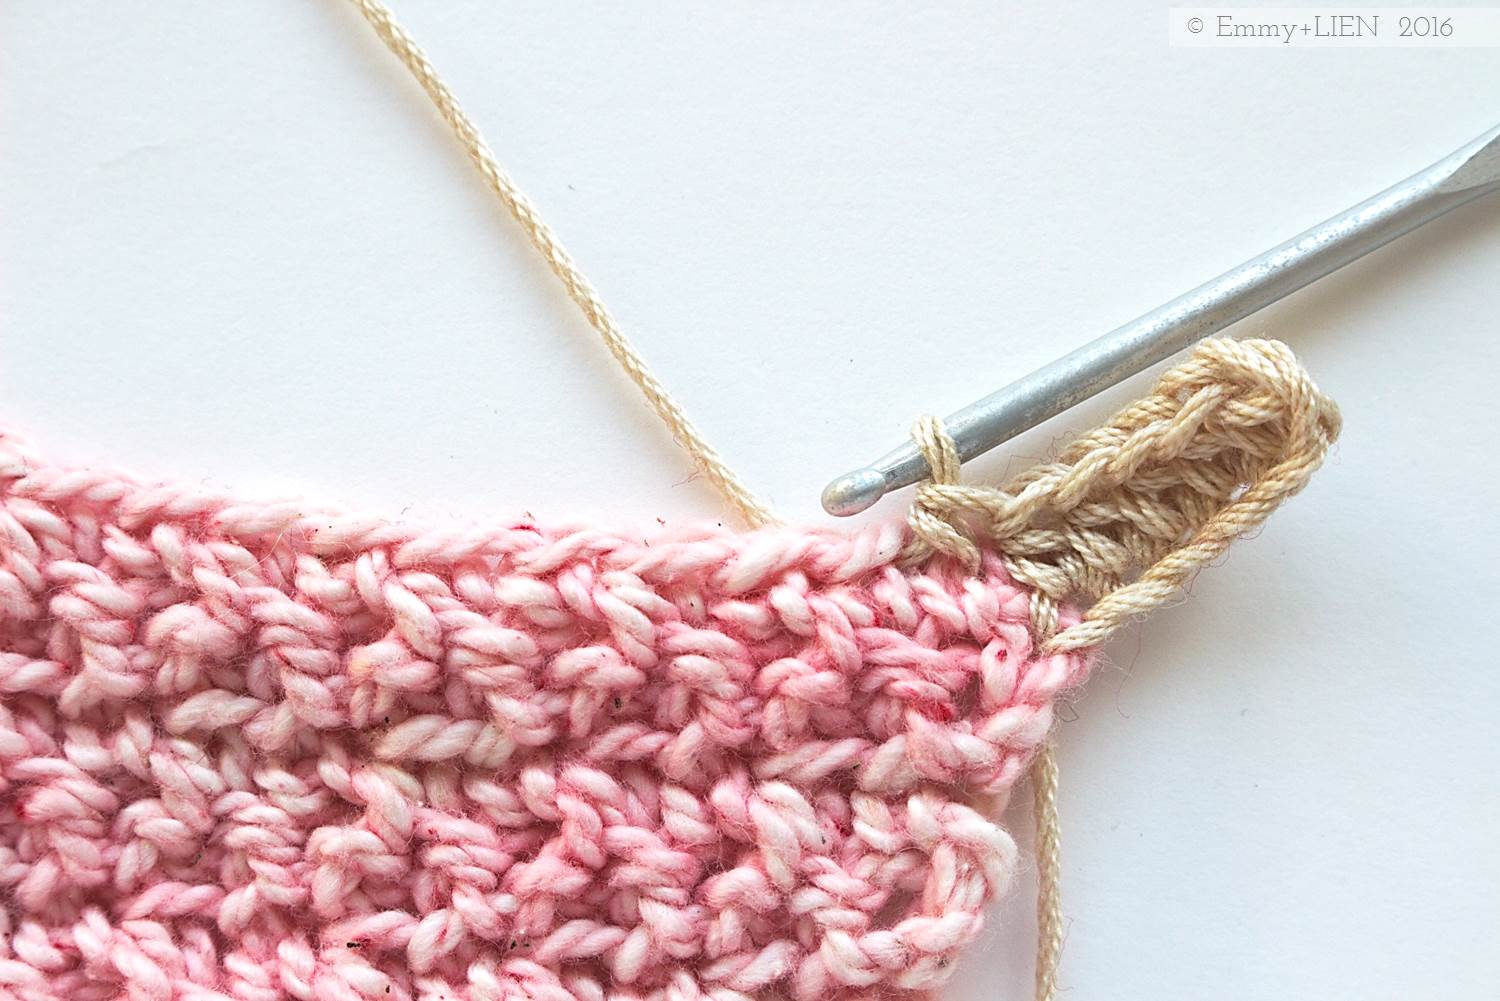
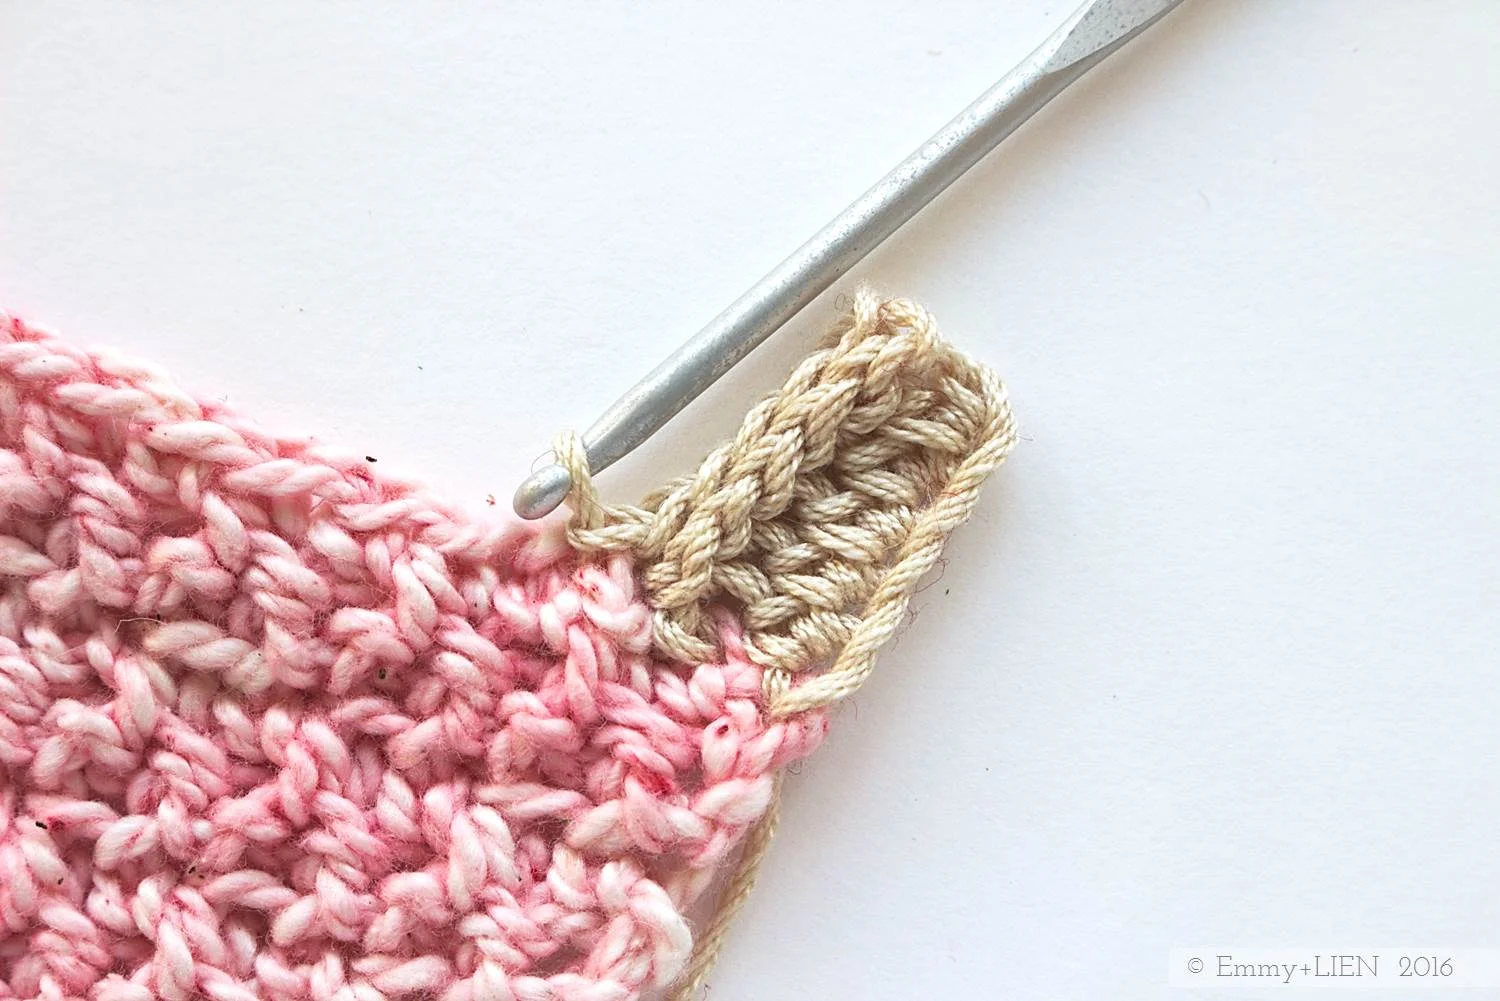
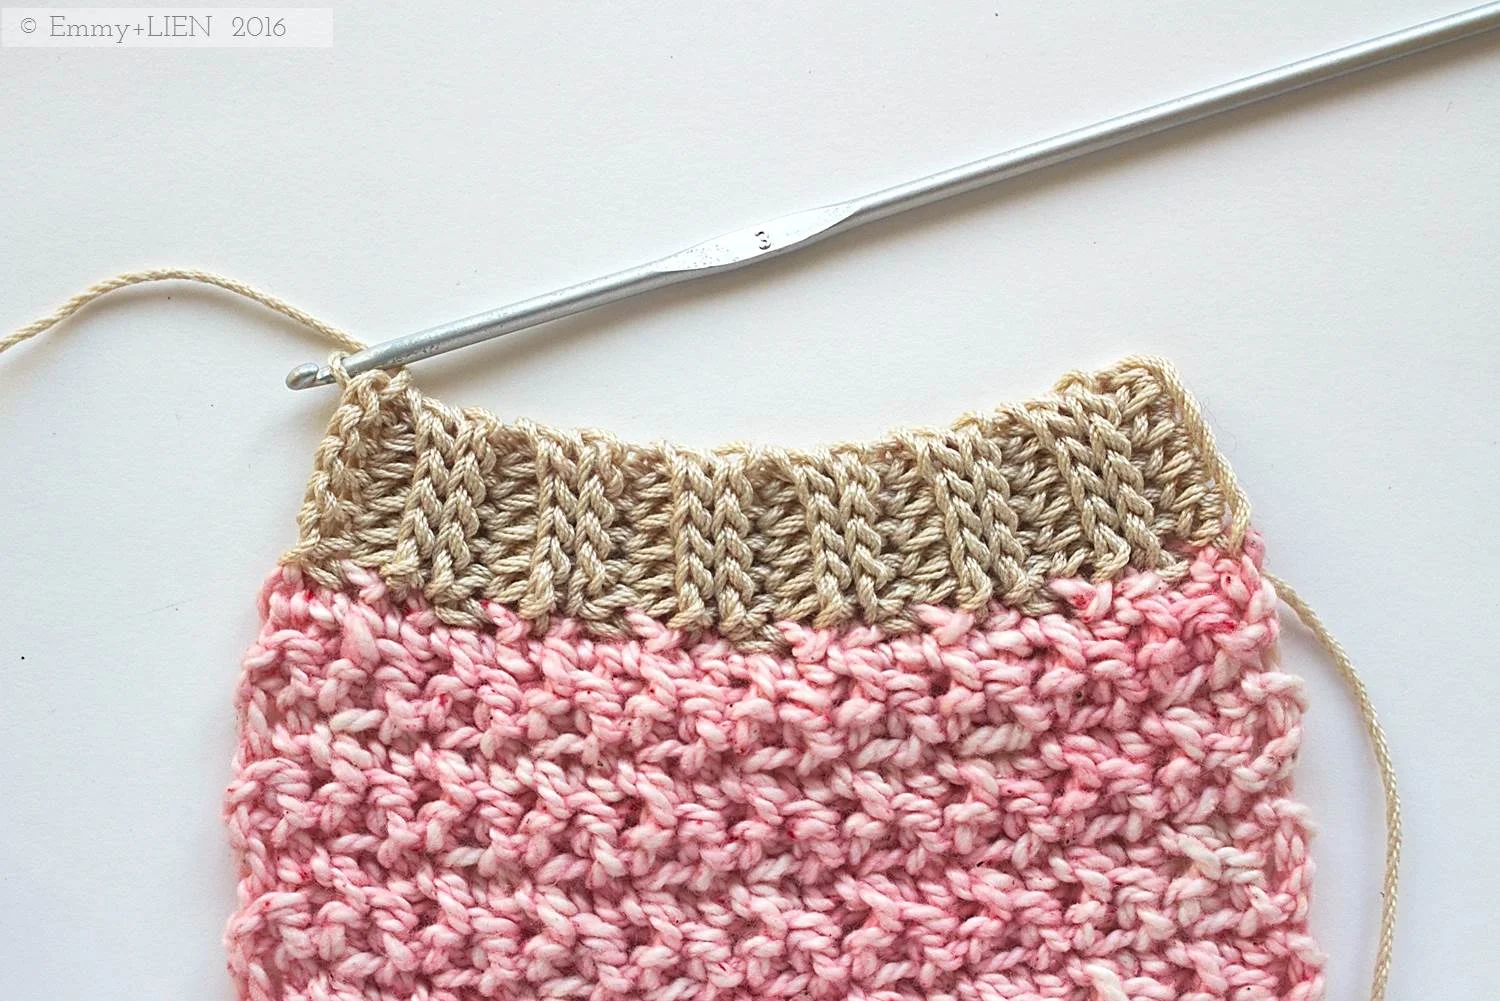
R2: Do not ch 1, skip 1, sl st 1 in BLO to end.
R3: Ch 1, skip 1, sl st 1 in BLO to end. Attach to hem with a sl st.
R4: Repeat R2.
R5: Ch 1, HTC 1 in BLO to end. Attach to hem with slst2og.
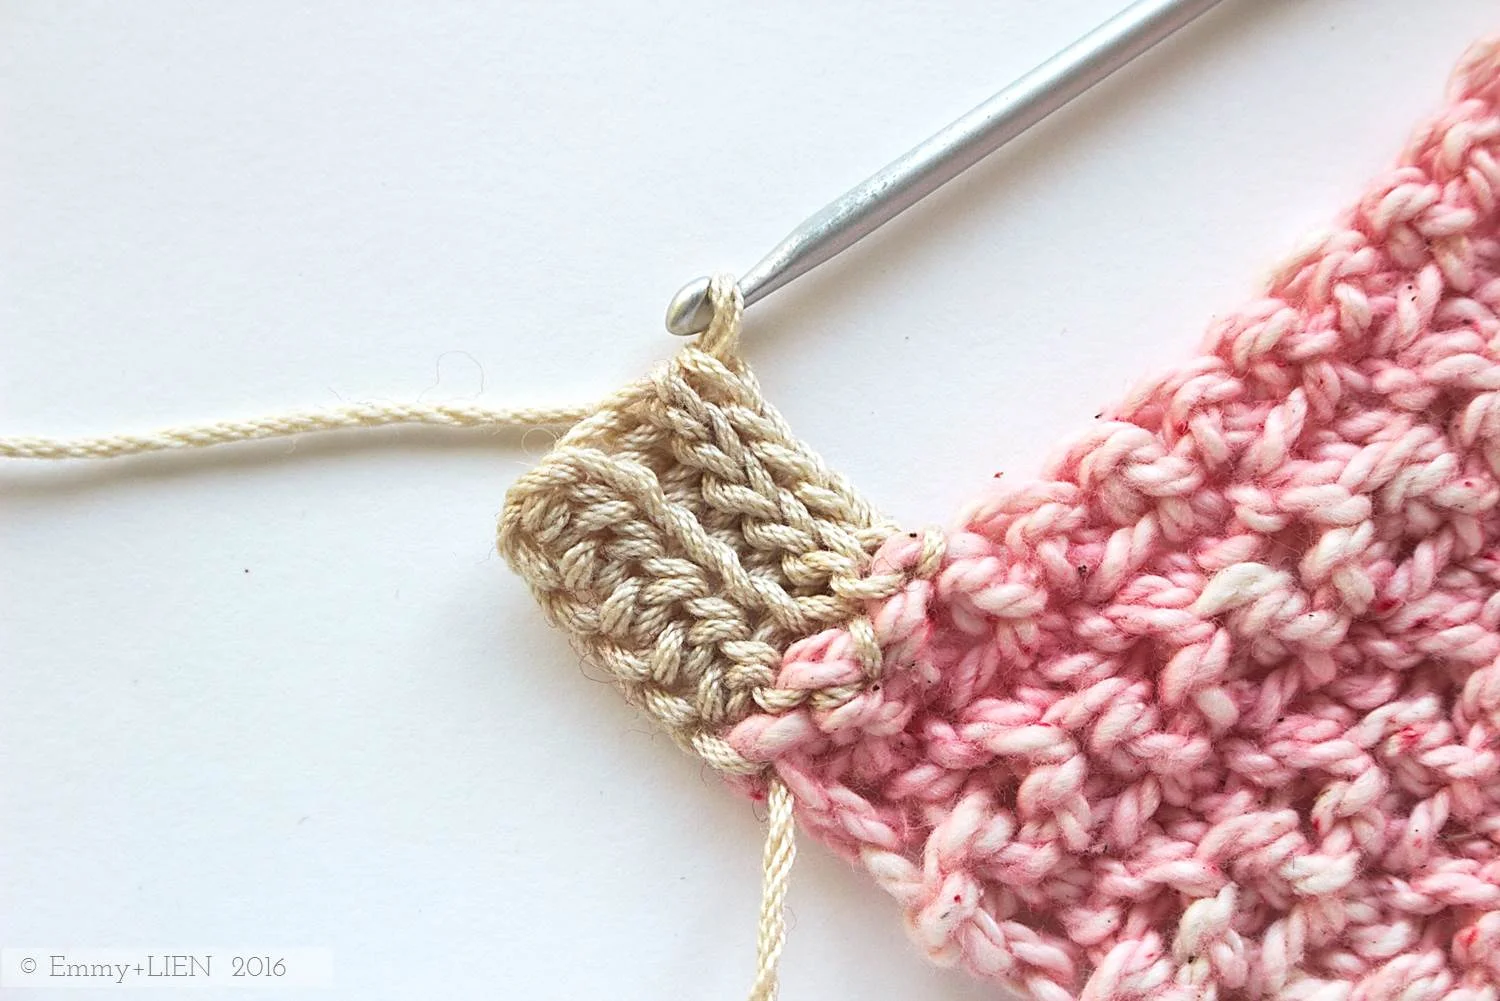
Repeat R2-R5 to end.
Copyright notice:
You may not reproduce, either partially or in full, any of the photos or the text contained in this tutorial without obtaining written permission from me first.
Thank you and happy crocheting!

PATTERN: The Sea Breeze Hoodie
The Sea Breeze Hoodie is the perfect summer to midseason layer for boys and girls ´lucky` enough to live in windier climes. Using a soft, medium-weight cotton, this unisex piece is quick to make and easy to wear. Pattern comes in US or UK terms.


When it became apparent we'd be moving from Italy to Sweden, my immediate thought was: we'll freeze! Don't get me wrong, as a pale-skinned redhead I wasn't sorry to say goodbye to months of humidity and heat (we lived in a smoggy city, not by a beautiful lake or beach!). It was, nevertheless, clear that we would need a little wardrobe adjusting. Out with the flimsy dresses and tiny tanks, in with sensible windproofs. Because, oh my, is it windy here. Even on a lovely, sunny summer's day it can howl straight through you. Windproof jacket, warm and practical layer underneath. The Sea Breeze Hoodie, the perfect summer staple on Scandi shores.
Does practical exclude fun and frivolous? Certainly not: mismatched buttons and bright yellow sleeves. Soft, soft organic cotton. A quick and easy construction with minimal shaping, and there you go. The perfect summer to midseason layer for boys and girls aged 12 months to 10 years and ´lucky` enough to live in windier climes.
You can purchase the PDF download in US and UK terms from my Ravelry store now.

The Sea Breeze Hoodie is worked in three panels from the bottom up: one for the back and two for the front, which are then seamed together. Both the hood and the ribbed sleeves are worked seamlessly into the selvedge edges. Finally, the piece can be finished with either buttons or a zip – this pattern includes instructions for both.

Difficulty level
This pattern uses an easy stitch pattern (linen stitch) and simple shaping, making it perfect for confident beginners who want to venture into garment-making. The pattern comes with full written instructions as well as stitch diagrams and schematics. A step-by-step photo tutorial for the ribbing is available here.
Materials
4mm and 3.5mm crochet hook (US size G/6 and E/4), or as required to meet gauge
scissors
wool needle
buttons or zip
yarn: 3 (3, 4, 4, 5, 6) x 50 g skein of Pickles Thin Organic Cotton in Sea Water 06 (MC); 1 (1, 1, 1, 1, 1) x 50 g skein of Pickles Thin Organic Cotton in Sun 21 (CC)
Yardage
MC 190 (250, 300, 350, 420, 580) m / MC 210 (275, 330, 385, 460, 635) yds
CC 90 (90, 90, 90, 90, 90) m / CC 100 (100, 100, 100, 100, 100) yds
Yarn alternatives
Choose a light to medium-weight yarn (DK to worsted, or 8 to 10-ply) with a soft handle and a recommended hook size of E/4 to 7 (4.0mm to 4.5mm). I recommend using 100% cotton or a cotton/merino blend, as these feel non-prickly against the skin.
Sizing
12M (24M, 2-4Y, 4-6Y, 6-8Y, 8-10Y)
Tension
a 10x10 cm (4" x 4") swatch should consist of 15 rows of 16 stitches, using larger hook.
Stitches + Skills
Basic crochet stitches, basic shaping, short row shaping (explained with diagram), basic sewing skills
You can purchase the PDF download in US and UK terms from my Ravelry store now.
€4.50 (plus VAT if applicable)

I'm linking up this post with Moogly Blog and Petals to Picots