TUTORIAL: Woven Shell Crochet Stitch
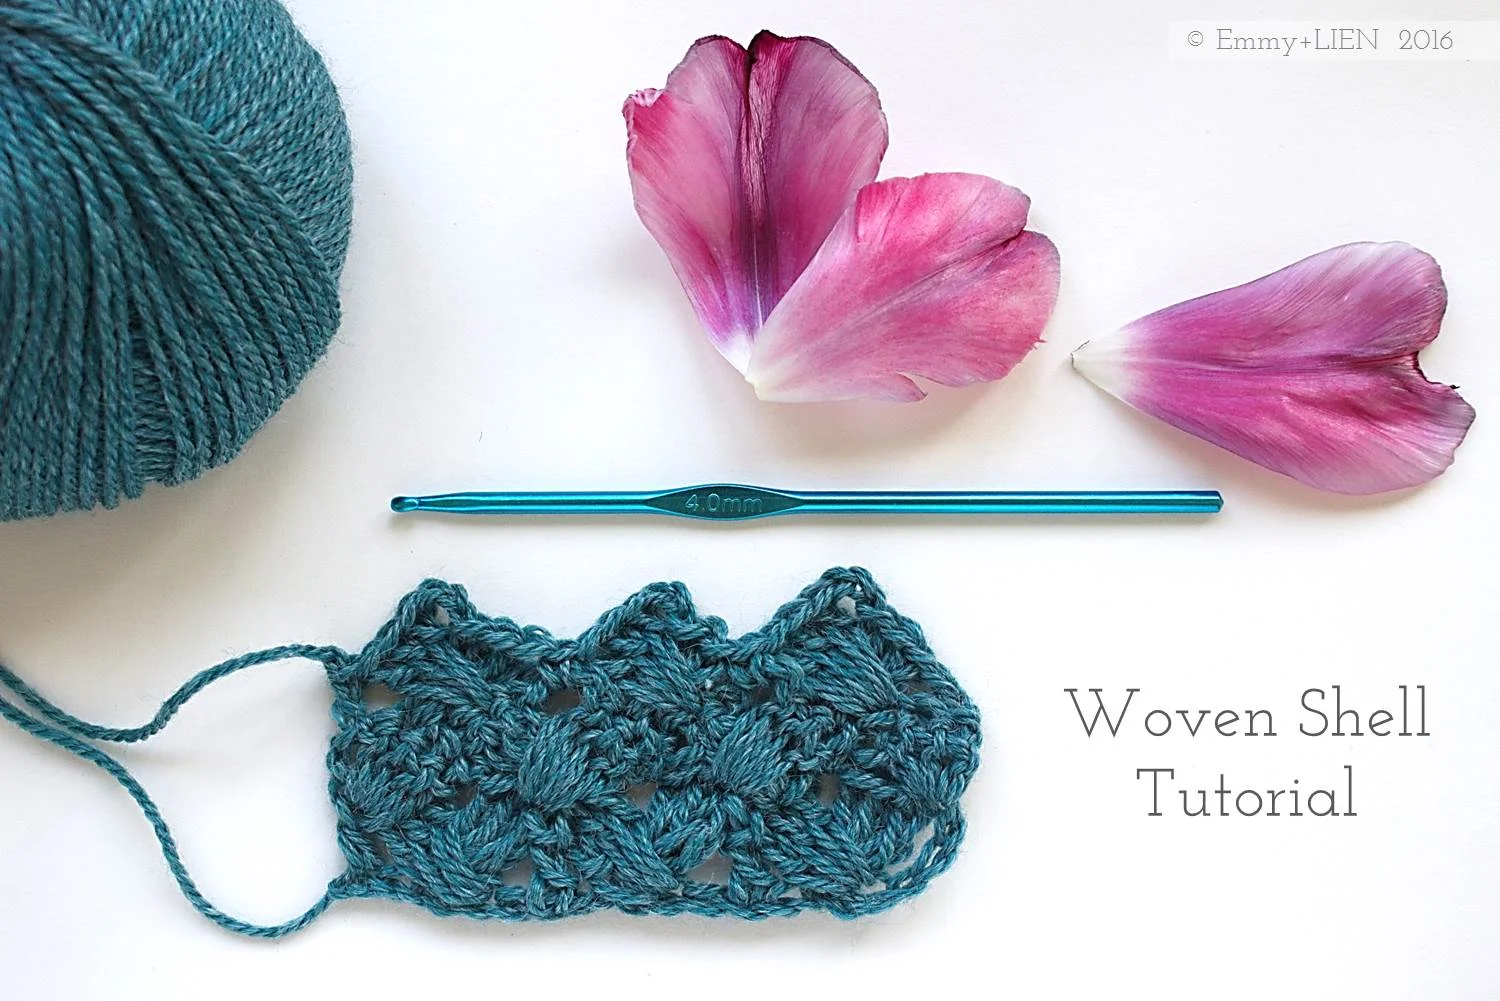
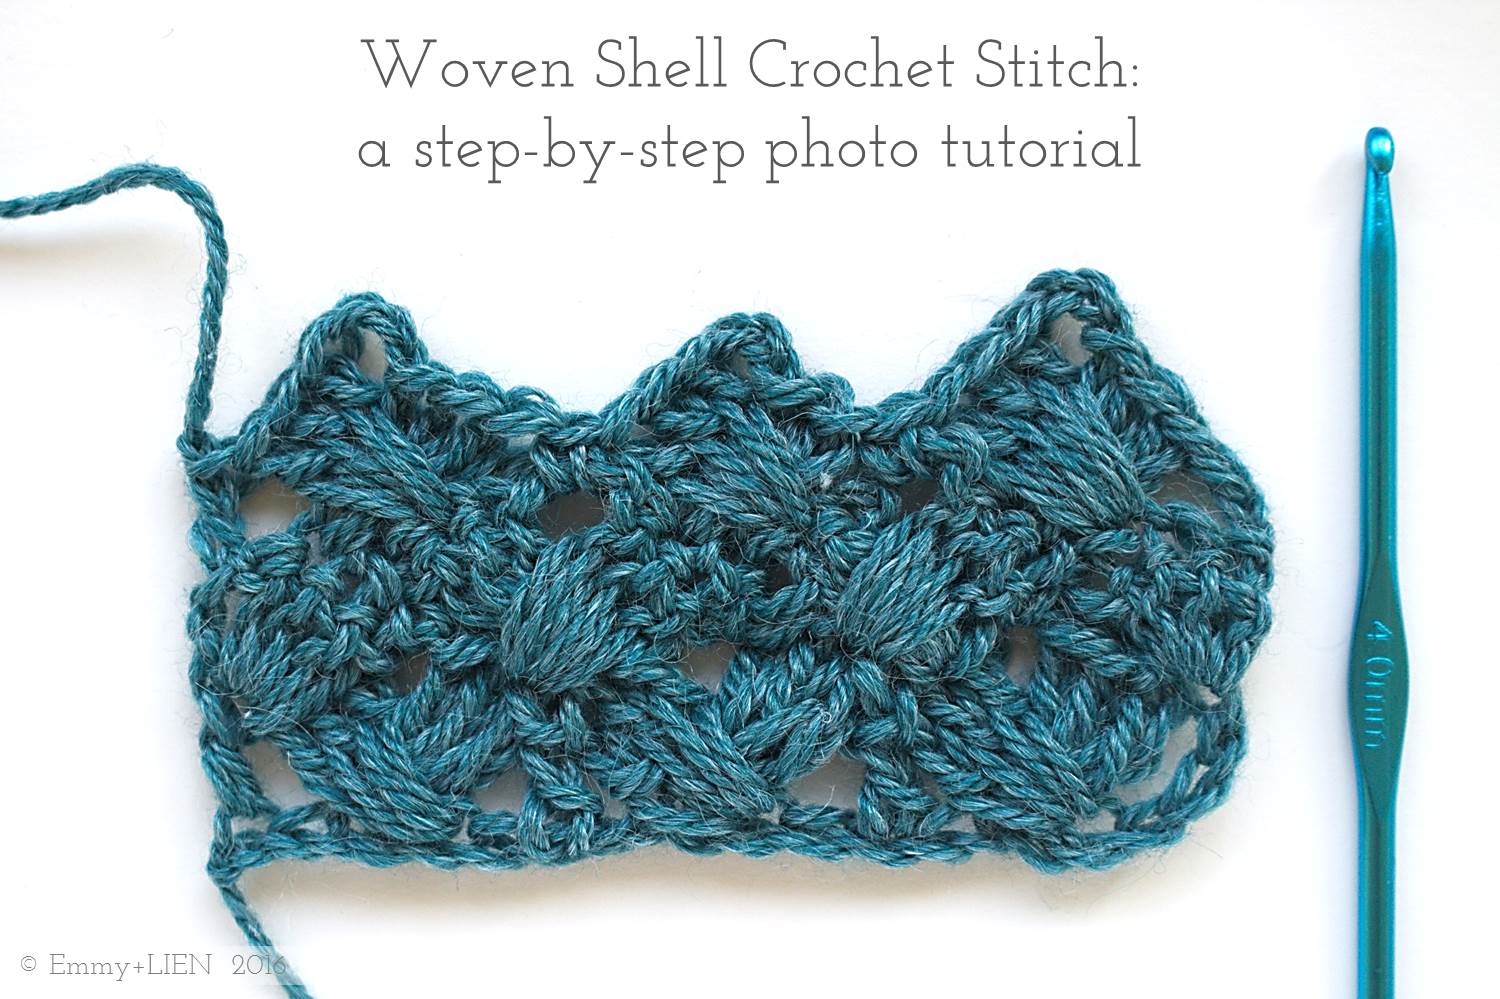
In this tutorial I will show you how to work the “Woven Shell” crochet stitch. It produces an amazing, cable-like texture that has the potential to add interest to so many different items - accessories, cardigans, even granny squares. What makes it so versatile is that, although there are overlapping stitches, the resulting fabric remains quite supple rather than rigid.
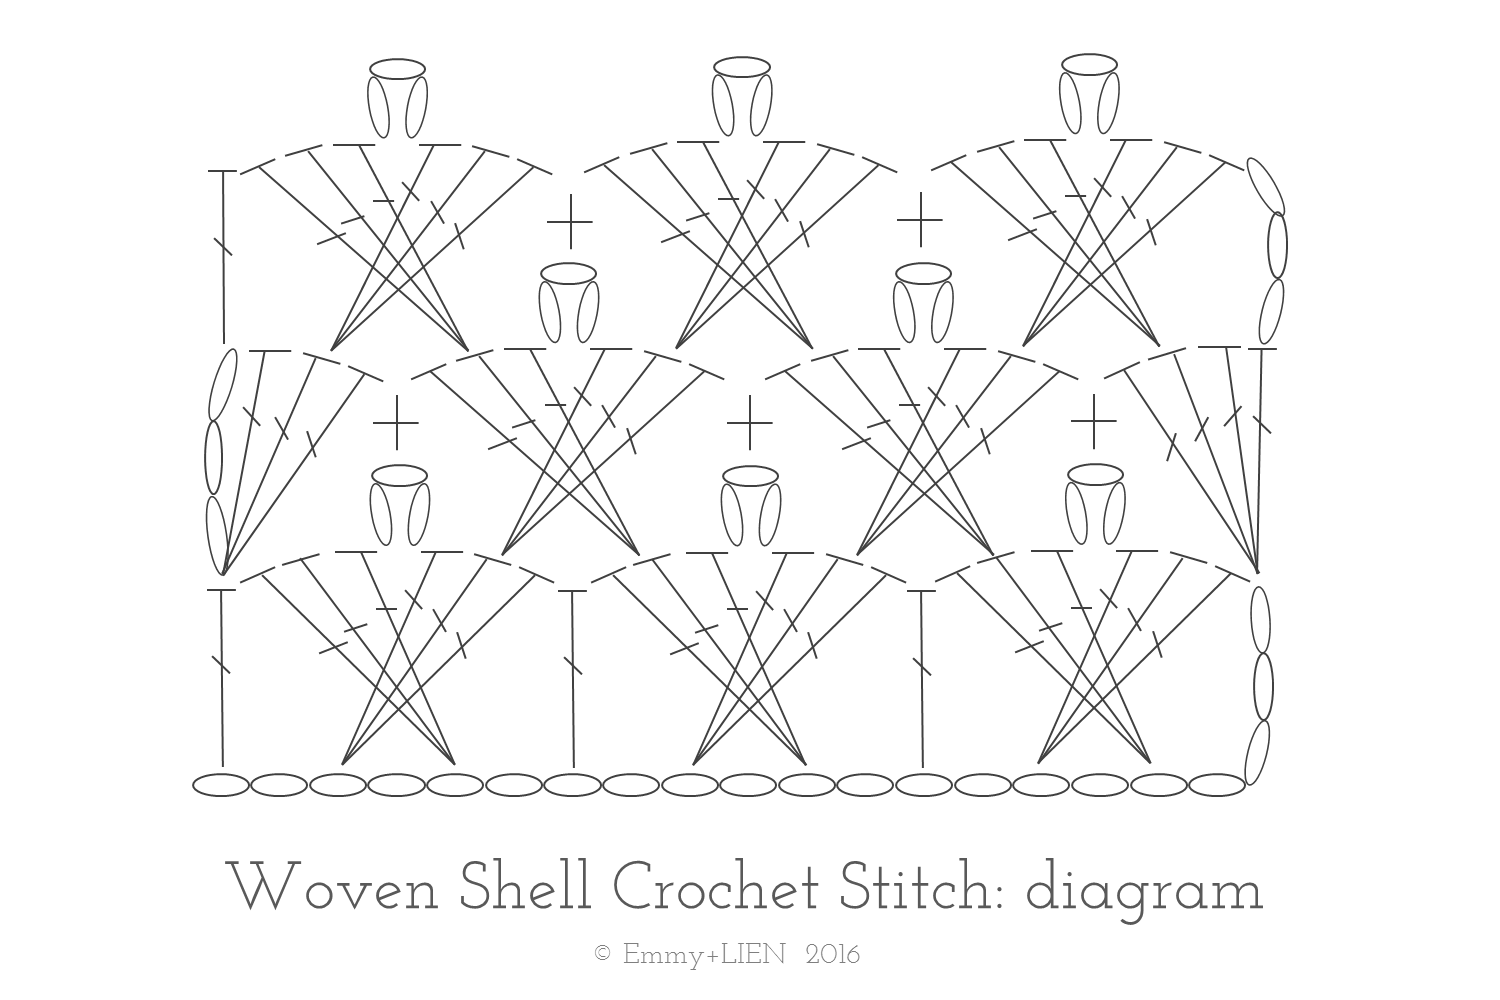
The Woven shelll stitch looks complicated, but you really only need to know basic crochet stitches: Chains, Treble Crochet - TC (Double Crochet if you use US terms), and Double Crochet (Single Crochet). I've included a diagram, but don't panic if you don't know how to read one of these - the photo tutorial and written instructions will walk you through each step.

The Woven Shell stitch will work with a variety of yarns, from lightweight cotton to heavy wool. That said, I personally like to use a DK yarn with a glossy finish in a light to medium colour, as it really shows off the texture of the parts where the stitches cross.
Materials:
4mm / size 6 crochet hook
DK yarn (for this sample, I’ve used No. 4 Organic Wool+Nettles in "petrol" by ONION)
Stitches + Abbreviations:
Chain - ch
Treble Crochet - TC
Double Crochet - DC
Difficulty:
Advanced beginner
Please note: this tutorial uses UK crochet terms
Starting chain:
work a multiple of 6, then add 3 to make the first TC. For this sample, I’ve chained 21:
18 (divisible by 6) + 3 = 21
R1:
Skip the first 6 ch. Ch. 7 is where you will start your first shell.
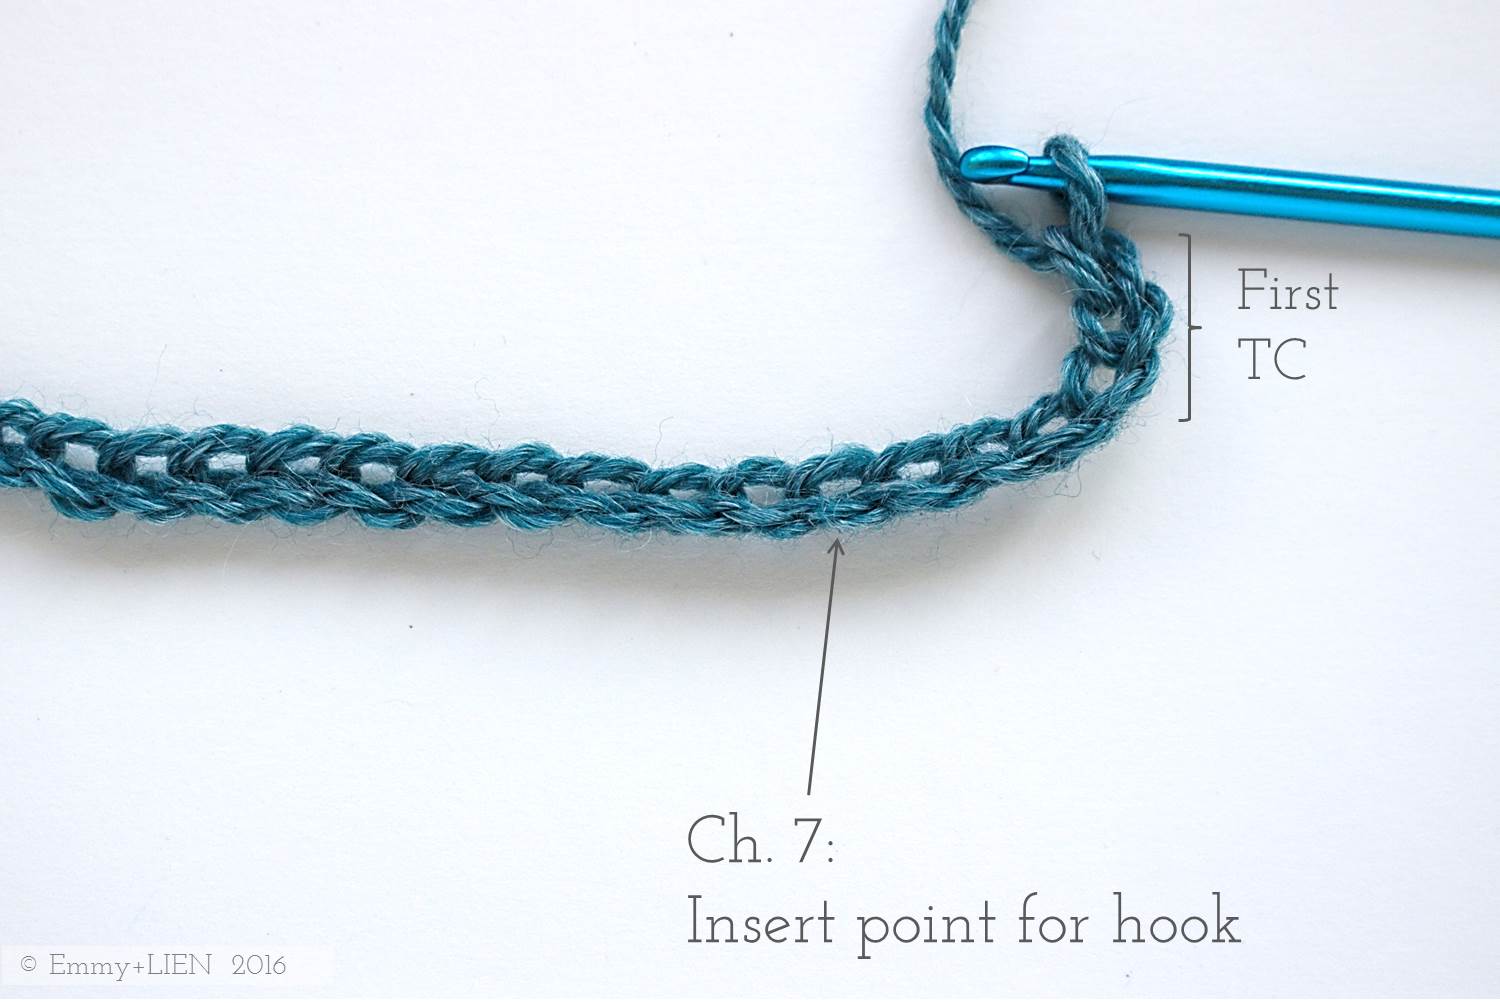
Yarn over, then TC in ch 7. Make sure the this TC is long.


TC 2 more in the same ch 7 space, to make a cluster of 3 TCs. To make the next 3 TC cluster, you will need to go backwards rather than forwards.

Going backwards, skip 1, ch 3, then TC 1 in ch 5 by yarning over and puling up a long loop around the cluster of 3 TCs.

TC 2 more in the same ch 5 to complete the cluster as well as the first shell.

Skip 1, then TC 1. The placement for the next Shell is shown below.

Skip 3, TC 3 in the next st, then ch 3. Going backwards, skip 1, then TC 3.
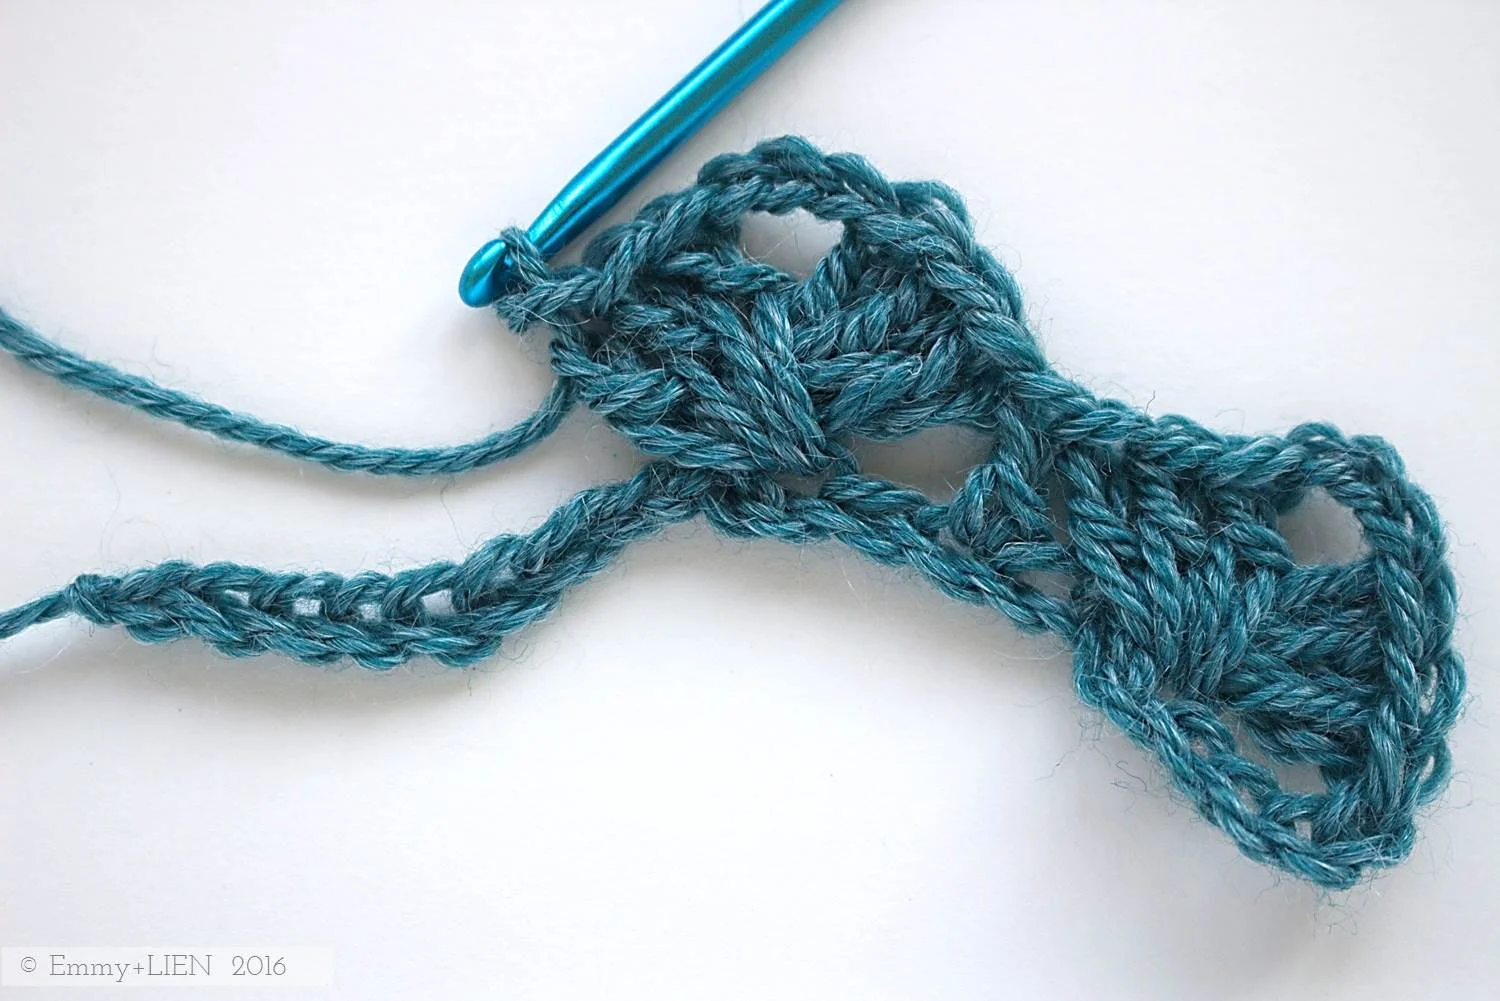
Going forwards again, skip 1 from the first set of TC 3 and DC 1.
Repeat for the last Shell: Skip 3, TC 3 in the next st, then ch 3. Going backwards, skip 1, then TC 3. Going forwards again, skip 1 from the first set of TC 3 and TC 1 in the last ch to complete the first row. Turn.
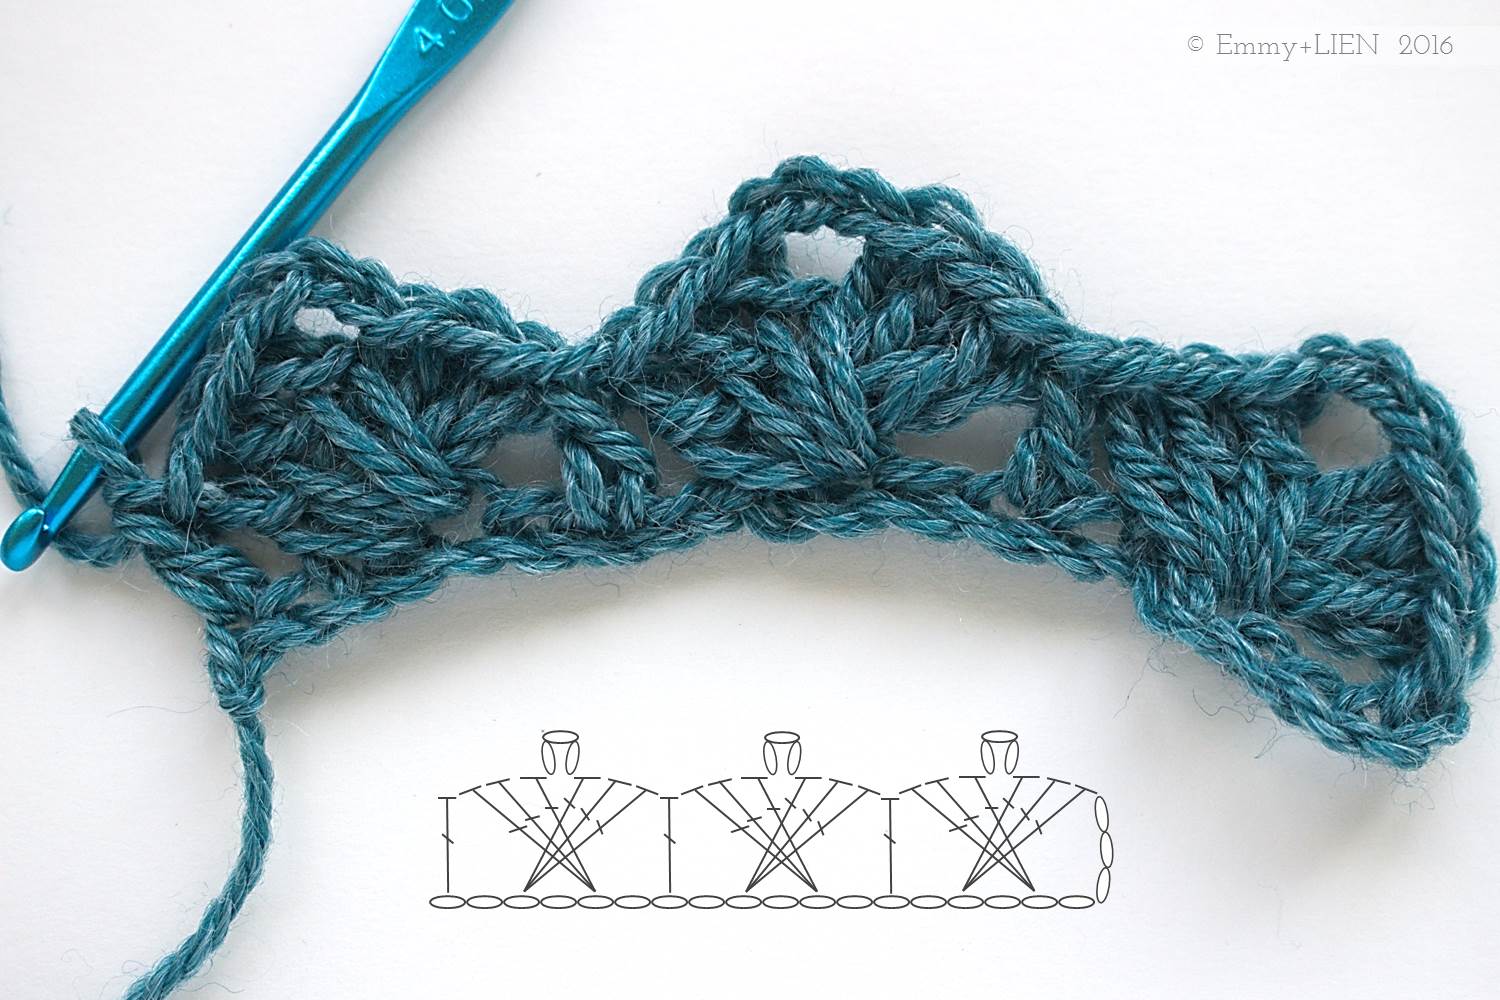
R2:
Ch 3 (counts as 1 TC), then TC 3 in the same st.

DC 1 around the top of the ch 3 of the woven shell underneath. The placement for the next Shell is shown below.

Skip the whole of the next 3-TC group, then TC 3 in the second (i.e. middle) TC of the next 3-TC group. Ch 3, then go back and TC 3 into the second (i.e. middle) TC of the 3-TC group just skipped to complete the Woven Shell.
DC 1 around the top of the ch 3 of the woven shell underneath. Skip the whole of the next 3-TC group, then TC 3 in the second (i.e. middle) TC of the next 3-TC group. Ch 3, then go back and TC 3 into the second (i.e. middle) TC of the 3-TC group just skipped.
DC 1 around the top of the ch 3 of the woven shell underneath. Skip the whole of the next 3-TC group, then TC 4 into the top of the turning chain of the previous row. Turn.

R3:
Ch 3 (counts as 1 TC), skip the whole of the 4-TC group, then TC 3 in the second TC of the next 3-TC group. Ch 3, then go back and TC 3 into the third TC of the 4-TC group just skipped.
* DC 1 around the top of the ch 3 of the woven shell underneath. Skip the whole of the next 3-TC group, then TC 3 in the second TC of the next 3-TC group. Ch 3, then go back and TC 3 into the second TC of the 3-TC group just skipped. Repeat from * until last st. TC 1 in the last ch 1 space.
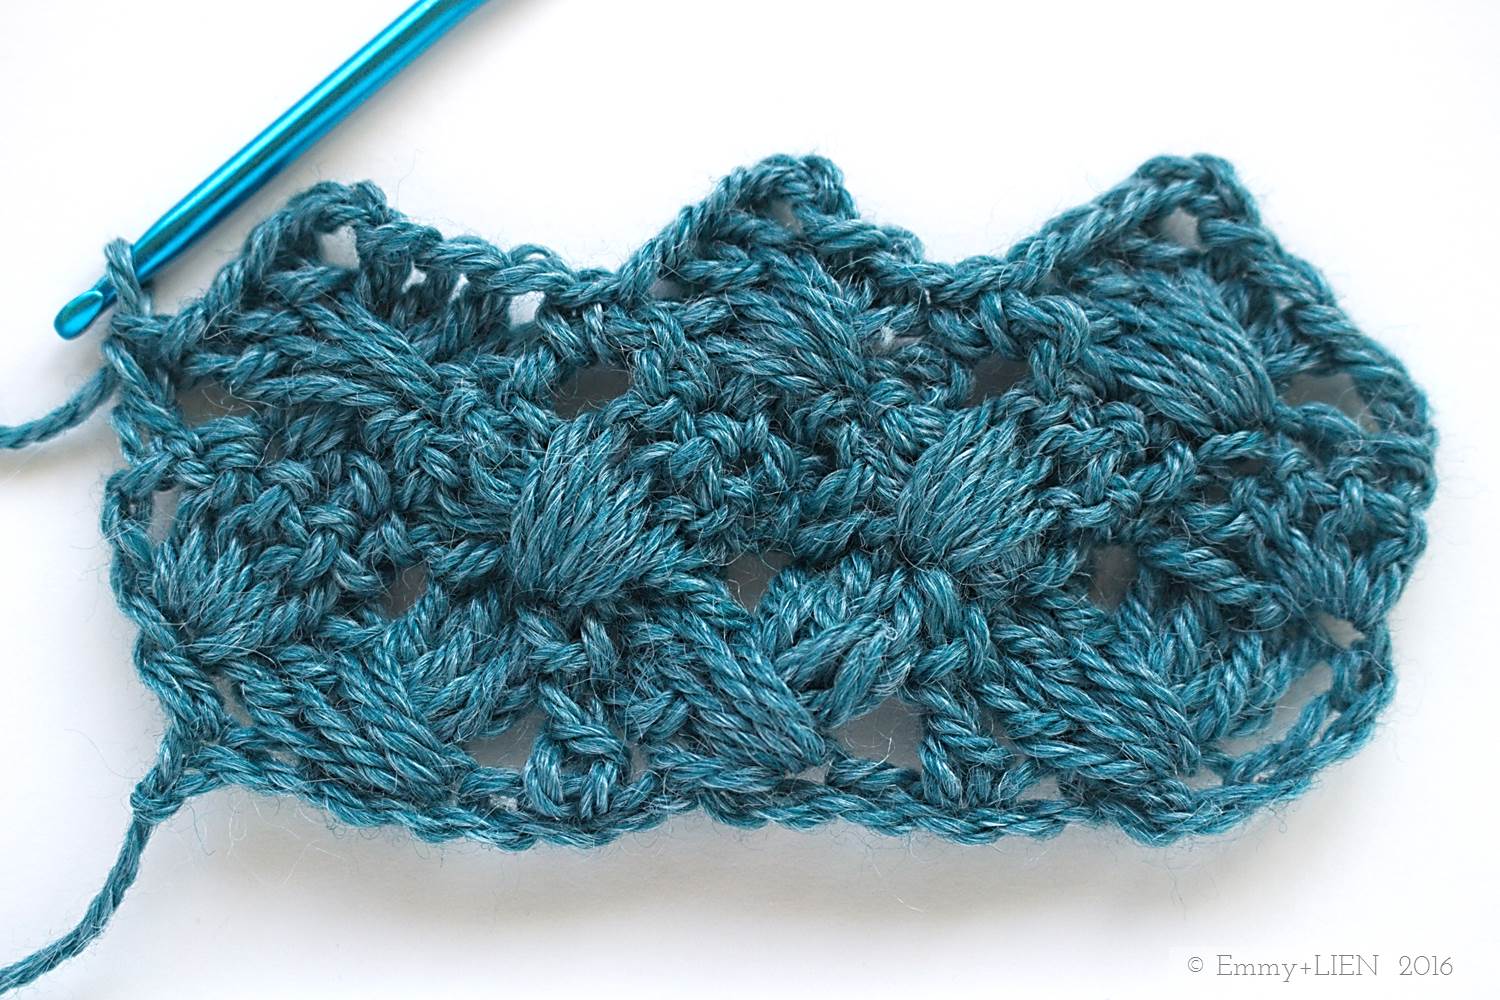

To continue, repeat rows 2 and 3 as many times as required.
So there you go, the Woven Shell. You might need a little practice on going back and forth and pulling up long enough loops to make the cross-overs, but hopefully this tutorial will have you creating beautifully textured pieces in no time. I'll be publishing the Lavender Skies Scarf, which is based on this stitch, later this month so if you like it, now is a good opportunity to start swatching!
