
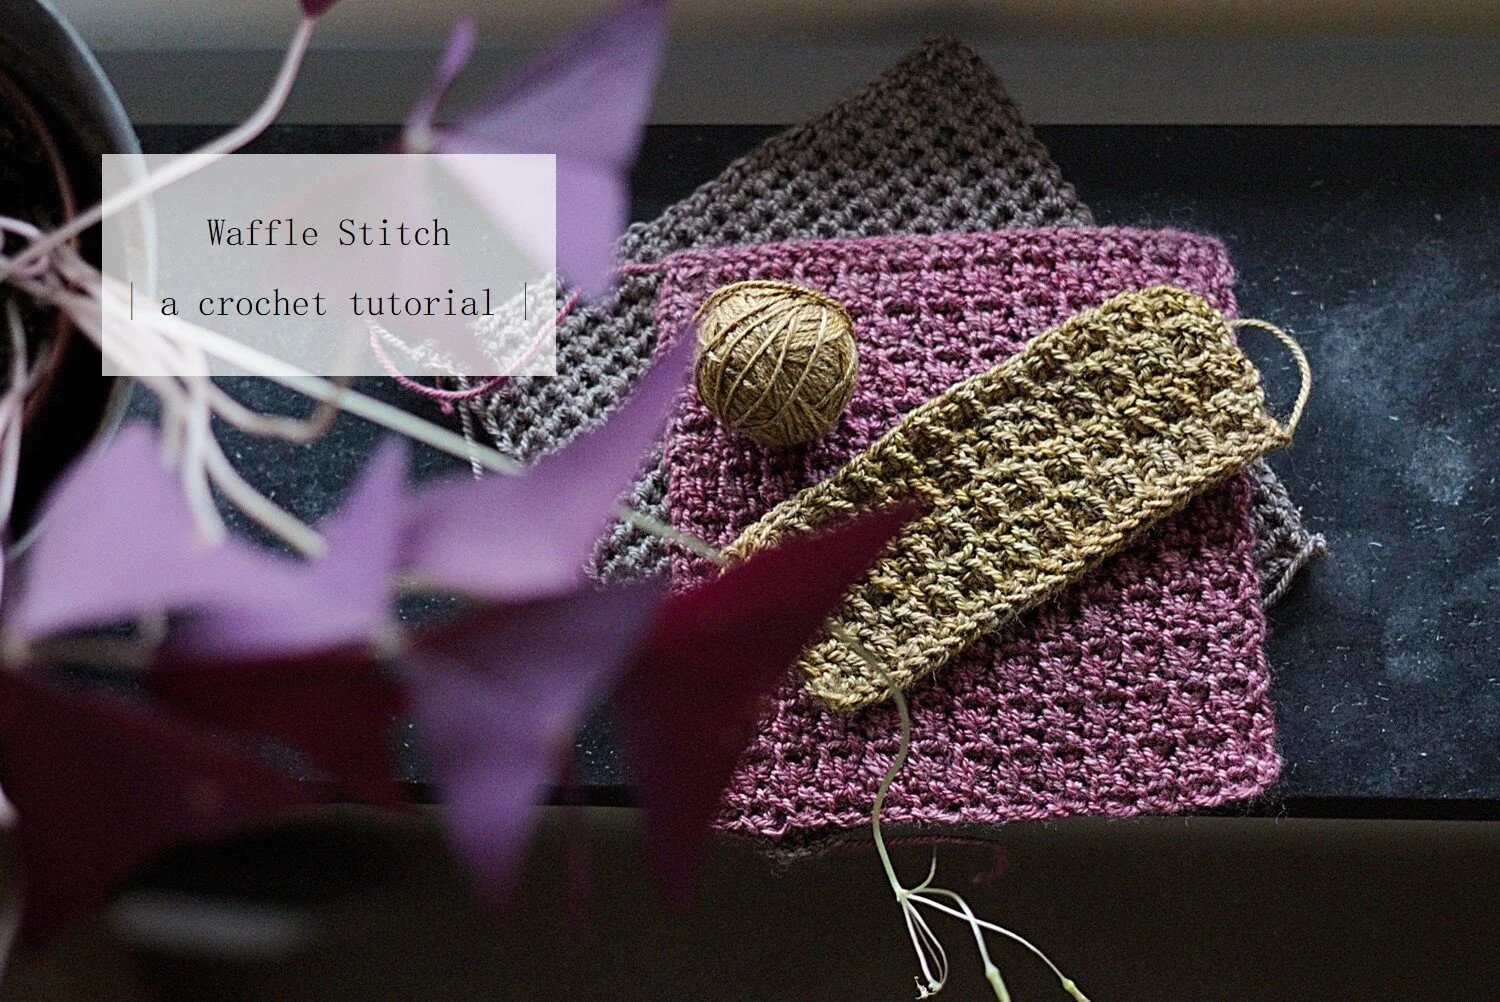
TUTORIAL: Crochet Waffle Stitch
Sometimes, the simplest stitches are the most effective. Such as the Waffle Stitch*; Although it is only an extension of the humble double crochet (single crochet in US terms), it produces the most amazing drape and texture. So much so, that when I took the sample of the Harvested Shawl to Oslo Knitting Festival, even the knitters couldn't stop stroking it. Definitely a triumphant moment for this crocheter!

This photo tutorial demonstrates how to work the Waffle Stitch in a plain sample or gauge swatch, as well as how to incorporate increases. The stitch placement at the beginning and end of each row can be a bit confusing, so I thought it best to show you both.
The yarn I'm using is Beyul Fingering by Kettle Yarn Co . It's a smooth, glossy blend of merino, yak and silk that I think really shows of the texture of this stitch. You can use any yarn though, from something very fine to a chunky one. About a year ago I hooked up a shawl in a very floofy, thick-thin merino I found in a bargain bin (but why?!). The end result is quite different, but it’s also very pleasing to touch and wear.

The only thing to bear in mind is that this stitch has a lot of give and will continue to stretch over time. For a shawl this will only add to the gorgeousness of the drape, but for a garment you might need go down half a hook size.
*If you search for "waffle stitch" on YouTube, something very different turns up. I'm using the term that I found in my stitch dictionary (200 Crochet Stitches by Sarah Hazell) but if you know this stitch by another name, please let me know in the comments!

Note: this tutorial uses UK crochet terms. For a conversion chart to US terms, see the Yarn & Craft Council.
Difficulty Level
Confident Beginner
Materials
fingering weight yarn (or yarn of your choosing)
3mm hook (or hook appropriate for your yarn)
2 removable stitch markers
Stitches + Abbreviations
Ch - chain
Ch-sp - chain space
DC - double crochet
FDC - foundation double crochet
PM - place marker
PUL - pull up a loop
YO - yarn over
Straight Waffle Stitch
The Waffle stitch is worked over an odd number of stitches. For this sample, we'll start with an FDC row of 25 stitches. If you prefer, you can also start with 26 chains, then DC 1 in each chain from the second chain onwards.

FDC 25 OR ch 26, then DC 1 in each ch from 2nd ch to end. Turn.
Next, we will work a set-up row. Every stitch, including the starting chain, counts. You might find it helpful to mark the 2nd starting chain of each row with a stitch marker.
Ch 2 (counts as 1 st, PM on 2nd ch if desired), then:
step 1: insert hook in first st and PUL.
step 2: insert hook in second st and PUL.
step 3: YO and draw through first 2 loops on hook only.
step 4: YO and draw through remaining 2 loops on hook.
step 5: ch 1.

Ch 2 (counts as 1 st, PM on 2nd ch if desired), insert hook in first st and PUL, insert hook in second st and PUL

YO and draw through first 2 loops on hook only

YO and draw through remaining 2 loops on hook (then ch 1 - not pictured)

Each repeat of steps 1-4 make an ExtDC2-tog, or an “extended double crochet 2 together”. The ch 1 between each ExtDC2-tog keeps the stitch count on track.
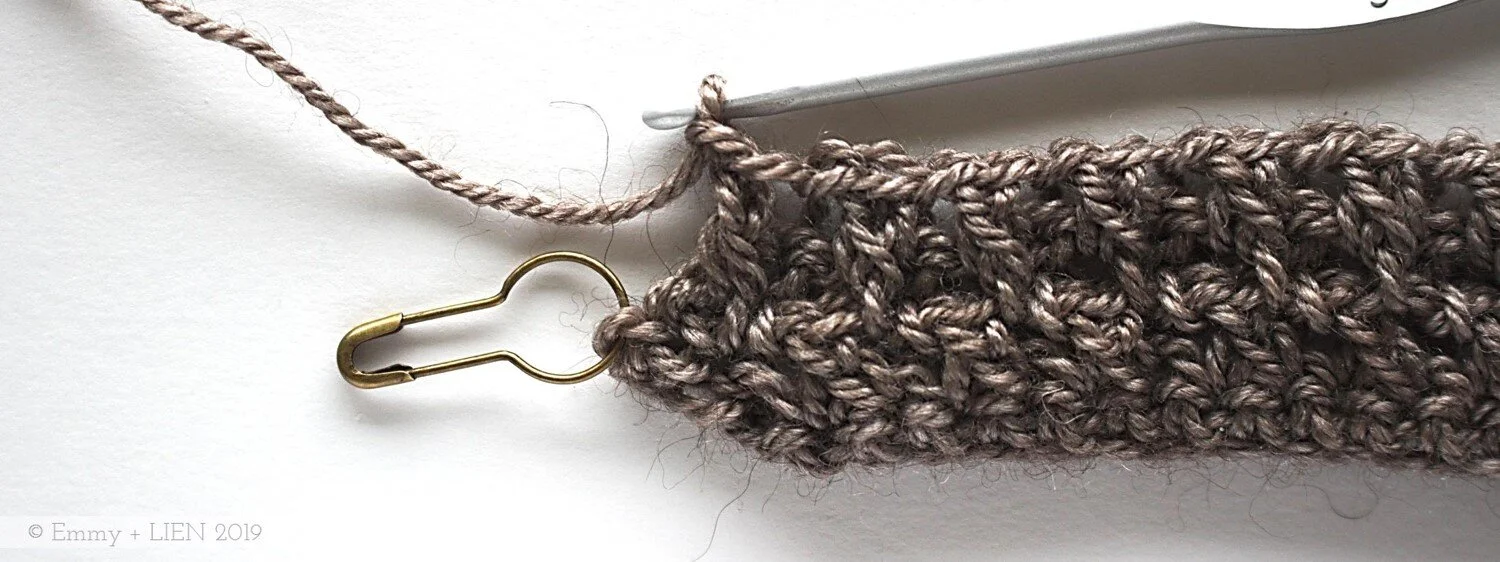
Keep repeating steps 1-5 until 1 st remains, then DC 1 in the last st. Turn.
![Work [ExtDC2-tog, ch 1] until 1 FDC remains](https://images.squarespace-cdn.com/content/v1/56b0b1c737013ba7c302f42c/1575966290638-RVH6O8NXF3WMBMWQ6UIB/image-asset.jpeg)
Work [ExtDC2-tog, ch 1] until 1 FDC remains

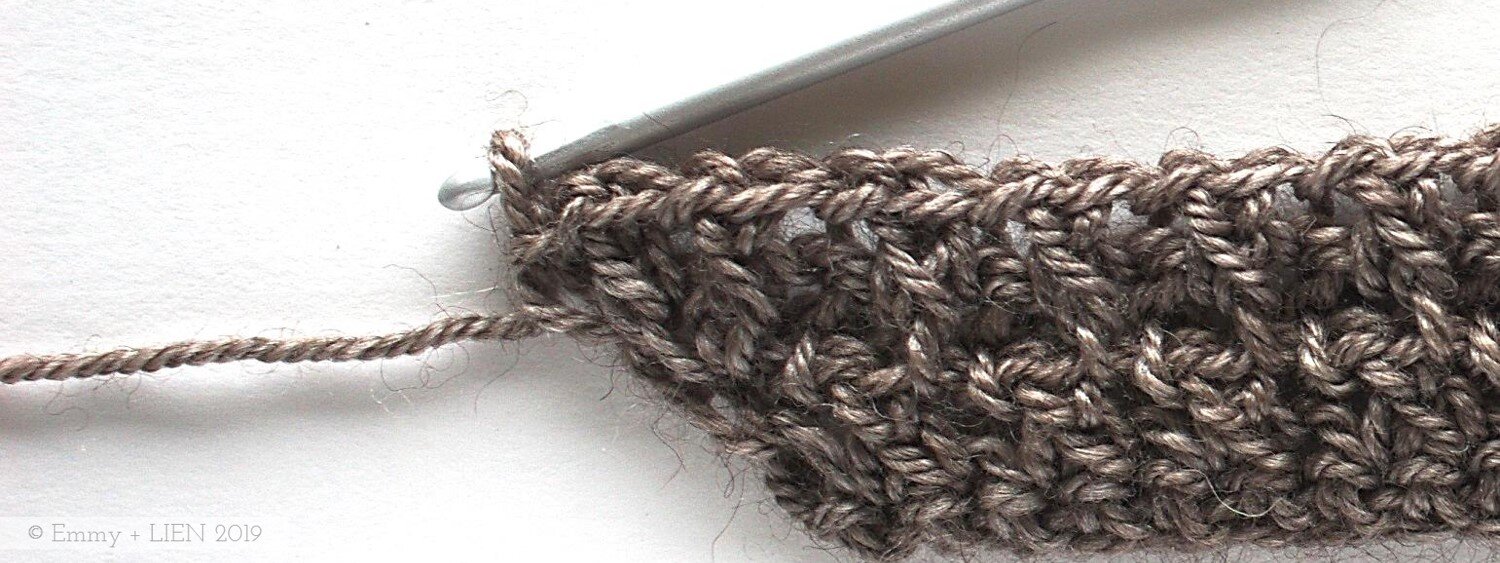
DC 1 in last FDC
For the rest of the sampler square we'll be working ordinary Waffle stitch rows. The first and last stitches of each row are always slightly different, but otherwise it's just the same stitch over and over.
Ch 2 (counts as 1 st, PM on 2nd ch if desired), then:
step 6: insert hook between the "V" of DC of prev row and PUL.
step 7: insert hook to left of DC of previous row (i.e. into ch-sp) and PUL.
step 8-10: as steps 3-5 above.

Insert hook in the “V” of DC of prev row and PUL

Insert hook to left of DC of prev row and PUL, YO and draw through first 2 loops on hook, YO and draw through remaining 2 loops on hook, ch 1
To continue:
step 11: insert hook to right of vertical thread of prev row and PUL.
step 12: insert hook to left of vertical thread of prev row (i.e. into ch-sp) and PUL.
step 13-15: as steps 3-5 above.

Insert hook to right of vertical thread of prev row and PUL

Insert hook to left of vertical thread of prev row and PUL

YO and draw through first 2 loops on hook, YO and draw through remaining 2 loops on hook, ch 1
Repeat steps 11-15 until 2 sts remain (i.e. one ExtDC2-tog and the starting ch). Skip the last ExtDC2-tog, remove the stitch marker, DC 1 in 2nd turning ch. Turn.


Skip the last ExtDC2-tog, remove stitch marker, DC 1 in 2nd turning ch
Continue working this last row until your piece has the required dimensions.
Increasing Waffle Stitch
In the Harvested Shawl pattern, the Waffle stitch increases by 4 stitches per row. This is achieved by working an extra DC and ch 1 at the beginning of the row, and working an extra ExtDC2-tog and ch 1 before the DC at the end of the row. Again, you might find it helpful to mark the second starting chain of each row.
Work both the foundation row and set-up row as for straight Waffle st. Turn.
Ch 2 (counts as 1 st, PM on 2nd ch if desired), then:
step 1: DC 1 between the "V" of DC of previous row, ch 1.
step 2: insert hook between the "V" of DC of previous row again and PUL.
step 3: insert hook to left of DC of previous row (i.e. into ch-sp) and PUL.
step 4: YO and draw through first 2 loops on hook only.
step 5: YO and draw through remaining 2 loops on hook.
step 6: ch 1.

DC 1 in “V” of prev row (then ch 1 - not pictured)

Insert hook between the "V" of DC of previous row again and PUL, then insert hook to left of DC of prev row and PUL

YO and draw through first 2 loops on hook, YO and draw through remaining 2 loops on hook, ch 1
Work ordinary Waffle st until only 1 st remains (i.e. the starting ch). Remove stitch marker, DC 1 in 2nd turning ch. Turn.

Work to end, DC 1 in turning ch
At the start of the next row, ch 2 (counts as 1 st, PM on 2nd ch if desired), work as prev row until 2 sts remain (i.e. DC and starting ch), then:
step 1: insert hook between the "V" of DC of prev row and PUL.
step 2: insert hook to left of DC of prev row (i.e. between DC and starting chains) and PUL.
step 3-5: as steps 4-6 above.
step 6: remove stitch marker, DC 1 in 2nd turning ch. Turn.

Insert hook between the "V" of DC of prev row and PUL, insert hook to left of DC of prev row (i.e. between DC and starting chains) and PUL,

YO and draw through first 2 loops on hook, YO and draw through remaining 2 loops on hook, ch 1
Remove stitch marker, DC 1 in 2nd turning ch
Disclosure: I was gifted three skeins of Beyul Fingering for the purpose of designing the Harvested Shawl.
This post does not contain affiliate links.


